Wedding Afghans

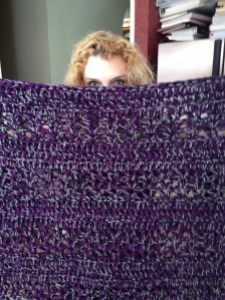
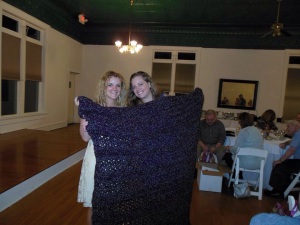
An acquaintance who had been in countless wedding once showed me a crocheted blanket that a bride had made her.  She gushed about how that gift was the most meaningful bridesmaid gift she had ever received.  Since I crochet, I tucked that little tidbit of information away for later.  When I got engaged, I pushed my fiance to help me pick out colors so I could start on the pile of blankets I was planning on making.

20131103-074736.jpg

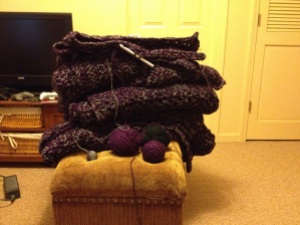
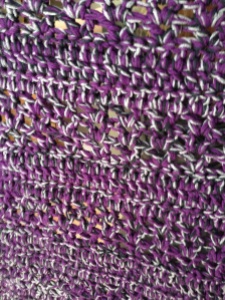
I decided to make blankets for our three bridesmaids and both sets of parents.  I had to make five blankets, so I needed to find an afghan pattern that I could make fairly quickly.  I have made many afghans that took me months to make.  I didn’t have that much time.  I had an afghan pattern pinned named “Super Quick Throw.”  The blanket was crocheted with four strands of yarn held together as one with a giant hook.  That’s about as quick as one can hope for.  The blankets crocheted beautifully.

20131103-074805.jpg

I do have a few tips:

  • The pattern is available free on the Red Heart website.
  • I bought yarn in bulk in our wedding colors.  I chose acrylic yarn because it holds up well and for the price.  It crocheted into a stiff, scratchy blanket.  However, after washing and drying each blanket once, they were completely transformed.  They became pliable and soft.
  • The pattern calls for a hook size P-16 (11.5 mm).  I couldn’t find a hook this size and ended up with a 10 mm hook.  I adjusted by crocheting to the correct size rather than the correct number of stitches.  The pattern is easy, so it wasn’t hard to do.  The rows that require a certain number of stitches have a three stitch repeat.  There is a two stitch “border” on each side.  This means that your starting row should have a total stitch number that is a multiple of 3 plus 4 stitches.  (As written, the pattern calls for 58 stitches.  This is a multiple of 3 (54/3=18) plus 4.)  I don’t remember how many stitches I used.  I think it was 70.  Whatever gets you to a 48 inch wide blanket.
  • I used the no foundation row starting technique instead of the chain start technique in the pattern.  Here is a good tutorial.  This technique keeps your tension from being off in the first row and is easier to measure your 48 inches.
  • With the same “size verses stitches” philosophy, you should repeat Rows 2-7 until the blanket is the length you want.  The pattern calls for 58 inches.  I wanted my blanket to be at least 60 inches so I repeated until I finished on a Row 7 with a length greater than 60 inches.
  • The edges of the blanket turned out a little jagged.  I finished the blanket off with a border.  I slip stitched in each stitch on the short edges and single crocheted along the long edges.  This cleaned the blankets up nicely.

Difficulty:  Easy

Time Required:  About 13 movies per blanket

Overall Experience:  Excellent
20131103-074719.jpg20131103-075255.jpg20131103-074736.jpg


Little Lady Slippers

My friend Parnak’s baby shower is today.  I’m so sad that I’m missing it!  I still have a lot of things to do for my wedding and just didn’t have time to drive to San Antonio, spend a whole day, and drive back.  In addition to the “real” present that I shipped, I sent these sweet little baby booties.  The pattern is available in Booties by the Dozen by Kay Meadors.  This is my go to book for baby booties.  I love these patterns!  I didn’t alter the pattern from what is written.  The pattern is really simply, so I don’t really have any tips either!

20130901-094850.jpg

Difficulty:  Easy

Time Required:  2 Movies

Overall Experience:  Excellent
Crochet Wine Carrier

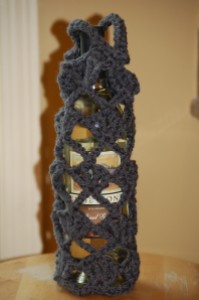
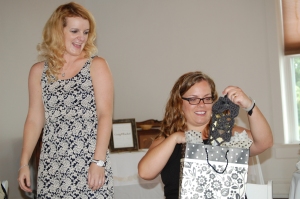
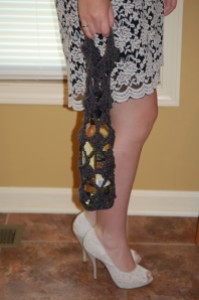
As I mentioned in my Chevron Koozies post, I also made a wine carrier to thank my cousin Amber for hosting my Indiana bridal shower.  I made up the pattern to give wine carriers to my friends Rachael and Cassie for hosting my Houston bridal shower last month.  I love how they turned out!

009

DSC_0092

011

Materials:

  • 2 skeins of worsted weight yarn
  • US size K crochet hook

Stitches Used:

Instructions:

Ch 4, sl st in first ch to make ring

R1:  Ch 1, 8 sc in ring, sl st in first sc (8 sc)

R2:  Ch 1, 2 sc in same stitch and in each stitch around, sl st in first sc (16 sc)

R3:  Ch 1, 2 sc in same stitch, 1 sc in next stitch, * 2 sc in next stitch, 1 sc in next stitch, repeat from * around, sl st in first sc (24 sc)

R4:  Ch 1, 2 sc in same stitch, 1 sc in next two stitches, 2 sc in next stitch, 1 sc in next two stitches, repeat from * around, sl st in first sc (32 sc)

R5:  Holding 1 strand from each skein of yarn together through the rest of the project, ch 1, 2 sc in same stitch, 1 sc in next three stitches, 2 sc in next stitch, 1 sc in next three stitches, repeat from * around, sl st in first sc (40 sc)

R6:  Ch 5, trc in same stitch, ch 1, trc in same stitch, ch 1, trc in same stitch, * ch 1, skip next 7 sc, 4 trc with a ch 1 between each trc in next sc, repeat from * four times, sl st in fourth ch of ch 5

R7:  Sl st in ch space, sl st in trc, sl st in ch space, * ch 9, skip next three ch spaces, sc in next ch space, repeat from * four times, ch 5, tr trc in sl st before first ch 9

R8:  Ch 5, trc in same stitch, ch 1, trc in same stitch, ch 1, trc in same stitch, * ch 1, 4 trc with a ch 1 between each trc in fifth ch of next ch 9, repeat from * four times, sl st in fourth ch of ch 5

R9-R14:  Repeat R8 and R9 three times

R15:  Ch 1, sc in same stitch, sc in each ch space and trc around, sl st in first sc (40 sc)

R16:  Ch 1, sc in same stitch, sc in next 3 stitches, ch 13, skip next 13 stitches, sc in next 7 stitches, ch 13, skip next 13 stitches, sc in next 3 stitches, sl st in first sc

R17:  Ch 1, sc in same stitch, sc in each sc and ch around, sl stitch in first sc, fasten off and work in ends (40 sc)

Difficulty: Medium to Hard (the stitches are somewhat difficult)

Time Required: 0.5 Movies

Overall Experience: Excellent
Wedding Doilies 3.0

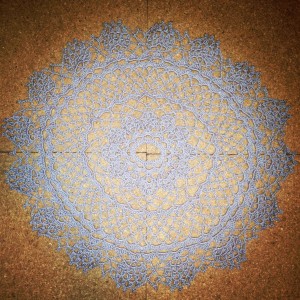
Last week I posted a pattern for an oval doily that I developed for my wedding. It almost looked circular from the outside, so I wasn’t overly happy with it. I edited the pattern, “fudging” the top and bottom stitches so they would be shorter in each round. I’m much happier with the outcome. The pattern would be absolutely ridiculous to write out. It’s quite complicated. Of anyone really, really wants it, leave me a comment and I’ll write it out. I really just wanted to share.  Yay ovals!

20130814-205056.jpg photo-46 Doily

Wedding Doilies 2.0

I haven’t had a lot to post recently despite the fact that I’ve been crafting A LOT. I’m making a lot of things for my wedding, and most of them are gifts for people helping me with things; therefore, they are secret.

photo-46 Doily

I wrote a few weeks ago about the doilies I am making for my wedding. In addition to the round varieties, I also needed some oval doilies. I took the original pattern and made some adjustment to it to create an oval version. The pattern for the oval version is below. I wanted the doilies to have a larger difference between their “long” and “short” sides, but they will do. They look nice with the round versions.

Materials:

  • Size 1 Crochet Hook
  • Bernat Handicrafter Crochet Thread in Misty Grey

Stitches Used:

Instructions:

Ch 36, join to form a ring.

R1: Ch 3, d c in same stitch,2 d c in next 5 stitches, d c in next 12 stitches, 2 d c in next 6 stitches, d c in next 12 stitches, slip stitch in top of ch 3.

R2: S c in same space, * ch 5, skip 3 d c, s c in next d c, repeat from * all around ending row with sl st in 1st s c.

R3: Work 1 s c, 7 d c, 1 s c in each ch 5 loop, join.

R4: Sl st to center of scallop, ch 7, 1 tr c in same space, * ch 3, 1 tr c in same space, repeat from *, * ch 4, 4 tr c with ch 3 between each tr c in center st of next scallop, repeat from * 12 times, ch 4, join to 4th st of ch 7.

R5: Sl st in first st of loop, ch 4, * thread over needle twice, insert in loop, pull through and work off 2 loops twice, repeat from *, thread over and pull through all loops at one time, ** ch 3, thread over twice, insert in next loop, pull through and work off 2 loops twice. * thread over twice, insert in same loop, pull through and work off 2 loops twice, repeat from *, thread over and work off all loops at one time, (cluster st), ch 3, cluster st in same loop, ch 3, cluster st in next loop, d c in next 4 ch loop, cluster st in next 3 ch loop, repeat from ** 12 times, ch 3, 2 cluster sts with ch 3 between each cluster st in next loop, ch 3, cluster st in next loop, d c in next 4 ch loop, join to top of 1st cluster st.

R6: Sl st in next loop, ch 4, * thread over needle twice, insert in same loop, pull through and work off 2 loops twice, repeat from *, thread over and work off all loops at one time, ch 3, cluster st in next loop, ch 3, thread over needle twice, insert in next loop, pull through and work off 2 loops twice, repeat from *, thread over and work off remaining loops at one time, ch 4, sl st in same loop, sl st in top of d c, repeat 11 times.

R7: Sl st in next 4 chain stitches, sl st in next loop, sc in same loop, ch 7, s c in next loop, ch 9, s c in 12 ch loop, repeat from beginning all around ending row with ch 5, d tr c in last stitch of previous row.

R8: Ch 9, s c in next loop, repeat from beginning all around ending row with ch 5, d tr c in d tr c of previous row.

R9: Ch 9, s c in next loop, repeat from beginning all around, join.

R10: Sl st to loop, ch 3, 8 d c in loop, * 9 d c in next loop, repeat from * all around, join.

R11: Sl st to center d c of d c group, * ch 5, skip 4 d c, cluster st in next space, ch 5, sl st in center d c of next d c group, repeat from * all around ending row with ch 2, d c in joining.

R12: S c in same space, ch 9, s c in next loop, repeat from beginning all around ending row with ch 5, d tr c in 1st s c.

R13 and 14: Same as 12th row.

R15: Ch 6, s c in next loop, repeat from beginning all around, join.

R16: Ch 3, 7 d c in next loop, * d c in next s c, 7 d c in next loop, repeat from * all around, join.

R17: Sl st to 4th d c, * ch 7, skip 7 d c, s c in next d c, repeat from * all around, join.

R18: Work 1 s c, 1 d c, 5 tr c, 1 d c, 1 s c in each loop, join.

R19: Sl st to center st of scallop, ch 7, tr c in same space, * ch 3, tr c in same space, repeat from *, * ch 4, s c in center st of next scallop, ch 9, s c in center st of next scallop, ch 4, 4 tr c with ch 3 between each tr c in center st of next scallop, repeat from * 14 times, ch 4, s c in center st of next scallop, ch 9, s c in center st of next scallop, ch 4, join to 4th st of ch 7.

R20: Sl st to loop, * 2 cluster sts with ch 3 between each cluster st in each of the next 3 loops, ch 5, skip ch 4 loop, s c in 9 ch loop, ch 5, skip ch 4 loop, repeat from * all around, join to top of 1st cluster st.

R21: Sl st to loop, * 1 cluster st with ch 3 between each cluster st in each of the next 5 loops, ch 7, sl st in next s c, ch 7, skip ch 5 loop, repeat from * all around, join in top of 1st cluster st.

R22: Sl st to loop, cluster st in same loop, * ch 6, sl st in 5th st from hook for picot, ch1, cluster st in next loop, ch 1, picot, ch 1, cluster st in next loop, ch 1, picot, ch 1, cluster st in next loop, ch 7, s c in next loop, ch 4, picot. ch 4, s c in next loop, ch 7, cluster st in next loop, repeat from * all around, in same manner join in top of 1st cluster st, break thread.

Difficulty: Medium to Hard (the stitches are somewhat difficult)

Time Required: 4 Movies

Overall Experience: Excellent
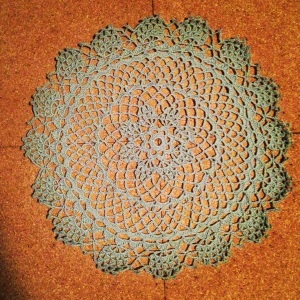
Wedding Doilies

I’m currently working on various projects for my upcoming October wedding.  Our colors are purple and grey.  For the centerpieces, I chose groups of three glass cylinders containing a single eggplant calla lily.  The cylinders will be filled with water with a floating candle floating on top of each.  The effect will be similar to picture below.

My dress is extremely lacy, and I am incorporating lace into various aspects of the decorations.  I wanted to include both lace and grey into the centerpieces, so I chose to crochet doilies to place under the centerpieces.  I searched Ravelry for free doily patterns and chose Doily 4403 8 Point Star.  The pattern creates a 9 3/4″ doily.  To achieve a more appropriate size for my purposes (17 “), I used a size 0 crochet hook rather than a size 11.  I’m making the doilies out of Bernat Handicrafter Crochet Thread in Misty Grey.

Doily

I recruited my grandmother and great aunt to help me make some of the 20+ doilies need for the reception.  That’s a lot of doilies!  Since I will busy with these, my summer knit-a-long project Nachtfalter, and some surprise projects for my wedding party, I won’t have “new” project to blog about for quite some time.  I have pictures of quite a few old projects to blog about until I finish.


Hello Kitty Scarf

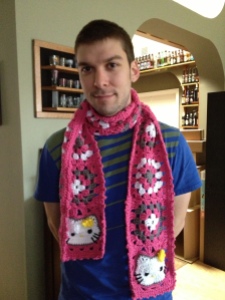
My 15-year-old sister is OBSESSED with Hello Kitty.  When I stumbled upon a crocheted Hello Kitty scarf on Pinterest, I knew that was going to be part of her Christmas present.  The pattern was written by Made by K.  The pattern is quick, easy, and looks just like Hello Kitty.  The only drawback is that it is very long.  Karin of Made by K included multiple sets of alternate instructions for different parts of the scarf.  I found this fun because I had choices, but others might find this confusing.

The scarf turned out adorable.  Below you can find my alterations from the written pattern (although the written pattern is really made for alterations):

  1. Karin made her scarf for a child and included seven regular granny squares (four white center and three grey center).  Since my scarf was for a very tall (5’10ish) teenager, I made 11 regular granny squares (6 white center and 5 grey center).
  2. There are several methods for joining the granny squares.  I used the join as you go method described in the pattern.
  3. Karin gives easy border and harder border instructions.  The connected squares tend to dip in where they are joined (see picture below from Karin’s blog).  After completing the first row of the harder border, which is supposed to give a smooth border, my project was still dipping in at these locations.  (I wasn’t planning a blog at this point or I would show pictures.)  I accounted for this in Row 2 of the border.  Row 2 asks the crocheter to single crochet all the way around the scarf.  I followed this except I half double crocheted in the double crochet stitches from Row 1 (see picture below).
  4. I added the flower detail to both Hello Kitty squares instead of just one.

IMG_2029

Here is my (almost) fiance (at that time) modeling the scarf.  It really brings out his…something.

Craig Hello Kitty

My sister loved the scarf.  She modeled it with all of her other Hello Kitty Christmas items.

Difficulty:  Easy

The pattern may be a little hard to follow since it is quite long.

Time Required:  2 Movies

Overall Experience:  Excellent

Saturday Night Purse

In addition to the Celtic Love Knot Scarf, I also made a purse for my friend Jenny’s fundraiser for her mission trip to Kenya.  I found this beautiful purse on cogknition’s site.  The pattern is freely available on the site.

Unfortunately, I did not have time before the auction to try to get the beautiful custom handles and leaves.  Instead, I was forced to purchase plain black bamboo handles from my local JoAnn. For the purse itself, I had a very difficult time achieving the crisp herringbone pattern shown in the picture.  The pattern is achieved by slipping some stitches from the left to right needle while holding the yarn in front of the stitches.  The purse is knit very tightly so that it is quite sturdy; however, I had a tendency to hold the yarn too tightly resulting in a non-existent herringbone pattern.  I ripped out my first attempt and started placing an extra needle under the yarn as I passed it in front of the stitches.  This helped, but the needle wasn’t big enough.  I ended up placing an extremely large (size N, 10mm) crocheting hook under the yarn as I passed the yarn in front of the stitches.  This process slowed me down, but I did achieve a herringbone pattern.  My pattern was still not as crisp as that shown in the picture.  Also, since I didn’t have the fancy leaves to put behind the roses, I didn’t think the knitted roses really looked like roses.  I substituted this Megan Mill’s crocheted rose instead.  Either I didn’t count right while making the rose, or the pattern had a problem.  It wasn’t necessary for the pattern to be exact, so I didn’t go back to see why I didn’t have the correct number of stitches left as I reached the end of Row 3.  I finished off and sewed the rose onto the front of the purse.

The purse turned out beautifully.  It is quite sturdy and both larger and heavier than it appears.  The knitted section of the purse ended up being about 8 in. tall and 10 in. wide.

Saturday Night Purse

Difficulty:  Moderate

The purse was constructed of a modified stockinette stitch, so the stitching wasn’t difficult.  The herringbone pattern was difficult to achieve as noted above.

Time Required:  8 movies

I didn’t like how the pattern was turning out, so I repeatedly knitted and ripped out stitches.  It would have taken less time if I hadn’t ripped out so much.

Overall Experience:  Good

The purse turned out really cute and sturdy.  I would make it again.

Celtic Love Knot Scarf

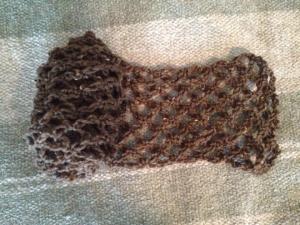
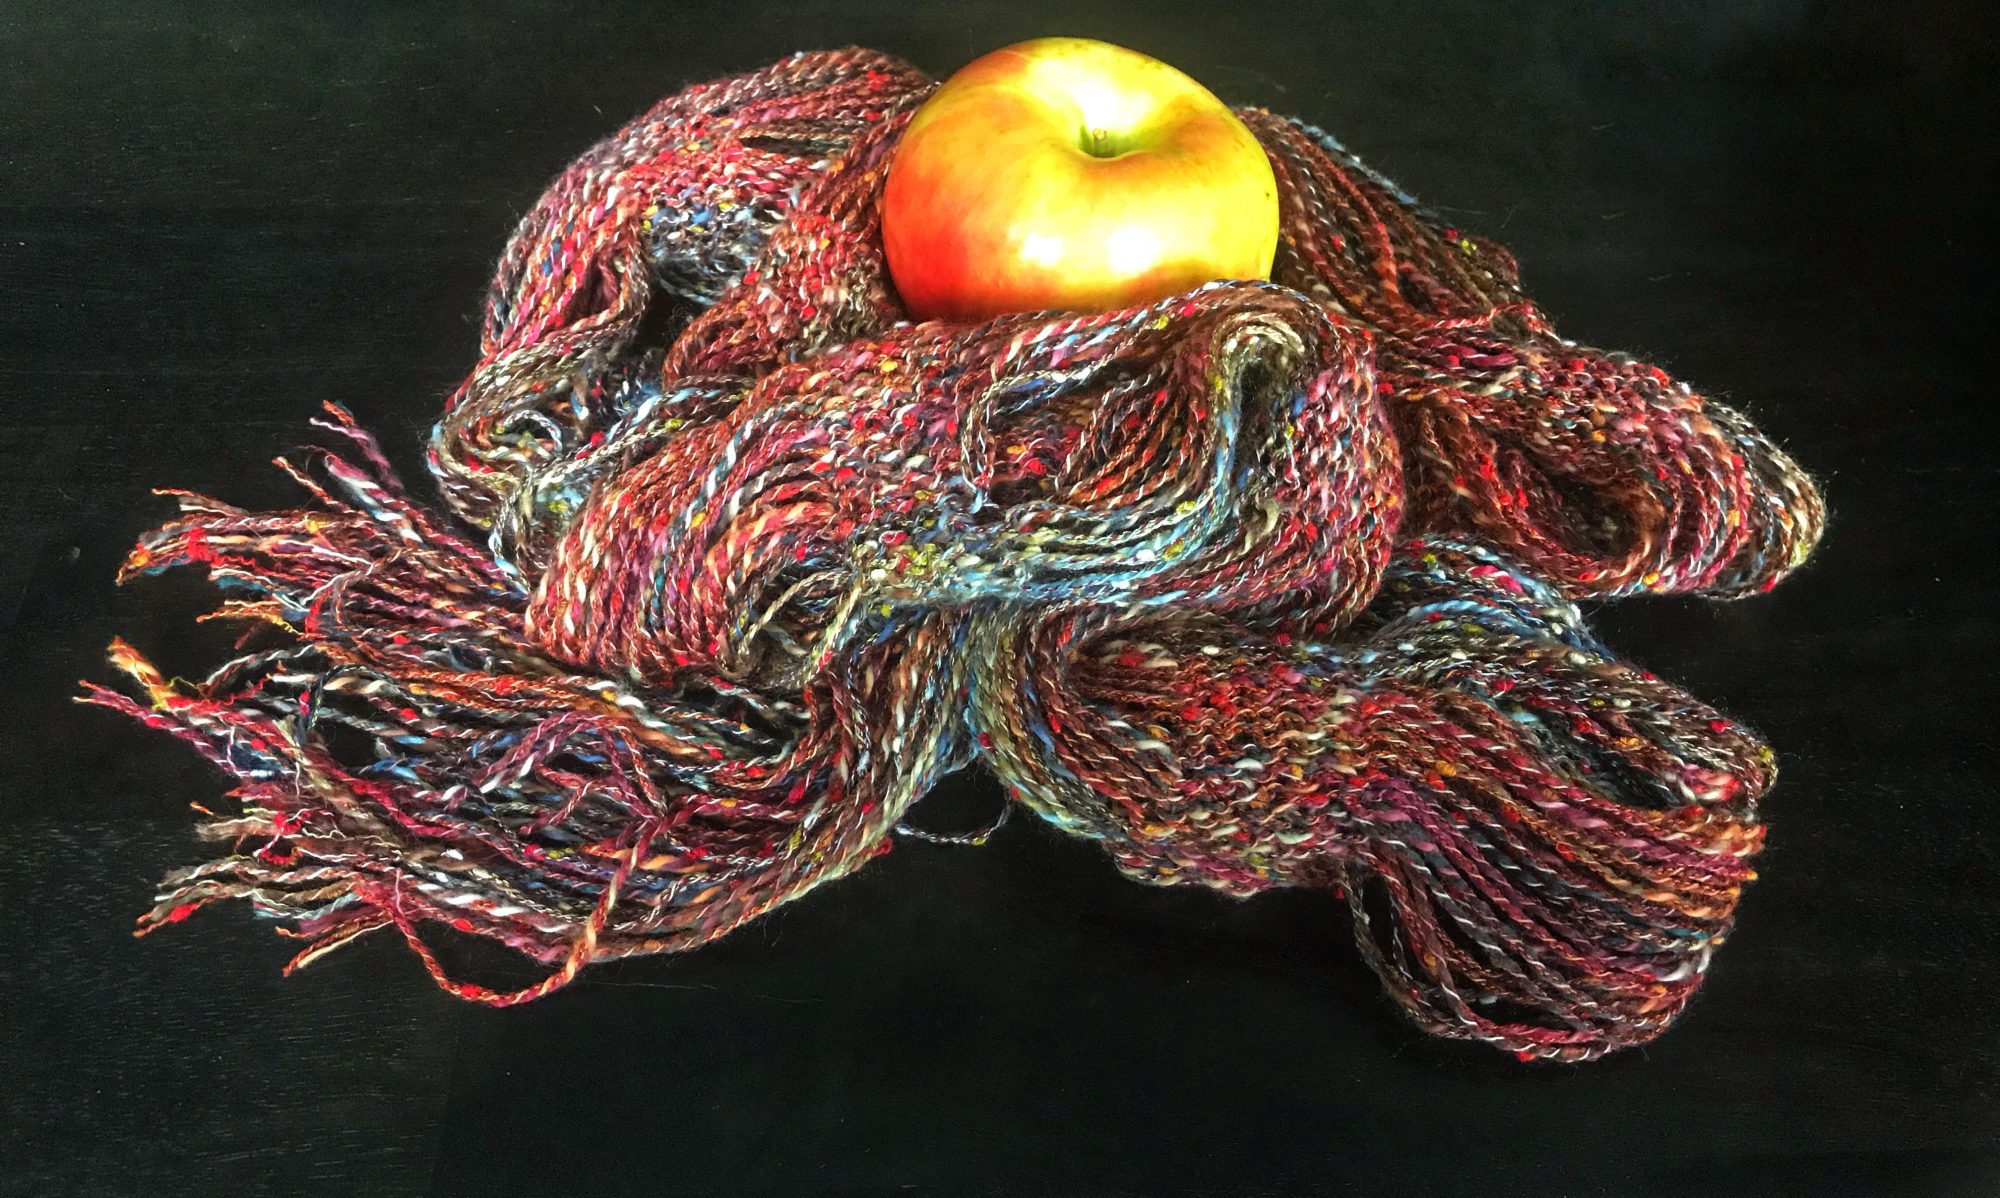
My friend Jenny is going to Kenya to work in an orphanage as part of a year long mission trip.  She held a silent auction to raise money for the trip and asked me to make a couple of things for the auction.  Since we are in Houston and it is ridiculously hot, I chose to try my hand at a love knot scarf.  I had seen some love knot items floating around Pinterest but didn’t really fall in love with a scarf until I found this free pattern on Ravelry.

I’ve been crocheting since before I can remember, but I had never made love stitches before.  Lucy Croft, who wrote the pattern, really covered all of her basis.  She included pictures with instructions for both left and right handed crocheters with both written instructions and a chart.  The directions were clear and easy to follow.  She used a light-weight yarn in her example that clearly showed loops (for lack of a better term) between the actual knots.  I used a heavier weight yarn (normal four-ply yarn) which resulted in less defined loops.  The final product was still a beautiful, light, summer scarf.

Love Knot Scarf

Difficulty:  Easy

Time Required:  1 Movie

Overall Experience:  Excellent