I haven’t had a lot to post recently despite the fact that I’ve been crafting A LOT. I’m making a lot of things for my wedding, and most of them are gifts for people helping me with things; therefore, they are secret.
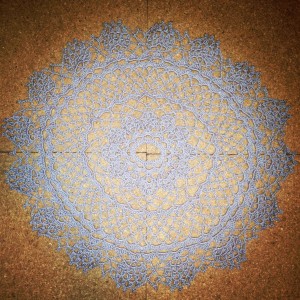
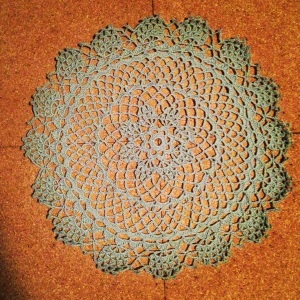
I wrote a few weeks ago about the doilies I am making for my wedding. In addition to the round varieties, I also needed some oval doilies. I took the original pattern and made some adjustment to it to create an oval version. The pattern for the oval version is below. I wanted the doilies to have a larger difference between their “long” and “short” sides, but they will do. They look nice with the round versions.
Materials:
- Size 1 Crochet Hook
- Bernat Handicrafter Crochet Thread in Misty Grey
Stitches Used:
- Chain (ch)
- Slip stitch (sl st), aka Join
- Single crochet (s c)
- Double crochet (d c)
- Triple crochet (tr c)
- Double triple crochet (d tr c)
- Triple tripe crochet (tr tr c)
Instructions:
Ch 36, join to form a ring.
R1: Ch 3, d c in same stitch,2 d c in next 5 stitches, d c in next 12 stitches, 2 d c in next 6 stitches, d c in next 12 stitches, slip stitch in top of ch 3.
R2: S c in same space, * ch 5, skip 3 d c, s c in next d c, repeat from * all around ending row with sl st in 1st s c.
R3: Work 1 s c, 7 d c, 1 s c in each ch 5 loop, join.
R4: Sl st to center of scallop, ch 7, 1 tr c in same space, * ch 3, 1 tr c in same space, repeat from *, * ch 4, 4 tr c with ch 3 between each tr c in center st of next scallop, repeat from * 12 times, ch 4, join to 4th st of ch 7.
R5: Sl st in first st of loop, ch 4, * thread over needle twice, insert in loop, pull through and work off 2 loops twice, repeat from *, thread over and pull through all loops at one time, ** ch 3, thread over twice, insert in next loop, pull through and work off 2 loops twice. * thread over twice, insert in same loop, pull through and work off 2 loops twice, repeat from *, thread over and work off all loops at one time, (cluster st), ch 3, cluster st in same loop, ch 3, cluster st in next loop, d c in next 4 ch loop, cluster st in next 3 ch loop, repeat from ** 12 times, ch 3, 2 cluster sts with ch 3 between each cluster st in next loop, ch 3, cluster st in next loop, d c in next 4 ch loop, join to top of 1st cluster st.
R6: Sl st in next loop, ch 4, * thread over needle twice, insert in same loop, pull through and work off 2 loops twice, repeat from *, thread over and work off all loops at one time, ch 3, cluster st in next loop, ch 3, thread over needle twice, insert in next loop, pull through and work off 2 loops twice, repeat from *, thread over and work off remaining loops at one time, ch 4, sl st in same loop, sl st in top of d c, repeat 11 times.
R7: Sl st in next 4 chain stitches, sl st in next loop, sc in same loop, ch 7, s c in next loop, ch 9, s c in 12 ch loop, repeat from beginning all around ending row with ch 5, d tr c in last stitch of previous row.
R8: Ch 9, s c in next loop, repeat from beginning all around ending row with ch 5, d tr c in d tr c of previous row.
R9: Ch 9, s c in next loop, repeat from beginning all around, join.
R10: Sl st to loop, ch 3, 8 d c in loop, * 9 d c in next loop, repeat from * all around, join.
R11: Sl st to center d c of d c group, * ch 5, skip 4 d c, cluster st in next space, ch 5, sl st in center d c of next d c group, repeat from * all around ending row with ch 2, d c in joining.
R12: S c in same space, ch 9, s c in next loop, repeat from beginning all around ending row with ch 5, d tr c in 1st s c.
R13 and 14: Same as 12th row.
R15: Ch 6, s c in next loop, repeat from beginning all around, join.
R16: Ch 3, 7 d c in next loop, * d c in next s c, 7 d c in next loop, repeat from * all around, join.
R17: Sl st to 4th d c, * ch 7, skip 7 d c, s c in next d c, repeat from * all around, join.
R18: Work 1 s c, 1 d c, 5 tr c, 1 d c, 1 s c in each loop, join.
R19: Sl st to center st of scallop, ch 7, tr c in same space, * ch 3, tr c in same space, repeat from *, * ch 4, s c in center st of next scallop, ch 9, s c in center st of next scallop, ch 4, 4 tr c with ch 3 between each tr c in center st of next scallop, repeat from * 14 times, ch 4, s c in center st of next scallop, ch 9, s c in center st of next scallop, ch 4, join to 4th st of ch 7.
R20: Sl st to loop, * 2 cluster sts with ch 3 between each cluster st in each of the next 3 loops, ch 5, skip ch 4 loop, s c in 9 ch loop, ch 5, skip ch 4 loop, repeat from * all around, join to top of 1st cluster st.
R21: Sl st to loop, * 1 cluster st with ch 3 between each cluster st in each of the next 5 loops, ch 7, sl st in next s c, ch 7, skip ch 5 loop, repeat from * all around, join in top of 1st cluster st.
R22: Sl st to loop, cluster st in same loop, * ch 6, sl st in 5th st from hook for picot, ch1, cluster st in next loop, ch 1, picot, ch 1, cluster st in next loop, ch 1, picot, ch 1, cluster st in next loop, ch 7, s c in next loop, ch 4, picot. ch 4, s c in next loop, ch 7, cluster st in next loop, repeat from * all around, in same manner join in top of 1st cluster st, break thread.
Difficulty: Medium to Hard (the stitches are somewhat difficult)
Time Required: 4 Movies
Overall Experience: Excellent
Related articles
- Wedding Doilies (engineeredcreations.wordpress.com)
