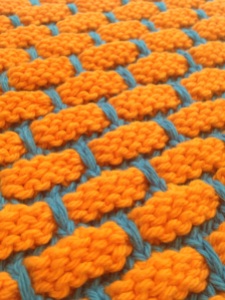
Appalachian Trail Koozie

We played Secret Santa at work this year. I drew a colleague who had recently taken off six months to hike the Appalachian Trail. (2200 miles!) For one of his gifts, I designed a koozie with the Appalachian Trail symbol. 


Difficulty: Easy

Time Required: 2 Movies

Overall Experience: Excellent

Purple and Gold Multiplicity

I decided to knit a Multiplicity purse for my sister since I loved mine so much. (See my posts about Multiplicity 1 and Multiplicity 2 for the others I made.) I chose a royal purple and mustard yellow, a play on her school colors of purple and gold. The only thing I didn’t like about mine is that it didn’t close. I knit button holes into the main pocket this time and loved the product!


Difficulty: Moderate

Time Required: 12 Movies

Overall Experience: Excellent

Cowboys Mason Jar Koozie

I haven’t written a blog post in forever. A lot of that is that it takes a lot of effort to figure out a pattern I improvised from pictures after I already gave away the actual product. I’ve been lazy. I decided to play catch up just sharing what I’ve been making. If someone wants the pattern, I am more than willing to share!

First up: a Dallas Cowboys mason jar koozie. I actually did not love how this turned out. I was knitting at a friends’ child’s birthday party and their neighbor asked if I could make them a mason jar koozie with the Cowboys logo. I said sure. I figured out a pattern for the letters, but it was really wide. Knitting with number 2 needles and worsted weight yarn (which is ridiculously tight if you know knitting) the letters went more than halfway around the jar. The only way I was going to get the letters on the front was to use super fine yarn. That would have been a crazy number of stitches, and I would have to buy new yarn instead of using stash yarn. Considering I had already spent a lot of time ripping out my work to even get the letters mostly on the front half of the jar, I really didn’t want to go through any more effort. Next I tried several different crochet star patterns, none of which were pointy enough.  Lastly, the letters ended up too low. I’m a perfectionist. Here is how it turn out. Not my best work.   


Difficulty: Easy

Time Required: 6 Movies (Due to a lot of ripping out)

Overall Experience: Meh

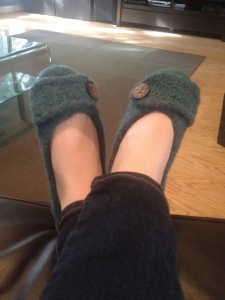
Felted House Slippers

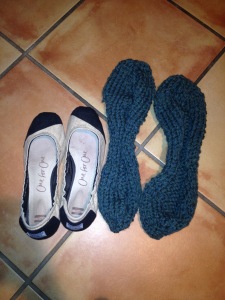
I had been wanting to try a technique where one knits an object using 100% wool then washes it to create felt.  I found an adorable house slipper pattern and decided my friend needed them for her birthday.  I knew that the slippers would shrink during the felting process, but I couldn’t believe how big they were knitting up!  They ended up shrinking down to the perfect size.  Here they are next to a pair of my Toms pre-felting.  Huge, right!?!

IMG_2695

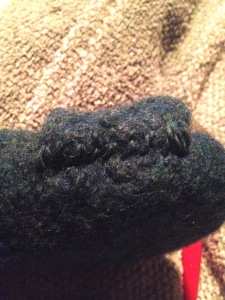
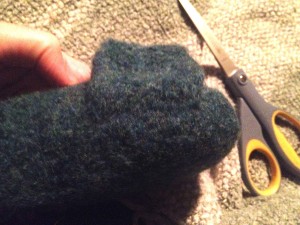
The pattern called for straps to simply be sewn on the toes; however, the stitching was quite obvious.  I used the needle felting techniques I used for my soap and pumpkin to make the seam nearly invisible.

IMG_2699

IMG_2700

Lastly, I added vintage-looking buttons.  I love them and need to make some for myself!

IMG_2701

Difficulty:  Easy

Time Required:  3 Movies

Overall Experience:  Good

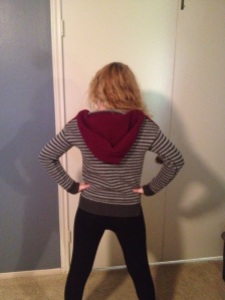
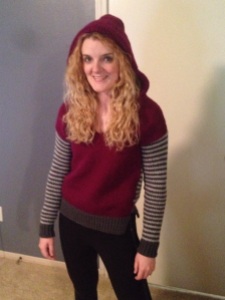
Deep V Hoodie

I asked for Vogue Knitting for Christmas and loved a pattern that showed up in the very first issue I received.  I like to make complicated things, but I tend to wear simple garments in mostly solid colors.  I like it when they are a little different from what you see everyday.  While not something I would love making, this hoodie was definitely something I would love wearing.  It knit up pretty quickly on No 8 needles.  I love the end product.  This is probably going to be my new favorite garment this fall.

IMG_2667

IMG_2670

IMG_2676

Difficulty:  Easy

Time Required:  Many Movies

Overall Experience:  Good

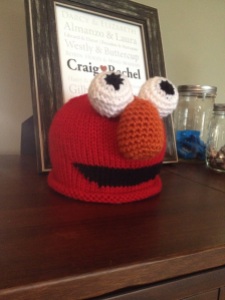
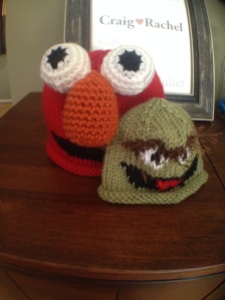
Elmo Inspired Baby Hat

Note:  I have created a second version of this hat with a simpler eyes and nose pattern (that I think looks a little better) and no mouth.  Check it out here.

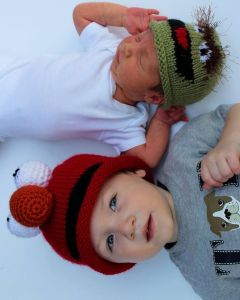
To continue my summer of baby hats (see Chappy Newsboy Caps and Lacey Summer Baby Cap), one of my coworkers had a baby (or rather his wife did).  They also have a toddler at home that loves Elmo.  I decided to rework my Oscar the Grouch hat for a newborn size and make an Elmo hat for their toddler.  I was rewarded with adorable pictures and videos of both babies the next day.  The Elmo hat was a huge hit!  I love that he liked it so much.  Usually when I make things, I don’t know if the item just sits in a drawer (meaning I wasted hours of my life) or is loved by the recipient.  The later makes me happy.  🙂

10600553_10153251051188797_1602740537430154179_n

IMG_2637

IMG_2635

Disclaimer:  Feel free to make this pattern for your personal use, for your platypus, for charity, or to sell.  The only thing I ask is that you please do not sell it on Etsy.  If you are interested in purchasing a hat from my Etsy store, you may do so here.

Gauge:  9 stitches x 13 rows = 2 in Stockinette

This hat was about 16 inches in circumference when finished.  It is quite stretchy and will stretch several inches.

Materials:

  • 5 Size US 7 double pointed needles
  • US Size G Crochet Hook
  • Tapestry needle
  • Vanna’s Choice yarn in Scarlet (R)
  • Vanna’s Choice yarn in Black (B)
  • Vanna’s Choice yarn in White (W)
  • Vanna’s Choice yarn in Terracotta (O)


Stitches Used:

Instructions:

Cast on 72 with R and distribute evenly on four needles

R1-R7:  Knitting in round, KR 72

R8:  KR 28, KB 16, KR 28

R9:  KR 26, KB 20, KR 26

R10:  KR 25, KB 22, KR 25

R11-R12:  KR 24, KB 24, KR 24

R13:  KR 23, KB26, KR 23

Continuing only in R:

R14-R34:  K 72

R35:  (K4, k2tog, ssk, K4) six times

R36:  K60

R37:  (K3, k2tog, ssk, K3) six times

R38:  K48

R39:  (K2, k2tog, ssk, K2) six times

R40:  K36

R41:  (K, k2tog, ssk, K) six times

R42:  K24

R43:  (k2tog, ssk) six times

Cut the yarn with several spare inches.  Thread a tapestry needle and pull yarn through all 12 stitches on needles.  Work in ends.

Note:  For alternative eye and nose pattern that has a more even eye iris, check out this post.

Eyes (make 2):

R1:  With B use magic ring technique to start round, ch 1, sc 8, sl st to first sc.  Cut yarn and work in ends. (8 stitches)

Continue with W

R2:  2 sc in first stitch from R1 and in each sc around, sl st to first sc (16 stitches)

R3:  Ch 1, sc in same stitch as sl st, sc in next stitch * 2 sc in next stitch, 1 sc in next 2 stitches, repeat from * 2 more times, 2 sc in last stitch, sl st to first sc (20 stitches)

R4-R6:  Ch 1, sc in each stitch around, sl st to first sc (20 stitches)

R7:  Ch 1, sc in same stitch as sl st, sc in next stitch * sc2tog, 1 sc in next 2 stitches, repeat from * 2 more times, sc2tog, sl st to first sc (16 stitches)

R8:  Ch 1, sc2tog around, sl st to first sc (8 stitches)

R9:  Ch 1, sc four together by slipping hook under the stitch from the row below, wrapping the yarn, and pulling a loop through, slip hook under next stitch and pull another loop, repeat until you have done this four times and there are five loops on your hook, yarn over and pull loop through all five loops, sc last four stitches together using the same method, sl st to first stitch (2 stitches)

Cut yarn and work in ends.

Nose:

R1:  With O use magic ring technique to start round, ch 1, sc 8, sl st to first sc (8 stitches)

R2:  2 sc in first stitch from R1 and in each sc around, sl st to first sc (16 stitches)

R3:  Ch 1, sc in same stitch as sl st, sc in next stitch * 2 sc in next stitch, 1 sc in next 2 stitches, repeat from * 2 more times, 2 sc in last stitch, sl st to first sc (20 stitches)

R4-R10:  Ch 1, sc in each stitch around, sl st to first sc (20 stitches)

R11:  Ch 1, sc in same stitch as sl st, sc in next stitch * sc2tog, 1 sc in next 2 stitches, repeat from * 2 more times, sc2tog, sl st to first sc (16 stitches)

R12:  Ch 1, sc2tog around, sl st to first sc (8 stitches)

R13:  Ch 1, sc four together by slipping hook under the stitch from the row below, wrapping the yarn, and pulling a loop through, slip hook under next stitch and pull another loop, repeat until you have done this four times and there are five loops on your hook, yarn over and pull loop through all five loops, sc last four stitches together using the same method, sl st to first stitch (2 stitches)

Cut yarn and work in ends.

Using a picture of Elmo as inspiration, tack the eyes and nose onto the hat using a tapestry needle and yarn.  I would also suggest tacking the eyes and nose to each other.

Difficulty:  Moderate

Time Required:  2 Movies

Overall Experience:  Excellent

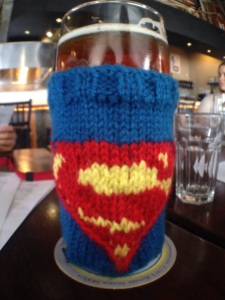
Superman Koozie

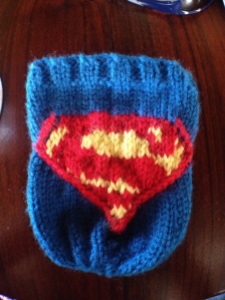
I created a Superman inspired koozie pattern.  The main design is achieved through fair isle stranding.  The crisp, raised border is cabled.  Enjoy!  You can also buy the koozie here.
20140628-090731-32851188.jpg

20140628-090826-32906635.jpg

Disclaimer:  Feel free to make this pattern for your personal use, for your platypus, for charity, or to sell.  The only thing I ask is that you please do not sell it on Etsy.  If you are interested in purchasing a koozie from my Etsy store, you may do so here.

Materials:

  • 5 Size US 4 double pointed needles
  • Vanna’s Choice Yarn in Sapphire (B)
  • Vanna’s Choice Yarn in Scarlett (R)
  • Vanna’s Choice Yarn in Radiant Yellow (Y)
  • Stitch Holder or Extra Needle

Stitches Used:

Gauge:

10 stitches and 15 rows = 2″ Stockinette Stitch

Instructions:

Cast on 48 stitches with B.  Distribute stitches evenly on four of the double pointed needles.

R1:  Knitting in round being careful not to twist the cast on stitches, (kB 2, pB 2) 12 times.

R2-R5:  (kB 2, pB 2) 12 times

R6-R11:  kB 48

R12:  kB 15, kR 18, kB 15

R13:  kB 14, slip next stitch on cable needle and hold in back, kR 1, knit held stitch with R, kR16, slip next stitch on cable needle and hold in front, kR 1, knit held stitch with R, kB 14

R14:  kB 13, slip next stitch on cable needle and hold in back, kR 1, knit held stitch with R, kY 2, kR 12, kY 2, kR 2, slip next stitch on cable needle and hold in front, kR 1, knit held stitch with R, kB 13

R15:  kB 12, slip next stitch on cable needle and hold in back, kR 1, knit held stitch with R, kY 2, kR 5, kY 6, kR 3, kY 1, kR 2, kY 1, slip next stitch on cable needle and hold in front, kR 1, knit held stitch with R, kB 12

R16:  kB 11, slip next stitch on cable needle and hold in back, kR 1, knit held stitch with R, kY 2, kR 4, kY 10, kR 4, kY 2, slip next stitch on cable needle and hold in front, kR 1, knit held stitch with R, kB 11

R17:  kB 10, slip next stitch on cable needle and hold in back, kR 1, knit held stitch with R, kY 2, kR 5, kY 10, kR 4, kY 3, slip next stitch on cable needle and hold in front, kR 1, knit held stitch with R, kB 10

R18:  kB 10, slip next stitch on cable needle and hold in FRONT, kB 1, knit held stitch with R, kR 1, kY 1, kR 7, kY 14, kR 1, slip next stitch on cable needle and hold in BACK, kR 1, knit held stitch with B, kB 10

R19:  kB 11, slip next stitch on cable needle and hold in front, kB 1, knit held stitch with R, kR 17, kY 4, kR 1, slip next stitch on cable needle and hold in back, kR 1, knit held stitch with B, kB 11

R20:  kB 12, slip next stitch on cable needle and hold in front, kB 1, knit held stitch with R, kR 18, kY 1, kR 1, slip next stitch on cable needle and hold in back, kR 1, knit held stitch with B, kB 12

R21:  kB 13, slip next stitch on cable needle and hold in front, kB 1, knit held stitch with R, kR 1, kY 1, kR 16, slip next stitch on cable needle and hold in back, kR 1, knit held stitch with B, kB 13

R22:  kB 14, slip next stitch on cable needle and hold in front, kB 1, knit held stitch with R, kR 1, kY 2, kR 13, slip next stitch on cable needle and hold in back, kR 1, knit held stitch with B, kB 14

R23:  kB 15, slip next stitch on cable needle and hold in front, kB 1, knit held stitch with R, kR 1, kY 7, kR 6, slip next stitch on cable needle and hold in back, kR 1, knit held stitch with B, kB 15

R24:  kB 16, slip next stitch on cable needle and hold in front, kB 1, knit held stitch with R, kR 5, kY 5, kR 2, slip next stitch on cable needle and hold in back, kR 1, knit held stitch with B, kB 16

R25:  kB 17, slip next stitch on cable needle and hold in front, kB 1, knit held stitch with R, kR 10, slip next stitch on cable needle and hold in back, kR 1, knit held stitch with B, kB 17

R26:  kB 18, slip next stitch on cable needle and hold in front, kB 1, knit held stitch with R, kR 8, slip next stitch on cable needle and hold in back, kR 1, knit held stitch with B, kB 18

R27:  kB 19, slip next stitch on cable needle and hold in front, kB 1, knit held stitch with R, kR 1, kY 4, kR 1, slip next stitch on cable needle and hold in back, kR 1, knit held stitch with B, kB 19

R28:  kB 20, slip next stitch on cable needle and hold in front, kB 1, knit held stitch with R, kR 1, kY 2, kR 1, slip next stitch on cable needle and hold in back, kR 1, knit held stitch with B, kB 20

R29:  kB 21, slip next stitch on cable needle and hold in front, kB 1, knit held stitch with R, kR 2, slip next stitch on cable needle and hold in back, kR 1, knit held stitch with B, kB 21

R30:  kB 22, slip next stitch on cable needle and hold in front, kB 1, knit held stitch with R, slip next stitch on cable needle and hold in back, kR 1, knit held stitch with B, kB 22

R32:  kB 22, kfb of next stitch with B, k2tog with R, kB 23

Continue with B only

R33-R36:  k48

R37:  (k2, k2tog) 12 times

R38:  (k2, k2tog) 9 times

R39:  (k1, k2tog) 9 times

R40:  (k2tog) 9 times

Difficulty:  Easy

Time Required:  2 Movies

Overall Experience:  Excellent
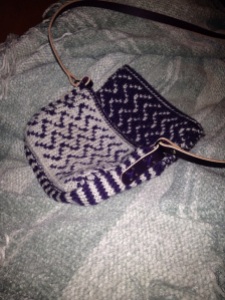
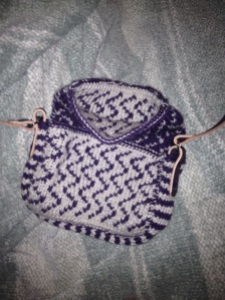
Purple Multiplicity

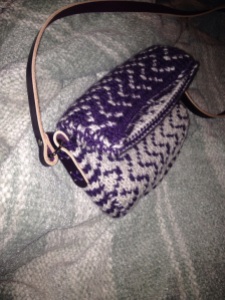
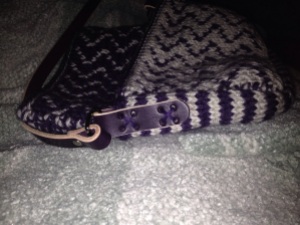
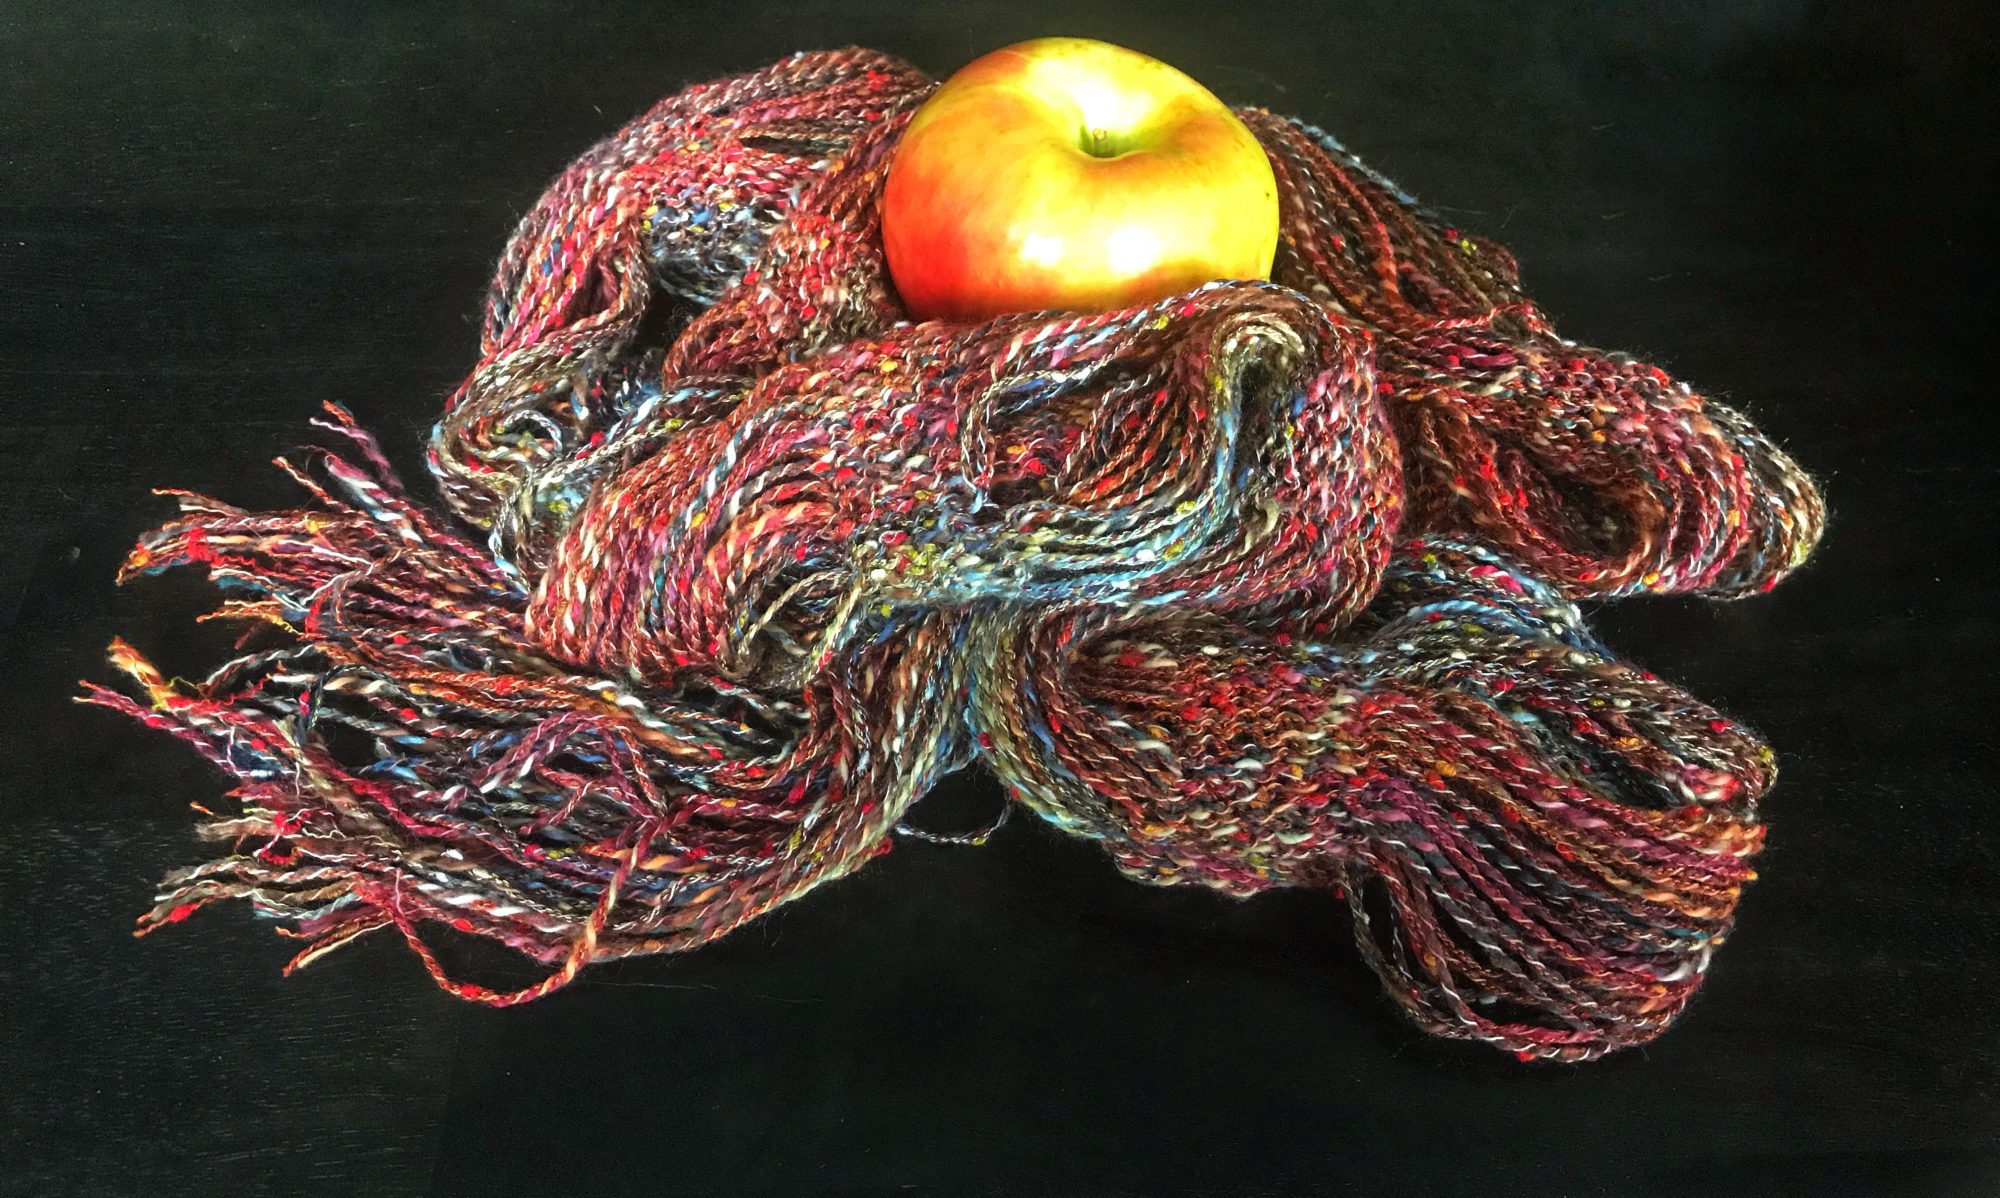
After carrying my Multiplicity for a couple of days, a friend asked me to make one in purple and off-white.  I really love how it turned out!

20140612-181750-65870450.jpg

20140612-181819-65899246.jpg

20140612-181837-65917621.jpg

20140612-181903-65943436.jpg

Difficulty:  Moderate

Time Required:  12 Movies

Overall Experience:  Excellent

Chevron Pillow

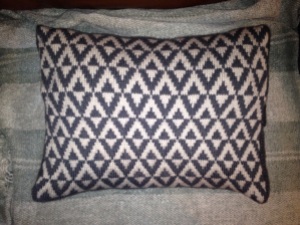
My friend Cassie bought me a knitting pattern book, Knitting 24/7, for my birthday last year.  It is full of fun, modern patterns.  She pointed out that there was a really cool pillow.  I took note and decided she was getting the pillow for her birthday.  While the pillow looks nice, I really hated making it.  I started it at the beginning of October on the car ride back from our wedding and just finished it two weeks ago!

20140530-075842-28722696.jpg

Why I didn’t like the pillow:

  • Construction Type:  I very much like my projects to be seamless if at all possible.  This pillow was the opposite of that.  The front of the pillow was made by knitting in a round with a steek.  A steek is basically an extra stripe in the fabric that you will cut through.  Yes.  You have to cut into your knitted fabric.  Then you have to sew up the edges so it doesn’t unravel.  Scariest thing ever.  You also have to knit a bunch of extra stitches, and I’m lazy.  After the front is made, the knitter must pick up stitches at the top and bottom of the pillow and knit the two back halves.  After all of that, the sides have to be seamed.  It would have been much easier to start at the center of the back, knit to the top, knit the front from the top to bottom, and knit the back from the bottom to the middle.
  • My Own Error:  I started out making the pillow on some very old circular needles my grandma gave me.  They were stiff and I was having a hard time working the project in the round and pulling the front design a little too tight.  I was really frustrated with the needles and was really wishing for new needles.  For Christmas, my husband bought me a new set of circular needles.  He wanted me to try them and I was super frustrated with the ones I was using.  I knew that the tension in the project may change a little if I switched, but I was ready to quit on the project.  I switched needles.  They were wonderful.  It was so easy to keep working the project.  After about an inch of more fabric, I noted that my tension had gotten looser.  I was concerned, but decided the pillow should stretch it out.  As I kept going, I noticed a major difference in the old knitting and new.  I didn’t know if a pillow was going to be able to overcome the problem.  I sat the project down for a couple of months.  I didn’t want to make the back (the pillow was very large) if I couldn’t fix the front.  My husband talked me into finishing it.  Despite the fact that the pillow was knitting too tight horizontally, it turned out wide.  The height was perfect.  Several people complained about this problem on Ravelry, so I wasn’t the only one.  I ended up sewing and stuffing my own pillow to fit it perfectly.  The change in tension isn’t obvious in the overstuffed pillow.

Difficulty:  Easy/Moderate

Time Required:  Many Movies

Overall Experience:  Poor

Ballband Dishcloth

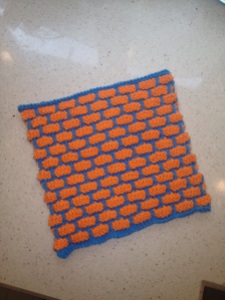
I’ve found a knitting buddy in Houston (that’s really exciting since all of the rest of my knitting buddies are online friends that live far away)!  She swears by ballband dishclothes, so I whipped one up.  The project was quick and the colors and design were fun.  I love the texture.  I’m excited to try it…even if that does mean I have to do dishes.

20140427-155654.jpg

20140427-155742.jpg

Difficulty:  Easy

Time Required:  2 Movies

Overall Experience:  Excellent