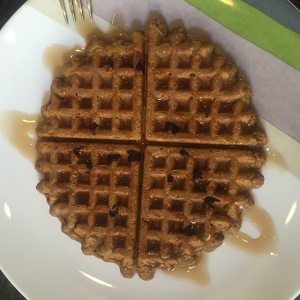
Pumpkin, Gingerbread, Chocolate Waffles (Gluten-Free)

I really wanted 21 Day Fix approved waffles or pancakes this morning but didn’t have all of the ingredients for any of my existing recipes.  I decided to experiment with what I did have, and the outcome was delicious!

IMG_4135

Servings:  2

Ingredients:

  • 1 cup of old-fashioned oats
  • 2 eggs
  • 2 egg whites
  • 1/2 cup pumpkin puree (not pie filling)
  • 1.5 tablespoons unsweet cocoa powder
  • 2 tablespoons 0% fat Greek yogurt
  • 1 teaspoon vanilla
  • 1/2 teaspoon salt
  • 1 teaspoon pumpkin pie spice
  • 1 teaspoon ginger
  • 1 teaspoon nutmeg
  • chocolate chips (a few)
  • Honey or maple syrup for topping

21 Day Fix Containers (per single serving):

  • 1 yellow (oats)
  • 1 red (eggs, egg whites, yogurt)
  • 1/4 green (there’s so little pumpkin you don’t really have to count it unless you really want to…)
  • teaspoons (depends on how much honey/syrup you use)

Directions:

  1. Turn on your waffle iron and allow it to preheat
  2. Add all ingredients except chocolate chips and honey/maple syrup to blender (oats, eggs, pumpkin, cocoa powder, Greek yogurt, vanilla, salt, pumpkin pie spice, ginger, and nutmeg)
  3. Blend ingredients until fully mixed with no large oat pieces
  4. Separate batter into two equal amounts (I like to measure it in two measuring cups)
  5. Pour 1/2 of the batter into your iron; depending on the iron size, it may not fill the entire iron
  6. Put a few chocolate chips on top of batter and close iron
  7. Cook waffle according to your waffle iron instructions
  8. Repeat cooking process with second waffle

Nutritional Information (without topping):  Calories 310, Fat 9.8 g, Cholesterol 211 mg, Sodium 726 mg, Potassium 207 mg, Carbs 38.4 g, Protein 17.8 g, Vitamin A 4.9%, Vitamin C 0.4%, Calcium 8.0%, Iron 20.6%

If you have any questions about 21 Day Fix, I would love to answer them.  Feel free to contact me in the comments below.  Check out my story here.
Slow Cooker Apricot Pork Roast

This recipe is a little fluid…  I make it a little differently every time.  Feel free to experiment!  This started out as a recipe from my mom, but I’ve added to it over the years.  The roast turns out extremely moist with a sweet glaze.  Adding root vegetables such as carrots and potatoes to the roast creates a complete meal.  I don’t have a picture here, but sliced tenderloin on a platter surrounded by carrots and potatoes presents beautifully.

IMG_2991

Ingredients:

  • Hormel Original Pork Tenderloin
  • Approximately 8 small red potatoes
  • Approximately 16 baby carrots
  • Dijon mustard
  • Salt
  • Pepper
  • Approximately 4 tablespoons of Balsamic vinegar
  • Approximately half a jar of Smuckers Appricot Preserves
  • 4 tablespoons of butter
  • Olive oil

Instructions:

  • Unwrap pork tenderloin and place in slow cooker
  • Salt and pepper tenderloin to taste
  • Squeeze dijon mustard onto tenderloin
  • Drizzle tenderloin with balsamic vinegar
  • Cut butter into single tablespoons and arrange evenly around tenderloin

IMG_2963

  • Spoon half a jar of apricot preserves on tenderloin

IMG_2966

  • Cook tenderloin on low for four hours
  • While tenderloin is cooking, wash and quarter the potatoes
  • Add potatoes and carrots to a ziplock bag and drizzle with olive oil
  • Add salt and pepper to taste
  • Shake bag to coat carrots and potatoes

IMG_2967

  • After the tenderloin has been cooking for about four hours, add the carrots and potatoes and allow to cook for an additional two hours (a total of six hours of cook time)

IMG_2991


Grandma Sula’s Peanut Butter Cake

I made my great-grandma’s peanut butter cake for work today.  Something is a little off in the recipe I was given, and I always end up improvising.  I decided to actually record what I think I did last night so I can repeat it!  The cake turned out delicious.  It was mostly gone before 9:30 this morning.  The powdered sugar heart was added at the last minute to make it holiday appropriate.

20140213-195014.jpg

Cake Ingredients:

  • 3 cups of flour
  • 1/2 cup of creamy peanut butter
  • 2 cups of milk
  • 2 teaspoons of apple cider vinegar
  • 2 teaspoons of baking soda
  • 2 cups of white sugar
  • 1/2 cup of butter
  • 2 eggs, beaten

Icing Ingredients:

  • 2 1/2 cups of powdered sugar
  • 3 tablespoons of butter
  • 6 tablespoons of coffee
  • 1/4 cup of peanut butter

Instructions:

  • Preheat the oven to 350 degrees Fahrenheit
  • Grease a 9 by 13 inch pan
  • Cream white sugar, 1/2 cup of butter, and 1/2 cup of peanut butter
  • Beat in eggs
  • Sift flour and baking soda in another bowl
  • Mix the milk and apple cider vinegar in a liquid measuring cup
  • Add the flour mixture to the first mixture alternating with milk
  • Pour batter into pan and bake 40-45 minutes or until a toothpick comes out of the center of the cake clean; the cake should be a dark golden brown
  • Allow the cake to cool
  • Using an electric mixer, mix the powdered sugar, remaining butter (melted), peanut butter, and coffee.  You may want to adjust the ingredients for taste or consistency.  Adding more sugar will make the icing thicker.  Adding more butter and coffee will turn the icing into more of a glaze.
  • Ice the cake

Eyeball Cake Pops and Punch

Since it’s Halloween, we interrupt all of the wedding posts for…well…a Halloween post.

20131031-182818.jpg

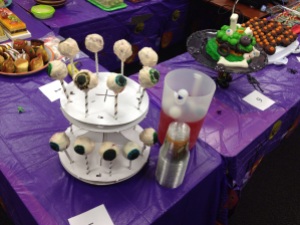
My engineering firm has an annual Halloween dessert contest.  After seeing the outcome of last year’s competition, I realized that the vote goes to aesthetics rather than flavor.  I bake a lot, but do very little dessert decorating.  (I do no dessert decorating.)  After an extensive Pinterest search, I chose to make eyeball cake pops.  I actually get to bake something rather than just putting together pieces of candy.  I had also been wanting to try cake pops for quite some time.  To add to the dessert, I also made eyeball punch.

This process turned out to be an exercise on how NOT to make cake pops.  They turned out cute/creepy in the end.  I didn’t even come close to placing in the competition.  I probably need to work on my decorating skills.

Materials/Ingredients:

Cake Pop Instructions:

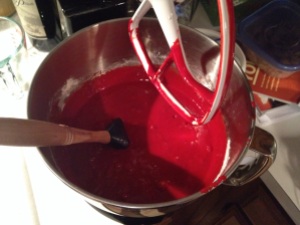
  • Make the cake as indicated on your cake mix.  (My red cake was really creepy.)

20131031-184131.jpg

  • Allow to cool fully.  (I made mine the night before.)
  • Crumble the cake using a fork and place crumbs in large bowl.
  • Mix the crumbs and 1/2 to 3/4 of a container of store bought frosting.  Mix until the frosting is completely absorbed.  My mixture was the consistency of Play-doh.  Since this was my first attempt at cake pops, I’m not sure that was correct.
  • Use a cookie or ice cream scoop to create balls of the mixture.  I used an ice cream scoop and rounded the balls with my hands.
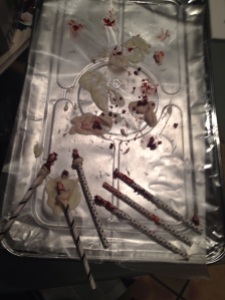
  • (After this point lots of things started going wrong.  So as to not confuse, I’ll continue with the steps that seemed to work.  See carnage below.)

20131031-182916.jpg

  • Place balls in small containers and put into FREEZER.  (Multiple containers are good because you can rotate the containers and only take a few balls out of the freezer at a time.  I used small baking dishes.)
  • While the balls are cooling, use a double boiler (or put water in a pot and put a glass bowl over it as I did) and bring your water to a boil.  Turn the heat down so the water is simmering.  Melt the almond bark in the upper compartment of the double boiler or in the bowl.  Add a few drops of vegetable oil if you wish your almond bark to have a smoother consistency.
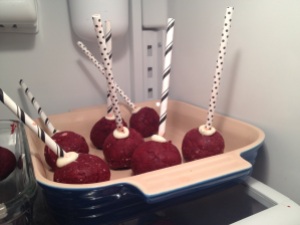
  • Remove a container of balls from the freezer.  Dip the end of one stick and push it into the center of the ball. ( Don’t push the stick too far or you will see balls sliding down your sticks later as the ends of the sticks push through the tops of the balls.)  Repeat the process for the rest of the balls in the container.  Put the container back into the freezer and remove a different container.  Repeat until all of the balls have sticks.  Leave the balls in the freezer until the almond bark on the sticks has hardened.

20131031-182800.jpg

  • After the almond bark has hardened for the first container of balls, remove it from the freezer.  Dip the entire ball in the almond bark.  You may need to spoon almond bark over the ball near the stick.  Remove the ball from the bowl of almond bark and spin the ball to remove access almond bark.  I found a wire whisk to be a useful tool for removing access almond bark.  Place the coated ball in the cake pop holder or place on a cookie sheet covered in wax paper.  Repeat until all of the balls are covered in almond bark.
  • Paint the eye design onto the balls using food coloring.  (I tried to use the food coloring markers first.  They did not work.  I would not suggest purchasing them.)  Mixing one drop of red with one drop of green made an almost black.  I painted the pupils first.  After letting the dry, I painted the iris region.  I started out painting the entire iris region a solid color, but the food color pigments were so dark that it looked like a giant, dark dot.  It looked much better when I painted the outer border of the iris and then painted lines going towards but not touching the pupil.  See below.

20131031-182818.jpg

20131031-182934.jpg

The balls turned out OK.  I had lots of problems and trial and error.  I had several pops break apart in my almond bark, causing the almond bark to have cake in it.  This resulted in a much less smooth almond bark.  I also didn’t like the design on the early pops.  They were really creepy when you tried to eat them.

20131031-183139.jpg

Eyeball Punch Instructions:

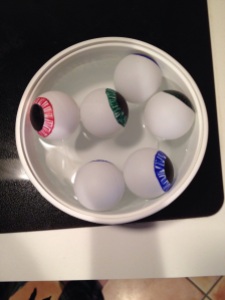
  • Draw eye designs on ping pong balls using Sharpies
  • (I thoroughly tested them to make sure they wouldn’t bleed in my punch.  After drawing on them, I washed them.  I then left them in a small bowl of water for two days to make sure they wouldn’t bleed.)

20131031-184151.jpg

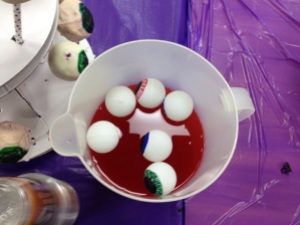
  • Make punch using equal parts Hawaiian Punch and Sprite in the pitcher.  Place the ping pong balls on top for a creepy touch.

20131031-183106.jpg

20131031-183037.jpg

Easy Baked Ranch Chicken Fingers

This is so easy and lacks real ingredient quantities, so I don’t know if I can really even call it a recipe!

ranch chicken 4

Time Required:  About 45 minutes

Yields:  5-6 servings

Ingredients:

  • About 2 pounds of chicken tenders
  • Ranch salad dressing (enough to coat the tenders)
  • Pregresso Italian bread crumbs (enough to coat the tenders)
  • Vegetable oil (enough to coat a cookie sheet)

Directions:

  • Preheat the oven to 350 degrees
  • Wash the chicken and cut off any unwanted parts such as tendons
  • Put some ranch dressing in the bottom of a small bowl and coat the tenders in dressing

ranch chicken 1

  • Optional step:  Allow tenders to marinate in the dressing in the refridgerator
  • Grease a cookie sheet with vegetable oil
  • Put the bread crumbs in another small bowl and coat the tenders in bread crumbs
  • Place the breaded tenders on the greased cookie sheet

ranch chicken 2

  • Bake for 30 minutes or until the chicken is no longer pink when sliced through the thickest part

ranch chicken 3

World’s Best Cinnamon Raisin Bread

As I posted last week, I got a KitchenAid stand mixer for my birthday!  I was working like crazy to finish my dissertation and didn’t really have time to play with it until this weekend.  I decided to using the kneading tool and attempt to make bread.  I had never made yeast bread by myself.  The last time I “made” any type of yeast bread, I think I was in second grade and “helping” my great-grandmother.  Spending that whole day baking is one of the best memories I have of her.

I’ve been slightly addicted to the Sun-Maid raisin bread lately, so I decided to try to find a homemade version online.  A quick Google search led me to a recipe titled “World’s Best Cinnamon Raisin Bread.”  That sounded promising.  Since I am not an experienced bread maker, I left the bread part of the recipe mostly alone, but I played with the filling that creates the cinnamon swirl.  I really felt like the bread needed some brown sugar and more raisins.

The bread turned out delicious.  I had one mishap in the baking process.  Several of the reviewers said that they used less flour than was specified to create a slightly sticky dough that made the bread more moist in the end.  I put all of recommended flour in and my dough was still quite sticky.  The sticky dough was OK until the point that I needed to roll the dough into a cylinder.  It was very difficult to roll.  My roll wasn’t symmetric, so my loaf ended up asymmetric.  I would suggest adding more flour initially, so I added some flour in the recipe below.

photo-37

Time Required:  About 3 hours

Yields:  1 loaf

Ingredients:

  • 1/2 cup and 1/2 tablespoon of milk
  • 1/3 cup of warm water (must be between 110-115 F)
  • 1 (1/4 oz) package of yeast
  • 1 egg
  • 1/2 cup white sugar
  • 1/4 cup brown sugar
  • 1 tablespoon cinnamon
  • 1/3 teaspoon of salt
  • 1/4 cup and 3 tablespoons of butter
  • 2/3 cups of raisins
  • 2-2/3 cups of flour

Directions:

  1. Warm 1/2 cup of  milk in a small saucepan until it starts to bubble, stirring occasionally.  Remove from heat.  Let cool until approximately 120 F.
  2. Dissolve yeast in warm water.  Set aside until yeast is frothy, about 10 minutes.
  3. Mix together yeast/water mixture, 1/4 cup white sugar, egg, salt, 1/4 cup softened butter, 1/3 cup of raisins.
  4. Knead dough on lightly floured surface until smooth.  (Or use your KitchanAid mixer!)
  5. Melt 1 tablespoon of butter and coat the bottom of a large mixing bowl.  Place the dough inside the bowl.  Tilt the bowl so that the access butter coats the dough.  Put a warm, damp cloth over the bowl and place in oven with the light on.  Allow to rise until the dough doubles in size (about one hour).
  6. Roll the dough to 1/2 inch thickness on lightly floured surface.  Moisten the dough with about 1 tablespoon of milk using your hands.
  7. Mix the 1/4 cup white sugar, brown sugar, cinnamon, and 1/4 cup raisins in a small bowl.  Sprinkle over rolled dough.
  8. Grease a 9 in by 5 in loaf pan with 1/2 tablespoon of melted butter.
  9. Roll the dough tightly.  Pinch ends together.  Place dough in loaf pan.  Coat the top of the dough with 1/2 tablespoon of melted butter.
  10. Let rise uncovered in oven with light on for one hour.
  11. Bake at 350 F for 45 minutes or loaves are lightly browned and sound hollow when tapped.
  12. Remove from oven.  Pour 1 tablespoon of melted butter on top of loaf.
  13. Allow to cool for 20 minutes in pan.  After 20 minutes put loaf on wire rack.

Here are some pictures of my process:

photo-42

photo-41

photo-40

photo-39

photo-43

photo-38

photo-37

Bacon and Cheese Crock Pot Quiche

Note:  I’ve created a “clean” 21 Day Fix approved version of this recipe.  The changes greatly reduced the calories and fat while maintaining the great flavor! Check it out here!

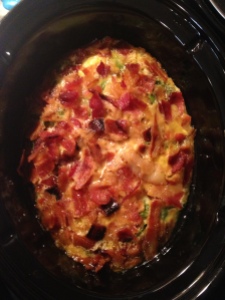
When I was so frustrated with my data for my dissertation that I wanted to scream, cry, or throw something, I decided it was time to take a break and prepare dinner.  I found this recipe on Pinterest and have made it a few times.  It’s quick to prep and tasty.  I love being able to put something in the crock pot and forget about it for a few hours.  (To be honest I don’t actually forget about the crock pot since most of the things I make in it tease me with appetizing smells.)  The original recipe is listed as a breakfast, but, honestly, who preps breakfast four hours before he or she plans to eat it?  I make this for dinner.  The recipe below is an adapted base.  I throw in whatever I have laying around.  Once again in the pictures I’m making half of the recipe in one of my tiny crock pots.

Quiche1

Servings:  8

Ingredients:

Directions:

  1. Grease the crock pot with the butter.  Turn the crock pot on low and leave the remaining butter in the bottom.  It will melt while you are preparing the other ingredients.
  2. Cook the bacon.  This is probably the only recipe I make that the primary objective is not to amass bacon grease.  I cook the bacon in the microwave while I am preparing the other ingredients.  Feel free to cook it any way you want.
  3. Cut the stems off of the spinach and tear the spinach into about 1/2 inch pieces.  I tear the pieces into a measuring cup.
  4. Chop the onion, peppers, and mushrooms.
  5. Beat the eggs in a large bowl.  Whisk in the cream, cheese, pepper, spinach, onions, peppers, and mushrooms.
  6. Pour the mixture into the crock pot.
  7. Tear the bacon into approximately 1/2 inch pieces and top the mixture with bacon.
  8. Cover and cook on low for 4 to 5 hours or on high for 2 to 2.5 hours.  The quiche is ready to eat when it is firm to the touch.

Quiche2Quiche1

Nutritional Information:  Calories 382, Fat 33.6 g, Cholesterol 352 mg, Sodium 470 mg, Potassium 174 mg, Carbs 2.2 g, Protein 18.1 g, Vitamin A 36.4%, Vitamin C 7.6%, Calcium 25.3%, Iron 7.9%

Cinnamon Toast

Cinnamon toast was probably my favorite breakfast as a kid.  It’s delicious and not even a little bit healthy.

Ingredients:

  • Slices of bread of your choice
  • Brown sugar
  • Cinnamon
  • Butter

Directions:

Cinnamon Toast 1

  1. Preheat oven to 350.
  2. Butter each slice of bread and place on cookie sheet.
  3. Top each slice of bread with 1-2 teaspoons of brown sugar.  Spread the sugar over the bread with the back of your spoon.
  4. Lightly sprinkle cinnamon over brown sugar.
  5. Bake for about 7 minutes.  The crust of the bead should be firm.  The butter should have melted and mixed with the cinnamon and sugar to form a delicious goo-like substance.

Cinnamon Toast 2

Crock Pot Roast Beef Sliders

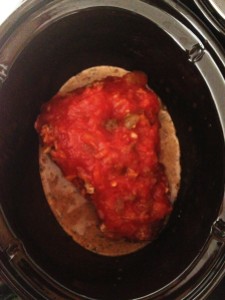
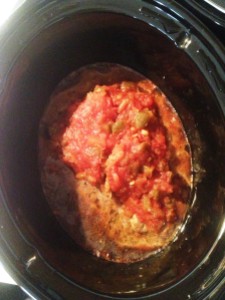
I found a recipe for roast beef sliders on Pinterest.  Here is my own slight variation on the recipe.  These sandwiches are really great.  These are probably my fiance’s favorite thing that I make for dinner.

PRS16

Ingredients:

Roast Directions:

PRS11

  1. Place roast in crock pot (picture above shows a 1/2 of recipe).
  2. Whisk together water, brown gravy mix, Italian dressing mix, and French onion soup mix.  Pour over roast.
  3. Pour jar of Picante sauce over roast.
  4. Cook the roast on low for 6-8 hours.

PRS15

Caramelized Onion Directions:

  1. Add butter and olive oil to large skillet.  Warm pan over medium-high heat.
  2. While the pan is warming, peel the onion and cut it into slices.
  3. The pan will be ready when the oil shimmers.
  4. Place the onions into the pan.  Stir to cover onions with oil and butter.  Cook for about 10 minutes stirring occasionally.
  5. Add salt and sugar.  Reduce heat to medium.  Continue to cook and stir.  The onions will go from from opaque and rigid to translucent and ductile.
  6. As the onions start to turn brown, you may have to stir more often.  If the onions start to get too dry, add more oil.  Remove the onions from heat when they reach a rich, dark brown color.  This should take about 1/2 an hour from the time you started cooking.

PRS12PRS13PRS14

Slider Directions:

  1. Cut the Hawaiian rolls in half.
  2. Cut the roast into chunks.  Place on the rolls.
  3. Spoon the sauce from the roast on top of the meat.
  4. Place caramelized onions on top of the meat.
  5. Top the onions with Swiss cheese.
  6. Enjoy!

PRS16

Spinach Artichoke Dip

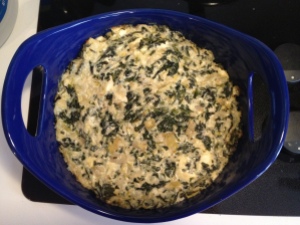
In addition to banana pudding, I also made spinach artichoke dip for the lab BBQ.  I couldn’t find my mom’s recipe, but I found a very similar, highly rated, recipe on food.com.  The dip turned creamy with a great flavor.  It also looks pretty.  I’ll make it again.

Spinach Dip

Ingredients:

2 cups parmesan cheese

1 (10 ounce) box frozen chopped spinach, thawed

1 (14 ounce) can artichoke hearts, drained and chopped

2/3 cup sour cream

1 cup cream cheese

1/3 cup mayonnaise

2 teaspoons garlic, minced

Directions:

  1. Preheat oven to 375°F.
  2. Mix together Parmesan cheese, spinach, and artichoke hearts.
  3. Combine remaining ingredients and mix with spinach mixture.
  4. Bake for 20-30 minutes.