Needle Felted Cat

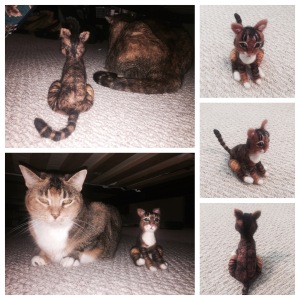
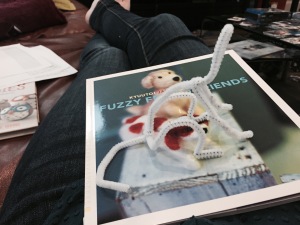
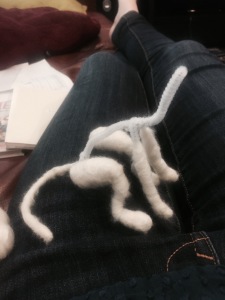
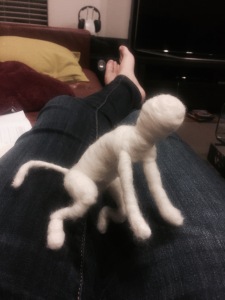
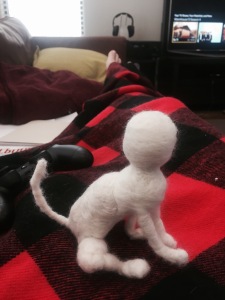
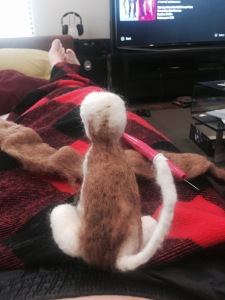
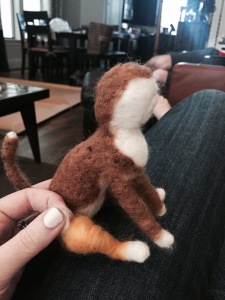
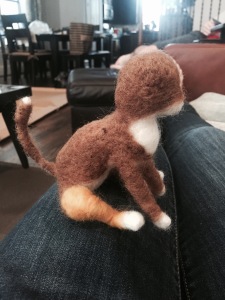
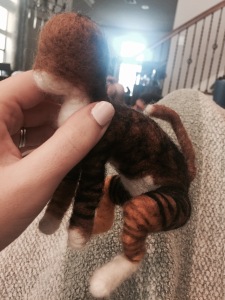
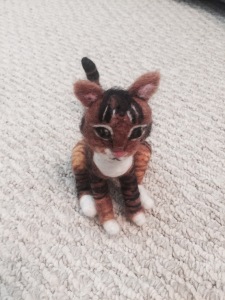
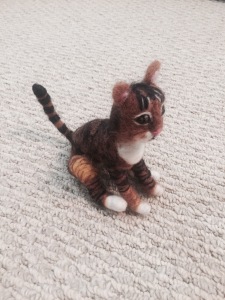
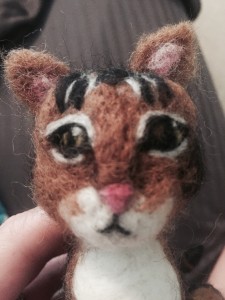
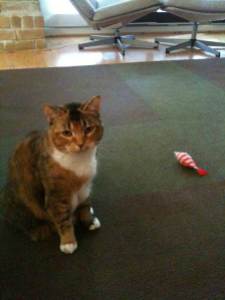
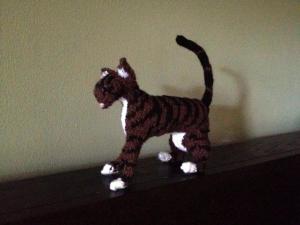
I couple of months ago I decided to needle felt our cat.  Well not actually stick needles in our cat.  I wanted to make a needle felted replica of our cat.  I had made a couple of simple needle felted projects, but I really wanted to try to make an animal.  I had seen gorgeous projects on Etsy and was dying to try my hand at it.  I started with a pipe cleaner frame and just reform added wool fiber until I had the shape and colors I desired.  I loved how this turned out!  The pictures really tell the story.

IMG_3604

IMG_3565

IMG_3566

IMG_3568

IMG_3573

IMG_3574

IMG_3582

IMG_3583

IMG_3585

IMG_3589

IMG_3590

IMG_3602

Difficulty:  Difficult

Time Required:  6 Movies

Overall Experience:  Excellent

Felted Soap

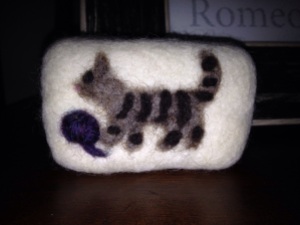
The same friend that taught me to make homemade soap in May taught me to make felted soap a couple of weeks ago.  (This post is way behind!)  Making felted soap is actually super easy and makes a great fun, creative gift.  I didn’t take picture during the process, but there are already some great tutorials on how to do it.  Frugal Kiwi breaks the process up into two parts:  how to wet felt the soap and how to needle felt a design on top.  I used a piece of my friend’s amazing homemade soap, wet felted in a natural off white fiber, then needle felted a cat and ball of yarn on top.  The only real variation from what Fugal Kiwi describes is that we used bubble wrap to create friction rather than a sushi bamboo mat.  I had a great experience.  If you are looking for a new, easy craft, I would definitely recommend making felted soap!

20140712-183105-66665320.jpg

Difficulty:  Wet Felting-Easy, Needle Felting-Moderate

Time Required:  30 minutes

Overall Experience:  Excellent

Mad Hatter Crochet Challenge – Cheshire Cat

One of the blogs I follow, The Crochet Crowd, held a Mad Hatter crochet challenge.  The goal of the challenge was to crochet a Mad Hatter hat following a pattern by Red Heart.  The crocheter could use any colors and decorate the hat using an Alice in Wonderland theme however he or she wished.  I made two hats.

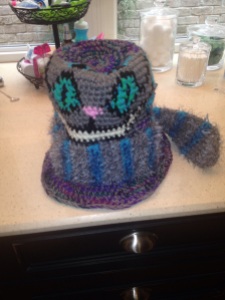
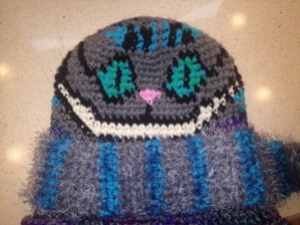
I had fun being a little more artistic than usual with these hats.  The first hat was Cheshire Cat themed.  I loved the colors from the Tim Burton movie, so I based the cat off of that Cheshire Cat.  Typically with crochet the main body of a piece is made in a solid color or stripes.  Other pieces are made seperately and sewn on.  For this hat, I imagined the cat appearing out of the side of the hat so I crocheted the color changes into the hat using a similar technique to that used for stranded colorwork in knitting.  His eyes, nose and smile are clear, he then fades into the hat with only three stripes showing.  His tail became the ribbon that goes around the hat.  I added Red Heart Foxy yarn to his tail to make it furry.  Since the contest was sponsored by Red Heart, I bought all Red Heart yarn (and used a little stash yarn) for the final product.  I love how he turned out!  I had the hardest time not posting pictures of him until after the mail-in deadline for the contest (which was yesterday.)

20140402-200107.jpg

20140402-201305.jpg

20140402-201618.jpg


Hello Kitty Hat

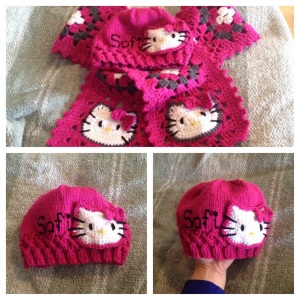
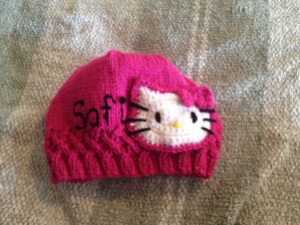
One of my coworkers asked me to make a Hello Kitty hat for his 3-year-old daughter.  He wanted it to be primarily pink rather than white (white and 3-year-olds don’t mesh well).  I knitted a hat and crocheted the Hello Kitty face from the Hello Kitty scarf that I made for my sister last year.  I chose a lattice pattern to put around the bottom of the hat to make the hat more feminine.  Afterwards, my coworker asked me to make the same scarf I made my sister.  I would have incorporated some gray into the hat as well if I was planning to make the scarf from the beginning.  The set did turn out really cute!
20140125-152935.jpg

Disclaimer:  Feel free to make this pattern for your personal use, for your platypus, for charity, or to sell.  The only thing I ask is that you please do not sell it on Etsy.  If you are interested in purchasing a koozie from my Etsy store, you may do so here.

Materials:

  • Vanna’s Choice Yarn in Berrylicious (P)
  • Vanna’s Choice Yarn in White (W)
  • Vanna’s Choice Yarn in Black (B)
  • Vanna’s Choice Yarn in Radiant Yellow (Y)
  • 5 Size US 7 Double Pointed Needles
  • Size H Crochet Hook

Stitches Used:

Instructions:

Band:

Cast on 84 stitches with P, knit in round being careful not to twist

R1-R4:  (k2, p2) 21 times (84 stitches)

R5:  (tr, p2) 21 times (84 stitches)

R6:  (k2, p2) 20 times, k2, p1 (83 stitches), leave last stitch unworked, this stitch becomes the first stitch of the next row

R7:  (pr, pl) 21 times (84 stitches)

R8:  (k1, p2, k1) 20 times, k1, p2 (83 stitches), leave last stitch unworked, this stitch becomes the first stitch of the next row

R9:  (tl, p2) 21 times (84 stitches)

R10:  (k2, p2) 20 times, k2, p1 (83) stitches), leave last stitch unworked, this stitch becomes the first stitch of the next row

R11:  (tr, tl) 21 times (84 stitches)

R12:  k83, leave last stitch unworked, this stitch becomes the first stitch of the next row (83 stitches)

R13:  (tl, k2) 21 times (84 stitches)

Knit each following row until the hat is 5.5 inches long.

Crown:

R1:  (K4, K2tog, SSK, K4) 7 times (70 stitches)

R2:  K70

R3:  (K3, K2tog, SSK, K3) 7 times (56 stitches)

R4:  K56

R5:  (K2, K2tog, SSK, K2) 7 times (42 stitches)

R6:  K42

R7:  (K, K2tog, SSK, K) 7 times (28 stitches)

R8:  K28

R9:  (K2tog, SSK) 7 times (14 stitches)

Cut the yarn with several spare inches.  Thread a tapestry needle and pull yarn through all 14 stitches on needles.  Work in ends.

Hello Kitty Face (from Made by K):

Switch to crocheting with W and crochet hook.

R1:  Ch5, sc in second ch from hook, sc in next 3 stitches (4 stitches)

R2: ch1, turn, 2 sc in next stitch, sc in next 2 sts, 2 sc in next stitch, 2 sc in bottom of same sc, 3 sc in bottoms of next 3 sc, sl st to 1st sc of current round (12 stitches)

R3: ch1, turn, sc, 2 sc in next stitch, sc x 2, 2 sc in next stitch x 3, sc x 4, 2 sc in next stitch, sl st to 1st sc of current round (18 stitches)

R4: ch1, turn, sc, 2 sc in next stitch, sc x 6, 2 sc in next stitch x 3, sc x 6, 2 sc in next stitch, sl st to 1st sc of current round (24 stitches)

R5: ch1, turn, sc x 2, 2 sc in next stitch, sc x 6, 2 sc in next stitch, sc, 2 sc in next stitch, sc, 2 sc in next stitch, sc x 8, 2 sc in next stitch, sc, sl st to 1st sc of current round (30 stitches)

R6: ch1, turn, sc x 3, 2 sc in next stitch, sc x 8, 2 sc in next stitch, sc, 2 sc in next stitch, sc x 2, 2 sc in next stitch, sc x 10, 2 sc in next stitch, sc, sl st to 1st sc of current round (36 stitches)

R7: ch1, turn, sc x 3, 2 sc in next stitch, sc x 10, 2 sc in next stitch, sc x 2, 2 sc in next stitch, sc x 2, sl st, hdc, ch1, dc in same stitch as hdc, ch 1, trc, ch 1, dc, ch1, hdc in same stitch as dc, sl st, sc x 4, sl st, hdc, ch1, dc in same stitch as hdc, ch 1, trc, ch 1, dc, ch1, hdc in same stitch as dc, sl st, sc x 2, sl st to 1st sc of current round and break off and work in ends (52 stitches)

Embroider eyes and nose on face using B and Y.

Hair Bow:

R1:  With P, ch5, sc in second ch from hook, sc in next 3 stitches (4 stitches)

R2:  Ch1, turn, sc 4 (4 stitches)

R3:  Ch1, turn, sc2tog twice (2 stitches)

R4:  Ch1, turn, sc 2 (2 stitches)

R5:  Ch1, turn, sc 2 in next stitch x 2 (4 stitches)

R6:  Ch1, turn, sc 4 (4 stitches)

R7:  Ch1, turn, sc 4  break off and work in ends (4 stitches)

Pinching center of bow together, sew the bow onto the face while wrapping the yarn around the center of the bow

Connecting the Face to the Hat:

Modified sc (msc):  When you insert your hook under top 2 loops of the stitch below, also insert it under the hat loop directly underneath the stitch on the face, yarn over, bring loop through hat loop and face stitch, yarn over and bring loop through both stitches on hook.

Hold the face in place on the hat.  With P, sl st to any stitch on R7 of the face, ch1, msc in same stitch.  Msc in each stitch on face except trc, place 3 msc in each trc, after completing all msc, sl st in first msc.

Embroider whiskers on face.
20140125-152957.jpg

Difficulty:  Moderate

Time Required:  5 Movies

Overall Experience:  Excellent

Finished Nachtfalter and Misadventures

Behind, behind, behind…

Due to work vamping up right before my dissertation defense, I got way behind on my summer knit-a-long project. The website said I had until Monday, July 22 to post my finished picture. I took that to mean that I could post a picture on July 22, but I wasn’t sure. I knitted all day on Sunday, July 21, but at 11 pm I was worn out. I had all but three rows of knitting finished, but I still needed to bind off, sew up the sides, and tuck in all of my ends. On July 22 I was disappointed to find out that I had to submit my picture before July 22 to be eligible for prizes. I was still planning to finish my sweater on July 22; however…

The cat peed on my wedding dress

I picked up my dress about two weeks ago. My fiance has two extra closets with basically no clothing in them. I chose the taller closet, hung my plastic enclosed dress in it, and shut the stiff-hinged accordion-style doors. My fiance has a cat. Somehow she managed to get the door open and pee on the dress. I don’t have a clue how she got the door open. It’s difficult for me to open. Most of the pee was caught by the plastic bag, but some of it seeped through. There were only a couple of spots of yellow, but the dress reeked of cat pee. I spent all of Monday evening trying to get the smell and yellow out. I did both successfully. Yay! Needless to say, the cat is in trouble.

Kittyface and Kittyface

Finishing the sweater

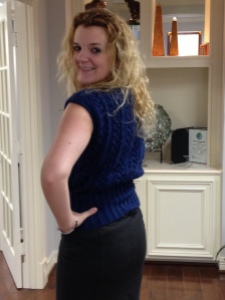
I didn’t finish the sweater until Tuesday night. I wore it to work today (Wednesday). It turned out really cute! My colleagues couldn’t believe that I actually made it.

Nachtfalter Front

Nachtfalter Back

Pattern Tips

The pattern can be purchased at Holla Knits (the store/blog that hosted the knit-a-long).

Usually I post tips and hints for things that I make, but I basically made this pattern as written. I lot of other people were making this sweater at the same time, so they posted tips about what they were doing. You may find these resources helpful.

  • Stefanie (the pattern author) gave some helpful tips for the butterfly lace on her blog
  • I used a crocheted seam on the sides of the sweater, already described here
  • There is a Ravelry discussion that talks all about the project here
  • A lot of people ran out of yarn because the quantities in the pattern were a little off. I think that the pattern has been remedied, but I’m not sure.

Difficulty: Moderate to Difficult

The lace was difficult if you have never knitted lace before.

Time Required: ~50 movies

Overall Experience: Good

This was really fun to knit, and I love how it turned out!

Hello Kitty Scarf

My 15-year-old sister is OBSESSED with Hello Kitty.  When I stumbled upon a crocheted Hello Kitty scarf on Pinterest, I knew that was going to be part of her Christmas present.  The pattern was written by Made by K.  The pattern is quick, easy, and looks just like Hello Kitty.  The only drawback is that it is very long.  Karin of Made by K included multiple sets of alternate instructions for different parts of the scarf.  I found this fun because I had choices, but others might find this confusing.

The scarf turned out adorable.  Below you can find my alterations from the written pattern (although the written pattern is really made for alterations):

  1. Karin made her scarf for a child and included seven regular granny squares (four white center and three grey center).  Since my scarf was for a very tall (5’10ish) teenager, I made 11 regular granny squares (6 white center and 5 grey center).
  2. There are several methods for joining the granny squares.  I used the join as you go method described in the pattern.
  3. Karin gives easy border and harder border instructions.  The connected squares tend to dip in where they are joined (see picture below from Karin’s blog).  After completing the first row of the harder border, which is supposed to give a smooth border, my project was still dipping in at these locations.  (I wasn’t planning a blog at this point or I would show pictures.)  I accounted for this in Row 2 of the border.  Row 2 asks the crocheter to single crochet all the way around the scarf.  I followed this except I half double crocheted in the double crochet stitches from Row 1 (see picture below).
  4. I added the flower detail to both Hello Kitty squares instead of just one.

IMG_2029

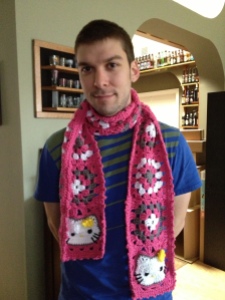
Here is my (almost) fiance (at that time) modeling the scarf.  It really brings out his…something.

Craig Hello Kitty

My sister loved the scarf.  She modeled it with all of her other Hello Kitty Christmas items.

Difficulty:  Easy

The pattern may be a little hard to follow since it is quite long.

Time Required:  2 Movies

Overall Experience:  Excellent

Knit Your Own Cat

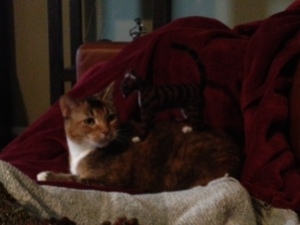
My fiance loves his cat.  I’m not so sure that he doesn’t love her more than he loves me.  A couple of months before his birthday I stumbled upon a book on Amazon, Knit Your Own Cat.  The cat featured on the front cover even resembled his cat, Kittyface.  I purchased the book.  Being an avid knitter, knitting a small cat looked like it would be a quick, easy project that would amuse my fiance.


Kittyface

When the book came, I was disappointed in the pictures of finished cats that I saw inside.  The instructions called for the knitter to knit each piece flat and then sew all of the pieces together.  Not only does this increase the amount of construction time, but it also resulted in unsightly seems along the backs of the legs and down the center of the cat’s back.  I made many alterations as detailed below.  The finished project turned out really cute!

Knit Kitty

Difficulty:  Moderate

The knitting itself was simple.  A stockinette stitch was used for most of the project.  However, the cat was knit extremely tightly on tiny needles, which made the knitting more difficult.  There are many color changes that require a lot of attention.  The construction of the cat is rather time consuming and difficult.

Time Required:  11 Movies

I thought this was going to be a really quick project.  Boy was I wrong!  The construction alone took me three movies to complete.  (I monitor time in the number of movies I watch while crafting.)

Overall Experience:  Good

The product turned out very cute.  I would only make it as a gift for someone I know would really enjoy it.  Someone offered me $20 for the cat.  I wasn’t willing to part with it for that price!

Pattern Tips and Alterations:

The pattern is copyrighted, so if you are interested in creating the cat above, please purchase the pattern and follow the alterations detailed below.  This is for the pattern “Tabby Cat Prowling.”  I do not include pictures of the steps because I decided to start this blog after finishing the cat.

Legs:  Knit the legs in a round rather than flat using double pointed US 2 needles.  To accomplish this, follow the directions as written for each odd row.  For the even numbered rows, knit rather than purling and follow the row backwards.  This removes all seams from the backs of the legs.

Side of Body Pieces:  I made the side of body pieces as they were written in the pattern.  Later during the finishing phase I used a revised Kitchener stitch detailed by Anonyknits.  This resulted in losing some of my body stitches and a slimmer cat.  If I were going to make the cat again, instead of binding off stitches along the top of the body, I would leave the stitches on an extra needle and use the actual Kitchener stitch.

Tummy:  I knitted the entire tummy white to match the coloration of my fiance’s cat.

Finishing:  Since the legs were knitted in rounds, they do not need to be sewn.  The directions tell you to embroider the face after sewing the cat together, but obviously that need to be completed before construction of the cat.  The cat should be sewn along the back as mentioned in the “Side of Body Pieces” section.