Mandala Madness Nursery Rug

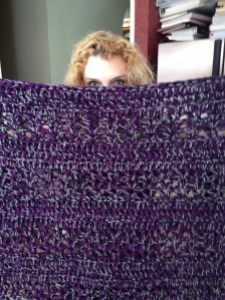
While I was pregnant with Zoe I found a pattern on Pinterest called Mandala Madness.  It looked like so much fun!  The pattern created a giant, whimsical circle of crazy crochet techniques and looked like a blast.  But what does one do with a giant whimsical circle?  I decided to make it and use it as a rug in the nursery.

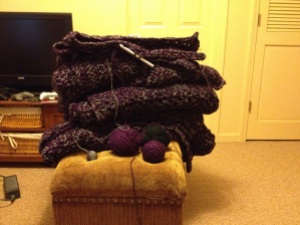
This project was FUN.  It is probably the most fun I have every had crocheting a project.  Every row was a different color or texture.  I finished all but the last two rows on it before having Zoe.  Since her brother moved to a big boy bed last night and she now has a crib in her room, I decided I had better finish the rug so we can finish the nursery.  (I’m not finished with her crib blanket, either.)  So, eight months later, the rug is finished!  I actually didn’t finish the 18 part pattern, I stopped when I got to the rug dimensions that I wanted.  I can always add more rows onto it later if I decide to reuse it as a larger circular blanket.  Right now it is about 4.5 feet in diameter, which is a great rug but a small blanket.


Horizontal Cable Knit Hat

Life got busy around the holidays, and I got behind on posting! One of my recent projects has been a new hat for Zoe. Baby heads grow so fast and none of her hats fit! The little jacket she wears all the time doesn’t have a hood, so she needed something to keep her little downy noggin’ warm. I was in love with some horizontal cabled hats I saw on Pinterest. I often make up my own patterns, but was interested in the construction techniques of this hat, so I bought a pattern I liked at Posh Patterns on Etsy. The pattern was quick, easy, and I love the way it turned out. We’ve already had many comments on it as we are out about town. The pattern can also easily be adjusted to use a different type of cable and now I have new ideas for how to construct a hat!


Cowboys Mason Jar Koozie

I haven’t written a blog post in forever. A lot of that is that it takes a lot of effort to figure out a pattern I improvised from pictures after I already gave away the actual product. I’ve been lazy. I decided to play catch up just sharing what I’ve been making. If someone wants the pattern, I am more than willing to share!

First up: a Dallas Cowboys mason jar koozie. I actually did not love how this turned out. I was knitting at a friends’ child’s birthday party and their neighbor asked if I could make them a mason jar koozie with the Cowboys logo. I said sure. I figured out a pattern for the letters, but it was really wide. Knitting with number 2 needles and worsted weight yarn (which is ridiculously tight if you know knitting) the letters went more than halfway around the jar. The only way I was going to get the letters on the front was to use super fine yarn. That would have been a crazy number of stitches, and I would have to buy new yarn instead of using stash yarn. Considering I had already spent a lot of time ripping out my work to even get the letters mostly on the front half of the jar, I really didn’t want to go through any more effort. Next I tried several different crochet star patterns, none of which were pointy enough.  Lastly, the letters ended up too low. I’m a perfectionist. Here is how it turn out. Not my best work.   


Difficulty: Easy

Time Required: 6 Movies (Due to a lot of ripping out)

Overall Experience: Meh

Deep V Hoodie

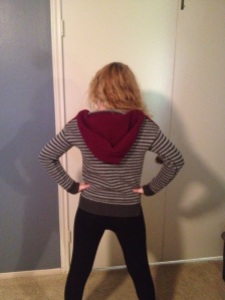
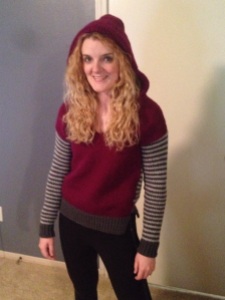
I asked for Vogue Knitting for Christmas and loved a pattern that showed up in the very first issue I received.  I like to make complicated things, but I tend to wear simple garments in mostly solid colors.  I like it when they are a little different from what you see everyday.  While not something I would love making, this hoodie was definitely something I would love wearing.  It knit up pretty quickly on No 8 needles.  I love the end product.  This is probably going to be my new favorite garment this fall.

IMG_2667

IMG_2670

IMG_2676

Difficulty:  Easy

Time Required:  Many Movies

Overall Experience:  Good

Chevron Pillow

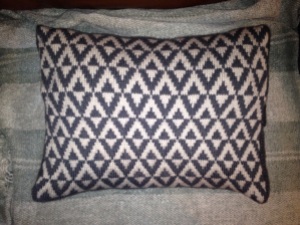
My friend Cassie bought me a knitting pattern book, Knitting 24/7, for my birthday last year.  It is full of fun, modern patterns.  She pointed out that there was a really cool pillow.  I took note and decided she was getting the pillow for her birthday.  While the pillow looks nice, I really hated making it.  I started it at the beginning of October on the car ride back from our wedding and just finished it two weeks ago!

20140530-075842-28722696.jpg

Why I didn’t like the pillow:

  • Construction Type:  I very much like my projects to be seamless if at all possible.  This pillow was the opposite of that.  The front of the pillow was made by knitting in a round with a steek.  A steek is basically an extra stripe in the fabric that you will cut through.  Yes.  You have to cut into your knitted fabric.  Then you have to sew up the edges so it doesn’t unravel.  Scariest thing ever.  You also have to knit a bunch of extra stitches, and I’m lazy.  After the front is made, the knitter must pick up stitches at the top and bottom of the pillow and knit the two back halves.  After all of that, the sides have to be seamed.  It would have been much easier to start at the center of the back, knit to the top, knit the front from the top to bottom, and knit the back from the bottom to the middle.
  • My Own Error:  I started out making the pillow on some very old circular needles my grandma gave me.  They were stiff and I was having a hard time working the project in the round and pulling the front design a little too tight.  I was really frustrated with the needles and was really wishing for new needles.  For Christmas, my husband bought me a new set of circular needles.  He wanted me to try them and I was super frustrated with the ones I was using.  I knew that the tension in the project may change a little if I switched, but I was ready to quit on the project.  I switched needles.  They were wonderful.  It was so easy to keep working the project.  After about an inch of more fabric, I noted that my tension had gotten looser.  I was concerned, but decided the pillow should stretch it out.  As I kept going, I noticed a major difference in the old knitting and new.  I didn’t know if a pillow was going to be able to overcome the problem.  I sat the project down for a couple of months.  I didn’t want to make the back (the pillow was very large) if I couldn’t fix the front.  My husband talked me into finishing it.  Despite the fact that the pillow was knitting too tight horizontally, it turned out wide.  The height was perfect.  Several people complained about this problem on Ravelry, so I wasn’t the only one.  I ended up sewing and stuffing my own pillow to fit it perfectly.  The change in tension isn’t obvious in the overstuffed pillow.

Difficulty:  Easy/Moderate

Time Required:  Many Movies

Overall Experience:  Poor

Multiplicity

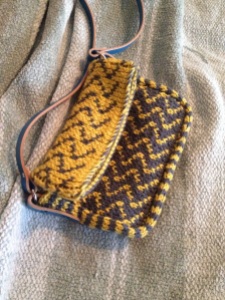
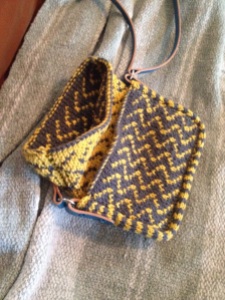
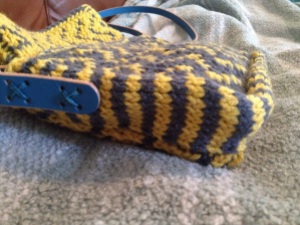
I finished my Multiplicity purse this afternoon, and I love it!  The purse is knit using double knit, which I had been wanting to learn for some time.  The technique is interesting because one creates a double sided fabric by knitting one stitch from one side then one stitch from the other.  The stitches from both sides are alternating on one set of needles.  In the case of this purse, the fabric was grey with yellow details on one side and yellow with grey details on the other.  The purse features a large main pocket that folds over a smaller pocket.  I purchased the leather strap from Homestead Heirlooms.

20140417-122223.jpg

20140417-122304.jpg

20140417-122340.jpg

Difficulty:  Moderate

Time Required:  12 Movies

Overall Experience:  Excellent

Tennarisukka Ankle Sock

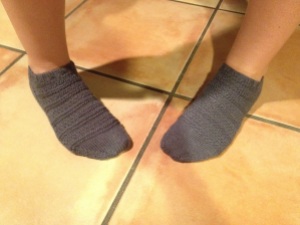
I’ve been participating in Socks with Sarah, verrrrry slowly.  Most days I only knitted one row.  I finally finished my first sock.  I’ve been making Tennarisukka ankle socks.  The pattern for the socks is free, and they have really fun texture.  They fit really nicely and are much cuter than the white sports socks I wear all the time.  These are definitely my new favorite socks.

20140222-192809.jpg

20140222-192726.jpg

20140222-192701.jpg

Difficulty:  Easy-Moderate

Time Required:  10 Movies

Overall Experience:  Excellent


Wedding Afghans

An acquaintance who had been in countless wedding once showed me a crocheted blanket that a bride had made her.  She gushed about how that gift was the most meaningful bridesmaid gift she had ever received.  Since I crochet, I tucked that little tidbit of information away for later.  When I got engaged, I pushed my fiance to help me pick out colors so I could start on the pile of blankets I was planning on making.

20131103-074736.jpg

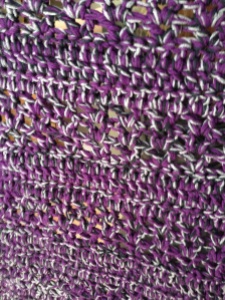
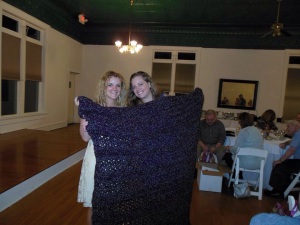
I decided to make blankets for our three bridesmaids and both sets of parents.  I had to make five blankets, so I needed to find an afghan pattern that I could make fairly quickly.  I have made many afghans that took me months to make.  I didn’t have that much time.  I had an afghan pattern pinned named “Super Quick Throw.”  The blanket was crocheted with four strands of yarn held together as one with a giant hook.  That’s about as quick as one can hope for.  The blankets crocheted beautifully.

20131103-074805.jpg

I do have a few tips:

  • The pattern is available free on the Red Heart website.
  • I bought yarn in bulk in our wedding colors.  I chose acrylic yarn because it holds up well and for the price.  It crocheted into a stiff, scratchy blanket.  However, after washing and drying each blanket once, they were completely transformed.  They became pliable and soft.
  • The pattern calls for a hook size P-16 (11.5 mm).  I couldn’t find a hook this size and ended up with a 10 mm hook.  I adjusted by crocheting to the correct size rather than the correct number of stitches.  The pattern is easy, so it wasn’t hard to do.  The rows that require a certain number of stitches have a three stitch repeat.  There is a two stitch “border” on each side.  This means that your starting row should have a total stitch number that is a multiple of 3 plus 4 stitches.  (As written, the pattern calls for 58 stitches.  This is a multiple of 3 (54/3=18) plus 4.)  I don’t remember how many stitches I used.  I think it was 70.  Whatever gets you to a 48 inch wide blanket.
  • I used the no foundation row starting technique instead of the chain start technique in the pattern.  Here is a good tutorial.  This technique keeps your tension from being off in the first row and is easier to measure your 48 inches.
  • With the same “size verses stitches” philosophy, you should repeat Rows 2-7 until the blanket is the length you want.  The pattern calls for 58 inches.  I wanted my blanket to be at least 60 inches so I repeated until I finished on a Row 7 with a length greater than 60 inches.
  • The edges of the blanket turned out a little jagged.  I finished the blanket off with a border.  I slip stitched in each stitch on the short edges and single crocheted along the long edges.  This cleaned the blankets up nicely.

Difficulty:  Easy

Time Required:  About 13 movies per blanket

Overall Experience:  Excellent

20131103-074719.jpg20131103-075255.jpg20131103-074736.jpg