Easy Slow Cooker Ground Beef Stew (Gluten Free)

One of my favorite things to eat as a child was my mom’s “Crockpot Soup.”  It was one of those great slow cooker recipes where you just dump in some Campbell’s soup, meat, veggies, and let it stew all day.  Unfortunately, Campbell’s tomato soup contains wheat, and I now have to eat gluten-free.  I made some adjustments to the original recipe, and I have to say, I actually like the outcome more than the original!  This is an easy, hearty, delicious meal.  Perfect for these mid-winter evenings.  I like to serve it with gluten-free corn muffins.

Servings:  6

Ingredients:

  • 1 lb ground beef
  • 1 cup diced onions
  • 2 carrots diced
  • 2 sweet potatoes cubed
  • 1 cup frozen peas
  • 3 cups organic marinara sauce
  • 1 cup chicken broth
  • Optional toppings:  cheese, sour cream, or Greek yogurt


Directions:

  1. Break ground beef up into bite sized chunks and place in slow cooker
  2. Add all remaining ingredients besides optional toppings
  3. Cook on low for eight hours or high for four hours
  4. Add toppings and serve with corn muffins

Nutritional Information:  Calories 363, Fat 15 g, Cholesterol 49 mg, Sodium 756 mg, Potassium 365 mg, Carbs 34 g, Protein 23 g, Vitamin A 293%, Vitamin C 63%, Calcium 11%, Iron 23%

Is Thrive Market Worth the Membership Cost?

Want to give Thrive Market a shot?  Use this code to get 25% off your first order up to a savings of $20.

Thrive Market is a wholesale organic grocery/natural product store that caters to specialized diets.  They popped up on several of my deals sites this week because they are offering 25% off the first order one makes with them up to a savings of $20.  (If you know someone who already uses the services, they can offer you a code that does the same thing.)  However, like other wholesale stores, they have a membership fee to join (after a 30 day free trial, so you could always get the $20 off and cancel before the service starts) of $59.95.  They claim to save the consumer 25-50% off wholesale prices, but would I really save enough to overcome the membership fee?

For health reasons, I have recently had to go gluten, dairy, and almond free.  Grocery shopping just got complicated and expensive.  I’ve been trying to save money on a lot of the specialized ingredients required to cook well without those ingredients and was interested in checking out what the company had to offer.

Thrive Market really does cater to specialized diets.  A costumer can choose from Certified Gluten-Free, Vegan, Keto, or Whole 30 (just to name a few) and then choose products that fit within his or her needs.  From someone with food sensitivities, this is AWESOME.  In an actual brick and mortar store, the gluten-free options are spread all throughout the store and one has to read every label.  It’s exhausting.  This makes that process infinitely simpler.

Having the groceries shipped to your home is also an added convenience.  Shipping is free after you spend $49, which isn’t difficult to do when buying groceries.  I know I would only use this for large stock-the-pantry type orders.

So let’s get to the cost comparison.  Thrive Market claims to save 25-50% off retail prices (and they do), but my local grocery store and Amazon also claim to give me savings.  All cost data was extracted from the Thrive Market, HEB, and Amazon websites on January 4, 2019.

The first cost comparison I did was where I saw the best cost savings.  Thrive Market has their own brand of organic staples.  I compared their prices again my local grocery store, HEB.  I compared the Thrive Market brand price against the HEB brand price listed on their website (or the cheapest other brand when an HEB brand wasn’t available).  I searched for several of the ingredients that are common ingredients for gluten/diary/almond free cooking and found them to be generally significantly cheaper through Thrive Market.

Item  Thrive Market  HEB
Organic Regular Coconut Milk (13.5 oz can)  $1.99  $2.29
Organic Coconut Flour (16 oz)  $3.49  $3.49
Organic Coconut Aminos (10 oz)  $5.69  $7.86
Organic Arrowroot Powder (16 oz)  $4.29  $5.37
Organic Raw Cashews (16 oz)  $10.99  $13.96
Organic Ghee (13.5 oz)  $9.99  $16.86

The second cost comparison I did was on the brand name organic products Thrive Market carries.  I chose some products I’ve used and liked in the past at random.  I compared these to the listed retail price, the HEB price, the Amazon Prime price, and the Amazon Subscribe and Save price assuming that the customer uses Subscribe and Save to it’s full potential and gets the 15% off discount.  In general the Thrive Market and HEB products were identical while the Amazon products were a larger quantity.  (For example, you had to buy six tubs of Justin’s Chocolate Hazelnut Butter.  I divided the Amazon cost by six to get the per item rate.  Also, while buying six on Amazon using Subscribe and Save is the cheapest option, most families probably don’t need six jars of this at a time.)

The results for the best deal were really mixed.  None of the baby products checked were cheaper than what is available at the local store.  It appears that for the very best deal on the name brand products, one should shop around.  However, none of the Thrive Market costs were significantly more than the best deal and there is a convenience factor in knowing that and buying everything in one place.

Item  Retail Price  Thrive Market  HEB  Amazon Prime  Amazon Subscribe and Save
Kind Vanilla Blueberry Granola Bars (5 ct) $4.29  $2.79 -35%  $2.98 -31%  $3.41 -21%  $2.90 -32%
PB2 Powdered Peanut Butter (6.5 oz)  $6.15  $4.29 -30%  $3.84 -38%  $ 5.24 -15%  –
Justin’s Chocolate Hazelnut Butter (16 oz)  $14.99  $9.99 -33%  $10.49 -30%  $9.99 -33%  $8.49 -43%
Bob’s Red Mill Gluten-Free All Purpose Baking Flour (22 oz)  $4.79  $3.79 -21%  $3.99 -17%  $4.20 -12%  –
Plum Organics Blueberry, Pear & Purple Carrot Baby Food Stage 2 (6 ct)  $12.90  $7.95 -38%  $7.08 -45%  $15.34 19%  –
Happy Baby Organic Purple Carrot & Blueberry Happy Puffs (2.1 oz)  $4.35  $2.99 -31%  $2.78 -36%  $3.36 -23%  $ 2.69 -38%
Annie’s Organic Cheddar Bunnies Crackers (11.25 oz)  $5.99  $4.49 -25%  $3.88 -35%  $3.19 -47%  $2.71 -55%

In the end, I decided that this is a good fit for my family.  The convenience of being able to have many foods that meet my dietary restrictions at my finger tips and the significant cost savings on what are now my pantry staples offset the cost of the yearly membership.  I just ordered my first box today.  I will post an update after I try their products.

Want to give Thrive Market a shot?  Use this code to get 25% off your first order up to a savings of $20.

Banana Oat Pumpkin Muffins (Gluten Free)

I am a HUGE fan of pumpkin. Not pumpkin spice, pumpkin. I get really disappointed every time I try something pumpkin spiced flavored expecting it to taste like pumpkin pie but it doesn’t.

Since it is November and officially pumpkin season, I decided to make a pumpkin version of my Fruit and Veggie Oatmeal muffins. These turned out AMAZING. It’s like eating pumpkin pie…in muffin form. I think they’re even better than the original; however, my toddler prefers the carrot/zucchini version.

Ingredients:

  • 1 cup pumpkin purée
  • 1 cup plain Greek yogurt
  • 1 ripe banana
  • 2 eggs
  • 2 cups gluten free old fashioned oats
  • 1/4 cup Truvia brown sugar baking blend
  • 1 1/2 tsp baking powder
  • 1/2 tsp baking soda
  • 2 tsp cinnamon
  • 1/2 tsp nutmeg
  • 1/2 cup raisins


Directions:

  • Preheat oven to 400 deg
  • Prepare muffin pan by spraying with cooking spray or using muffin liners (I love silicone liners!)
  • Add all ingredients except raisins to a blender and blend until smooth
  • Mix raisins into batter by hand
  • Place batter in prepared muffin tins.  The volume will be slightly different each time because of varying fruit and vegetable sizes.  This will make approximately 12 muffins.
  • Bake for 18 to 20 minutes or until toothpick comes out clean
  • Eat fresh or freeze for later

Mushroom and Onion Steak Bites (Gluten Free)

This steak bite recipe is quick and easy while providing excellent flavor.  It began as a recipe share from a friend on Facebook, but has morphed into a lower fat, gluten free, veggies added version of the original, so it warrants a new post.

Ingredients:

  • 1/2 cup gluten free soy sauce or coconut aminos
  • 1/4 cup Worcestershire sauce
  • 2 tbsp olive oil
  • 1 tsp minced garlic
  • 1 tbsp dried basil
  • 1 tsp black pepper
  • 1.5 lb flat iron or top sirloin steak, trimmed and cut in 1-inch pieces
  • 1 cup diced onion
  • 8 oz sliced mushrooms of choice


Directions:

  • Mix soy sauce (or coconut aminos), Worcestershire sauce, 1 tbsp olive oil, garlic, basil, and pepper together
  • Place steak in bowl and pour marinade on top.  Allow to marinate at least an hour or overnight in refrigerator
  • Remove steak from marinade.  Heat marinade in sauce pan over high heat until it comes to a rapid boil.  Set aside.
  •  Place a large diameter shallow pan on the stovetop and heat over medium-high.  (I have an enameled cast iron casserole dish I like to use for this.)  When you add the meat, it will cook quickly, so having a larger surface area that heats evenly is ideal.
  • Add 1 tbsp of olive oil, onion, and mushroom to the pan and cook until the onions are translucent and the mushrooms have begun to brown.
  • Add marinade and steak to pan.  Stir and cook until all steak pieces are browned on all sides.  If your pan is large enough that the steak is in a thin layer, that should only take about 3 minutes.
  • I like to serve with salad, green beans, and/or mashed potatoes.

The Waffle Challenge – Original vs. Gluten Free Bisquick

On Saturdays I usually make something fun for breakfast.  It’s tradition. If I’m feeling lazy, the fun breakfast is either Bisquick pancakes or waffles. One of the first gluten free things I bought was Gluten Free Bisquick because Bisquick has always been a pantry staple in our home. I really wanted to try it and compare it to the original, so this morning I did.

Cost

Before we get to the actual product comparison, these two boxes of Bisquick are a perfect example of how eating gluten free is more expensive. The original box contains twice as much product for about $1 less per box!  However, if you can’t eat gluten without becoming very ill, there’s really no way around that if you are craving baked goods. All of the substitute flours are more expensive.


Bisquick Consistancy

As soon as I scooped my measuring cup the difference was obvious. Original Bisquick is flour-based and sticks to itself. The gluten free version is rice-based, granular, and not sticky at all.

Recipe

I’ve always halved the waffle recipe on the back of the box to feed myself, my husband, and our toddler. As soon as I looked on the back of the box, I realized the recipe was not what I was used to. The recipe made fewer waffles with less Bisquick and more oil than I was used to. I knew from previous experience that the various flour options do not behave the same and are not directly interchangeable; however, for some reason I expected the two types of Bisquick to be interchangeable. I plan to do a research project on how the flours behave, but that’s for another day.

Please note that I substituted almond milk for cow’s milk, but I also do that with the original mix.

Original Bisquick Waffles:  54.6% Bisquick, 36.4% Milk, 5.6% Egg, 3.4% Vegetable Oil

Gluten Free Bisquick Waffles:  44.8% Bisquick, 42.0% Milk, 6.8% Egg, 6.3% Vegetable Oil

Waffle Consistency

The waffles did not come out looking like normal waffles (as shown on the box).  Air bubbles were very obviously visible, and the surface of the waffles were more crispy than typical waffles.

Taste

The waffles tasted great!  The taste was very similar to traditional Bisquick waffles. As mentioned before, they were a little crispier and  lighter than traditional waffles; however, they definitely fulfilled my waffle cravings, and I did not feel deprived. Best of all, they were toddler approved!

Fruit and Veggie Oatmeal Muffins (Gluten Free)

Anyone else have a toddler who would gladly live off only carbs?  Yeah.  Us, too.  I developed this recipe to trick my toddler into eating some more fruit and vegetables while he thinks he’s eating carbs.  The muffins look like muffins and are sweet, like a cross between banana and zucchini bread.

It’s absolutely incredible when you look at the nutritional facts of a “typical” coffee shop blueberry muffin and a healthy muffin such as the one in this recipe.  While a coffee shop muffin may be larger than the healthy muffin (exact size wasn’t given), the overall calories, carbs, sugar, fat, and sodium are dramatically decreased beyond the size effect, and the healthy muffin contains much more fiber and vitamins (see the full nutritional information at the bottom of the post).  This muffin is definitely something I can feed my toddler and feel good about it!  And he loves them.

Nutrient Regular Blueberry Muffin* Fruit and Veggie Oatmeal Muffin
Calories 467 119
Carbohydrates (g) 68 23
Sugar (g) 39 7
Fiber (g) 1 2
Total Fat (g) 19 2
Unsaturated Fat (g) 15 2
Saturated Fat (g) 4 0
Trans Fat (g) 0 0
Protein (g) 6 5
Sodium (mg) 367 68

*Regular Blueberry Muffin nutritional information taken from Harvard T. H. Chan School of Public Health.

Ingredients:

  • ~3/4 cup food processed zucchini
  • ~3/4 cup food processed carrots
  • 1 cup plain Greek yogurt
  • 1 ripe banana
  • 2 eggs
  • 2 cups gluten free old fashioned oats
  • 1/4 cup Truvia brown sugar baking blend
  • 1 1/2 tsp baking powder
  • 1/2 tsp baking soda
  • 2 tsp cinnamon
  • 1/2 cup raisins


Directions:

  • Preheat oven to 400 deg
  • Prepare muffin pan by spraying with cooking spray or using muffin liners (I love silicone liners!)
  • Add zucchini and carrots to the blender and blend until fine.  I’m not very exact when measuring the zucchini and carrots.  I will put a whole small zucchini or half of a large zucchini in the blender and then add baby carrots until I end up with about 1 1/2 cups of zucchini and carrots.  My blender is marks volume on the size so I can easily see how much zucchini and carrots I have.
  • Add all remaining ingredients except raisins and blend until smooth

  • Mix raisins into batter by hand
  • Place batter in prepared muffin tins.  The volume will be slightly different each time because of varying fruit and vegetable sizes.  This will make approximately 15 muffins.
  • Bake for 18 to 20 minutes or until toothpick comes out clean
  • Eat fresh or freeze for later

Nutritional Information: Calories 119, Fat 2 g, Cholesterol 245 mg, Sodium 68 mg, Potassium 128 mg, Carbs 23 g, Dietary Fiber 2 g, Sugars 7 g, Protein 5 g, Vitamin A 19%, Vitamin C 2%, Calcium 1%, Iron 6%

Starting to Blog Again – Babies, Gluten, and Free Time

I know that I’ve already posted a few entries, but I wanted to explain where I’ve been, and why I’m back.

Where I’ve Been

I took a three year hiatus from blogging. Why?  The short answer is babies. I was extremely fatigued when I was pregnant with my first baby and didn’t have time to craft, try new recipes, or blog about either.   Then I had a baby and was adjusting to life. When the baby was nine-months-old I got pregnant again. Now I have a two-year-old and a five-month old.

Why I’m Back

I’ve really missed having a creative outlet. I still make up knitting/crochet patterns (at a much slower rate) to share.  I have also developed an issue with gluten. I was waiting for an official diagnosis before writing this post, but it doesn’t look like that is happening anytime soon.

I have been sick to my stomach daily since I was pregnant with my second baby. I’ve also had extreme fatigue and brain fog along with other symptoms (that’s a post for another time). I was seeing a doctor for some issues I was having with my adrenal glands and she tested me for celiac. The blood test came back positive. She was pretty sure I had it and didn’t trust intestinal biopsies since celiac often causes localized areas of damage in your intestines. If you don’t take a biopsy at the right location, you don’t see the disease. She suggested I stop eating gluten, and if I feel better, that is the answer.

I already had an endoscopy and colonoscopy scheduled, so I decided to just ask that doctor to take the biopsies.  I got a letter two days ago that those biopsies did not show celiac, and I should come back to that doctor in two weeks.

I quit eating gluten the day of my endoscopy and colonoscopy almost two weeks ago. I’ve gotten sick once since then. Once!  I had been getting sick multiple times a day. While I was bummed about not getting the official diagnoses in the mail (not that I want to have celiac…I want to know what is wrong) my husband pointed out that whether I actually have celiac or not, it doesn’t matter that much because it’s obvious that the gluten was making me sick and I should stick to eating gluten free.

Long story short, I also plan to document my gluten-free journey on the blog. I plan to share recipes and products that I like as well as experimenting with gluten free baking.

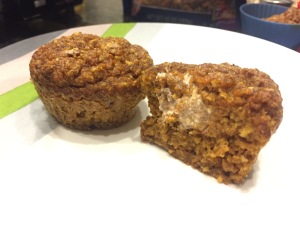
Fix Approved Carrot Cake Muffins with Cream Cheese Filling (Gluten Free)

My husband loves carrot cake, and I wanted to try to make a clean version.  A typical carrot cake is loaded with fat and calories.  It seemed like I ought to be able to make it healthy.  Carrot cake has a ton of carrots in it after all!  In the 21 Day Fix Fixate cookbook, there is recipe for a pumpkin muffin with cream cheese filling.  I realized that I could use the same concept for a carrot cake muffin.  These turned out so good!  (With only 84 calories per muffin!)

IMG_4347

Servings:  5 (2 muffins per serving)

Muffin Ingredients:

  • 1 cup old-fashioned oats (make sure the container says gluten-free)
  • 1 teaspoon baking powder
  • 1 teaspoon baking soda
  • 1 teaspoon cinnamon
  • 1/4 teaspoon nutmeg
  • 1/2 teaspoon salt
  • 1/2 cup unsweetened applesauce
  • 2 eggs
  • 1/4 cup baking stevia or 3 tablespoons stevia
  • 1/4 cup brown sugar baking Truvia
  • 1/2 teaspoon vanilla
  • 2 cups of carrots
  • 20 pecan halves

Muffin Filling:

  • 2 oz fat free cream cheese
  • 1 tablespoon maple syrup
  • 1/4 teaspoon cinnamon
  • 1/2 teaspoon vanilla

21 Day Fix Containers (per single serving):

  • 1/2 yellow
  • 1/2 green
  • 1/2 blue
  • 1/2 teaspoon

Directions:

  1. Preheat oven to 350 degrees
  2. Prepare muffin tins with cooking spray, paper cups, or silicon cups
  3. Put all filling ingredients in a small bowl and whip with fork until blended, set aside
  4. Put all muffin ingredients in a blender and blend until smooth
  5. Fill 10 muffin cups halfway with muffin batter
  6. Spoon one teaspoon of cream cheese mixture in center of each muffin cup
  7. Spoon remainder of batter evenly over each muffin cup
  8. Bake for 20 minutes or until toothpick comes out clean!

Nutritional Information:  Calories 168, Fat 5 g, Cholesterol 84.4 mg, Sodium 406 mg, Potassium 166 mg, Carbs 36.6 g, Protein 6.6 g, Vitamin A 53.2%, Vitamin C 4.6%, Calcium 5.6%, Iron 8.2%

If you have any questions about 21 Day Fix, I would love to answer them.  Feel free to contact me in the comments below.  Check out my story here.

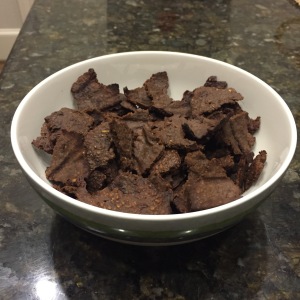
21 Day Fix Approved Salted Caramel Brownie Brittle (Gluten-Free)

I developed quite a liking for brownie brittle before starting the 21 Day Fix and was really craving it today.  I decided to run by the grocery to pick up supplies and try to make my own clean, Fix-approved version.  This is what I came up with, and it was great!  You also can’t beat 70 calories per serving!

IMG_4187

Servings:  6

Ingredients:

  • 3/4 cups old-fashioned oats (make sure the container says gluten-free)
  • 1/4 teaspoon baking powder
  • 1/4 cups baking stevia or 3 tablespoons stevia
  • 2 tablespoons unsweeted cocoa powder
  • 1/4 cups unsweetened applesauce
  • 1 teaspoon vanilla
  • 1/2 teaspoon caramel extract
  • 1 tablespoon almond milk
  • 2 egg whites
  • 1/4 teaspoon paprika
  • 1/4 teaspoon coarse sea salt
  • 1 tablespoon miniature chocolate chips

21 Day Fix Containers (per single serving):

  • 1/2 yellow (oats)
  • All other ingredients less than 1/4 of a container

Directions:

  1. Preheat oven to 325 degrees
  2. Place parchment paper on a baking sheet
  3. Put all ingredients except for salt and chocolate chips in blender (oats, baking powder, stevia, cocoa powder, applesauce, vanilla, caramel extract, almond milk, egg whites, and paprika)
  4. Blend ingredients until fully mixed with no large oat pieces (will be very runny)
  5. Pour batter into middle of prepared baking sheet
  6. Use a spoon or spatula to spread batter as thin as possible
  7. Sprinkle top of batter with salt and chocolate chips
  8. Bake for 20 minutes
  9. Remove from oven and pick up paper by corners transferring baked brittle to countertop to cool
  10. After cooling for 2-5 minutes, the brittle should be cool enough to touch and easy to tear into bite-size pieces; you will notice that at this point the brittle is a soft, chewy consistency (because of the nature of the oat/applesauce base, the brittle will not get super crunchy)
  11. Optional:  While you are tearing your brittle into pieces, increase your oven temperature to 400 degrees
  12. Optional:  Place the parchment paper back onto the baking sheet and spread brittle pieces evenly on top
  13. Optional:  Continue baking for 5-10 minute intervals checking the “crunchiness” of the brittle until it is the consistency you desire; the edges will begin to curl as the brittle hardens

Nutritional Information:  Calories 70, Fat 1g, Cholesterol 0 mg, Sodium 115 mg, Potassium 68.4 mg, Carbs 13.5g, Protein 3.7 g, Vitamin A 5.2%, Vitamin C 0.1%, Calcium 0.2%, Iron 5.2%

If you have any questions about 21 Day Fix, I would love to answer them.  Feel free to contact me in the comments below.  Check out my story here.

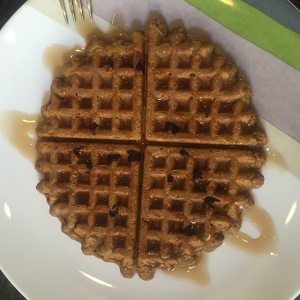
Pumpkin, Gingerbread, Chocolate Waffles (Gluten-Free)

I really wanted 21 Day Fix approved waffles or pancakes this morning but didn’t have all of the ingredients for any of my existing recipes.  I decided to experiment with what I did have, and the outcome was delicious!

IMG_4135

Servings:  2

Ingredients:

  • 1 cup of old-fashioned oats
  • 2 eggs
  • 2 egg whites
  • 1/2 cup pumpkin puree (not pie filling)
  • 1.5 tablespoons unsweet cocoa powder
  • 2 tablespoons 0% fat Greek yogurt
  • 1 teaspoon vanilla
  • 1/2 teaspoon salt
  • 1 teaspoon pumpkin pie spice
  • 1 teaspoon ginger
  • 1 teaspoon nutmeg
  • chocolate chips (a few)
  • Honey or maple syrup for topping

21 Day Fix Containers (per single serving):

  • 1 yellow (oats)
  • 1 red (eggs, egg whites, yogurt)
  • 1/4 green (there’s so little pumpkin you don’t really have to count it unless you really want to…)
  • teaspoons (depends on how much honey/syrup you use)

Directions:

  1. Turn on your waffle iron and allow it to preheat
  2. Add all ingredients except chocolate chips and honey/maple syrup to blender (oats, eggs, pumpkin, cocoa powder, Greek yogurt, vanilla, salt, pumpkin pie spice, ginger, and nutmeg)
  3. Blend ingredients until fully mixed with no large oat pieces
  4. Separate batter into two equal amounts (I like to measure it in two measuring cups)
  5. Pour 1/2 of the batter into your iron; depending on the iron size, it may not fill the entire iron
  6. Put a few chocolate chips on top of batter and close iron
  7. Cook waffle according to your waffle iron instructions
  8. Repeat cooking process with second waffle

Nutritional Information (without topping):  Calories 310, Fat 9.8 g, Cholesterol 211 mg, Sodium 726 mg, Potassium 207 mg, Carbs 38.4 g, Protein 17.8 g, Vitamin A 4.9%, Vitamin C 0.4%, Calcium 8.0%, Iron 20.6%

If you have any questions about 21 Day Fix, I would love to answer them.  Feel free to contact me in the comments below.  Check out my story here.