Sweetheart Hat Pattern

I wrote a guest blog this week over at Her Exchange about self-care through creativity, especially knitting and crocheting.  If you read the article, you’ll read about how after having kids, I really lost the joy in knitting in crocheting due to real or self-imposed deadlines and closed down my Etsy shop.  I have decided to change the focus of my shop and reopen!  Instead of selling finished products, I’m going to try to start selling my patterns.  And if I’m being truthful, I really enjoy the design aspect of coming up with a new pattern more than I enjoy making that pattern over and over for clients.

Without further ado, here is my first pattern:  the Sweetheart Hat.  I designed this hat for my daughter as a Valentine’s seasonal hat, but hearts are really always in season, so she doesn’t have to put it away after the holiday.  The pattern features my favorite heart cable that I’ve been putting on everything since college.  The hat can be worked in sizes baby through adult, but the cable size does not change so the cable will be more prominent on the baby sizes and less prominent on the adult sizes.

Buy the pattern on Etsy here or on Ravelry here.

Materials:

Go to this link to buy a kit with everything you need to make this hat on Amazon.

  • Worsted weight yarn
  • 2 Size US 8 needles for cable
  • 5 Size US 6 double pointed needles for remainder of hat
  • Cable needle
  • Tapestry needle


Stitches Used:

Please comment below with any questions!


Horizontal Cable Knit Hat

Life got busy around the holidays, and I got behind on posting! One of my recent projects has been a new hat for Zoe. Baby heads grow so fast and none of her hats fit! The little jacket she wears all the time doesn’t have a hood, so she needed something to keep her little downy noggin’ warm. I was in love with some horizontal cabled hats I saw on Pinterest. I often make up my own patterns, but was interested in the construction techniques of this hat, so I bought a pattern I liked at Posh Patterns on Etsy. The pattern was quick, easy, and I love the way it turned out. We’ve already had many comments on it as we are out about town. The pattern can also easily be adjusted to use a different type of cable and now I have new ideas for how to construct a hat!


Superman Koozie

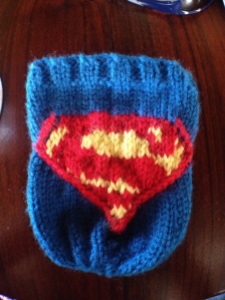
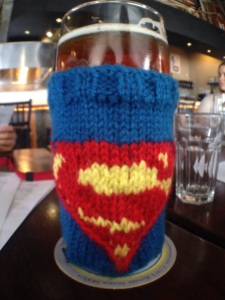
I created a Superman inspired koozie pattern.  The main design is achieved through fair isle stranding.  The crisp, raised border is cabled.  Enjoy!  You can also buy the koozie here.
20140628-090731-32851188.jpg

20140628-090826-32906635.jpg

Disclaimer:  Feel free to make this pattern for your personal use, for your platypus, for charity, or to sell.  The only thing I ask is that you please do not sell it on Etsy.  If you are interested in purchasing a koozie from my Etsy store, you may do so here.

Materials:

  • 5 Size US 4 double pointed needles
  • Vanna’s Choice Yarn in Sapphire (B)
  • Vanna’s Choice Yarn in Scarlett (R)
  • Vanna’s Choice Yarn in Radiant Yellow (Y)
  • Stitch Holder or Extra Needle

Stitches Used:

Gauge:

10 stitches and 15 rows = 2″ Stockinette Stitch

Instructions:

Cast on 48 stitches with B.  Distribute stitches evenly on four of the double pointed needles.

R1:  Knitting in round being careful not to twist the cast on stitches, (kB 2, pB 2) 12 times.

R2-R5:  (kB 2, pB 2) 12 times

R6-R11:  kB 48

R12:  kB 15, kR 18, kB 15

R13:  kB 14, slip next stitch on cable needle and hold in back, kR 1, knit held stitch with R, kR16, slip next stitch on cable needle and hold in front, kR 1, knit held stitch with R, kB 14

R14:  kB 13, slip next stitch on cable needle and hold in back, kR 1, knit held stitch with R, kY 2, kR 12, kY 2, kR 2, slip next stitch on cable needle and hold in front, kR 1, knit held stitch with R, kB 13

R15:  kB 12, slip next stitch on cable needle and hold in back, kR 1, knit held stitch with R, kY 2, kR 5, kY 6, kR 3, kY 1, kR 2, kY 1, slip next stitch on cable needle and hold in front, kR 1, knit held stitch with R, kB 12

R16:  kB 11, slip next stitch on cable needle and hold in back, kR 1, knit held stitch with R, kY 2, kR 4, kY 10, kR 4, kY 2, slip next stitch on cable needle and hold in front, kR 1, knit held stitch with R, kB 11

R17:  kB 10, slip next stitch on cable needle and hold in back, kR 1, knit held stitch with R, kY 2, kR 5, kY 10, kR 4, kY 3, slip next stitch on cable needle and hold in front, kR 1, knit held stitch with R, kB 10

R18:  kB 10, slip next stitch on cable needle and hold in FRONT, kB 1, knit held stitch with R, kR 1, kY 1, kR 7, kY 14, kR 1, slip next stitch on cable needle and hold in BACK, kR 1, knit held stitch with B, kB 10

R19:  kB 11, slip next stitch on cable needle and hold in front, kB 1, knit held stitch with R, kR 17, kY 4, kR 1, slip next stitch on cable needle and hold in back, kR 1, knit held stitch with B, kB 11

R20:  kB 12, slip next stitch on cable needle and hold in front, kB 1, knit held stitch with R, kR 18, kY 1, kR 1, slip next stitch on cable needle and hold in back, kR 1, knit held stitch with B, kB 12

R21:  kB 13, slip next stitch on cable needle and hold in front, kB 1, knit held stitch with R, kR 1, kY 1, kR 16, slip next stitch on cable needle and hold in back, kR 1, knit held stitch with B, kB 13

R22:  kB 14, slip next stitch on cable needle and hold in front, kB 1, knit held stitch with R, kR 1, kY 2, kR 13, slip next stitch on cable needle and hold in back, kR 1, knit held stitch with B, kB 14

R23:  kB 15, slip next stitch on cable needle and hold in front, kB 1, knit held stitch with R, kR 1, kY 7, kR 6, slip next stitch on cable needle and hold in back, kR 1, knit held stitch with B, kB 15

R24:  kB 16, slip next stitch on cable needle and hold in front, kB 1, knit held stitch with R, kR 5, kY 5, kR 2, slip next stitch on cable needle and hold in back, kR 1, knit held stitch with B, kB 16

R25:  kB 17, slip next stitch on cable needle and hold in front, kB 1, knit held stitch with R, kR 10, slip next stitch on cable needle and hold in back, kR 1, knit held stitch with B, kB 17

R26:  kB 18, slip next stitch on cable needle and hold in front, kB 1, knit held stitch with R, kR 8, slip next stitch on cable needle and hold in back, kR 1, knit held stitch with B, kB 18

R27:  kB 19, slip next stitch on cable needle and hold in front, kB 1, knit held stitch with R, kR 1, kY 4, kR 1, slip next stitch on cable needle and hold in back, kR 1, knit held stitch with B, kB 19

R28:  kB 20, slip next stitch on cable needle and hold in front, kB 1, knit held stitch with R, kR 1, kY 2, kR 1, slip next stitch on cable needle and hold in back, kR 1, knit held stitch with B, kB 20

R29:  kB 21, slip next stitch on cable needle and hold in front, kB 1, knit held stitch with R, kR 2, slip next stitch on cable needle and hold in back, kR 1, knit held stitch with B, kB 21

R30:  kB 22, slip next stitch on cable needle and hold in front, kB 1, knit held stitch with R, slip next stitch on cable needle and hold in back, kR 1, knit held stitch with B, kB 22

R32:  kB 22, kfb of next stitch with B, k2tog with R, kB 23

Continue with B only

R33-R36:  k48

R37:  (k2, k2tog) 12 times

R38:  (k2, k2tog) 9 times

R39:  (k1, k2tog) 9 times

R40:  (k2tog) 9 times

Difficulty:  Easy

Time Required:  2 Movies

Overall Experience:  Excellent

Crafternoon Tea Preemie Hats

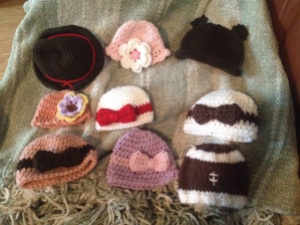
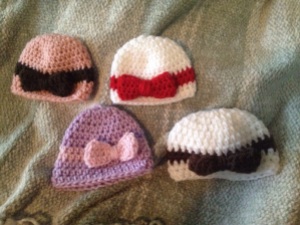
Some ladies in my Sunday School class are interested in learning to knit and crochet.  We decided to add a missions component to the learning experience and make preemie hats to donate to local NICUs.  We had our first meeting yesterday and it was a blast!  We taught some crochet skills and made some hats.  I wanted to show off some of the hats and give the ladies some digital resources concerning what we learned yesterday.

20140406-153518.jpg

Stitches Learned

Yesterday we taught the basics of crochet to the beginners.  We taught some combination of the following stitches.  If you didn’t learn all of them, no big deal!  You can learn them next time.  If you have any questions, feel free to ask Shanda or me anything you would like.  The links below describe the stitches using words and figures.  The Crochet Crowd also provides a great series of YouTube videos for beginners.  After you learn these basic stitches, you can make any of the hats featured above!

Patterns

I had several patterns printed out yesterday and wanted to make them digitally available to everyone.  I found these patterns on Ravelry, which is a great source for everything knitting/crocheting.  If you join Ravelry, friend me!  My profile is here.  Feel free to be creative with the patterns!

Micro Preemie Hats – Crochet

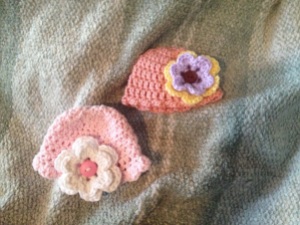
Both of the hats we made have an added on edging.

20140406-153750.jpg

Wrapped with Love – Crochet

20140406-153532.jpg

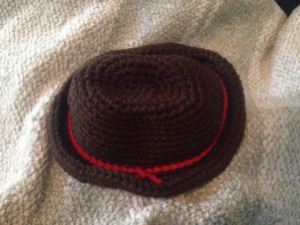
Baby Cowboy Hat – Crochet

This turned out looking a little more like a Fedora than a cowboy hat.  I might edit it a little next time I made it.

20140406-153915.jpg

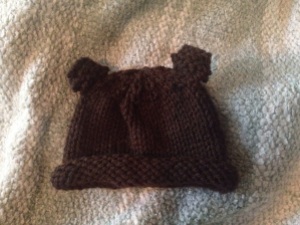
Baby Bear Hat – Knit

I made one edit to this pattern.  The pattern calls to knit until the hat is 6″ long.  That is very long for a preemie hat.  I knit it to 4.5″.  It looks about right.

20140406-154110.jpg

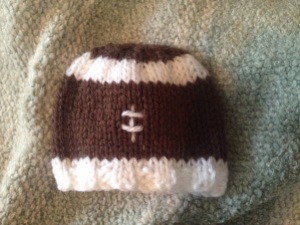
Preemie Football Hat – Knit

20140406-154027.jpg

Enjoy the patterns and feel free to ask me questions!

20140406-153518.jpg

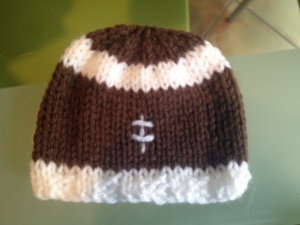
Preemie Football Hat

Some ladies in my Sunday School class are interested in learning to knit and crochet.  We decided to add a missions component to the learning experience and make preemie hats to donate to local NICUs.  We had our first meeting yesterday.  Since I wasn’t sure about the skill level that would be coming, I wanted to have some simple hat patterns on hand for the people with some experience.  During my search I found some cute football-inspired baby hats, but they weren’t scaled down to a preemie size.  I decided to make up my own pattern to include preemies.  These hats are heartbreakingly tiny.

20140406-131950.jpg

Materials:

  • 4 Size 8 double pointed needles
  • Lion Brand Vanna’s Choice Yarn in Toffee (B)
  • Lion Brand Vanna’s Choice Yarn in White (W)
  • Tapestry Needle

Gauge:

8 stitches = 12 rows = 2 inches stockinette stitch

Stitches Used:

For a 1 to 3 lb Preemie

(Hat has an 8 in circumference that stretches to 10 in.  The hat is 4 in from edge to crown.)

Using W, cast on 32 stitches

R1 – R2:  (K2, p2) around (32 stitches)

R3:  K32 (32 stitches)

R4 – R13:  With B, k32 (32 stitches)

R14 – R16:  With W, k32 stitches (32 stitches)

R17:  With B, (k2, k2tog) around (24 stitches)

R18:  K24 (24 stitches)

R19:  (K1, k2 tog) around (16 stitches)

R20:  K16 (16 stitches)

R21:  (k2tog) around (8 stitches)

Cut the yarn with several spare inches.  Thread a tapestry needle and pull yarn through all 8 stitches on needles.  Work in ends.  With W, thread tapestry needle and embroider the laces on the football using the picture for placement.

For a 3 to 5 lb Preemie

(Hat has an 10 in circumference that stretches to 12 in.  The hat is 4.5 in from edge to crown.)

Using W, cast on 40 stitches

R1 – R3:  (K2, p2) around (40 stitches)

R4:  K40 (40 stitches)

R5 – R16:  With B, k40 (40 stitches)

R17 – R20:  With W, k40 stitches (40 stitches)

R21:  With B, (k2, k2tog) around (30 stitches)

R22:  K30 (30 stitches)

R23:  (K1, k2 tog) around (20 stitches)

R24:  K20 (20 stitches)

R25:  (k2tog) around (10 stitches)

Cut the yarn with several spare inches.  Thread a tapestry needle and pull yarn through all 10 stitches on needles.  Work in ends.  With W, thread tapestry needle and embroider the laces on the football using the picture for placement.

Difficulty:  Easy

Time Required:  1 TV episode

Overall Experience:  Excellent

Bombshell Shorts

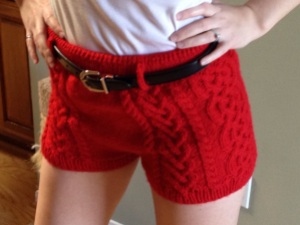
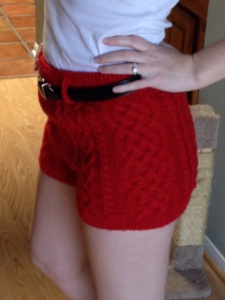
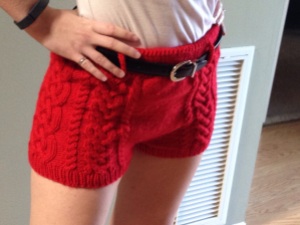
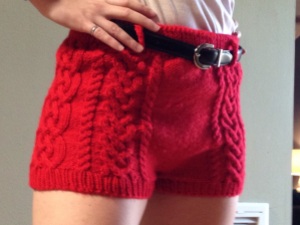
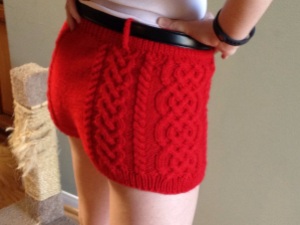
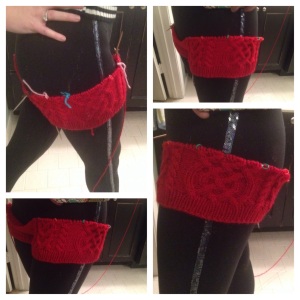
I finally finished my Bombshell Shorts!  It took me a while because I had several other projects in the works at the same time.  They turned out adorable.  I love love love them.  The pattern was very customizable.  My goal here is to share how I customized it and what I would do differently if I made them again.

20140329-164521.jpg

  • The length of the shorts is customizable.  The length that is suggested is longer than I would wear, but a short length suggestion isn’t given.  I knitted the band at the bottom of the shorts and knit the first 8 rows of the first 16 row repeat before joining.  I like the length of the front of the shorts, but my butt requires more material in the back.  They are shorter than I would prefer in the back.  I would knit 12-16 rows of the first 16 row repeat before joining if I were to make them again.  Ideally, the back could be made longer.  At least on me, the difference in length in the front and back is noticeable if you are really looking.  I don’t think there is really any way to do that with this pattern.
  • The pattern suggests that the knitter can decrease for butt shaping if a gap starts to form, but doesn’t give any details on where to decrease.  I didn’t have a noticeable gap until I reached Row 8 of my fourth 16 row repeat.  I made a size medium and decreased as follows:
    • Row 9:  Pearl each stitch until two stitches before the first 4-Stitch Cable, pearl two together, follow established pattern until last 4-Stitch Cable is complete, pearl two together though back loops, pearl until end of row (following rows will have two fewer pear stitches in back panel)
    • Row 10:  Follow pattern until second 4-Stitch Cable is complete, pearl 1, pearl two together, Celtic Cable, pearl two together through back loops, follow pattern until sixth 4-Stitch Cable is complete, pearl 1, pearl two together, Celtic Cable, pearl two together through back loops, follow pattern until end of row (the following rows will have one fewer pearl stitch on each side of Celtic Cable)
    • Row 11:  Pearl each stitch until two stitches before the first 4-Stitch Cable, pearl two together, follow established pattern until last 4-Stitch Cable is complete, pearl two together though back loops, pearl until end of row (following rows will have two fewer pear stitches in back panel)
    • Row 12:  Follow established pattern
    • Row 13:  Pearl each stitch until two stitches before the first 4-Stitch Cable, pearl two together, follow established pattern until last 4-Stitch Cable is complete, pearl two together though back loops, pearl until end of row (following rows will have two fewer pear stitches in back panel)
    • Row 14:  Follow established pattern
    • Row 15:  Pearl each stitch until two stitches before the first 4-Stitch Cable, pearl two together, follow established pattern until last 4-Stitch Cable is complete, pearl two together though back loops, pearl until end of row (following rows will have two fewer pear stitches in back panel)
    • Row 16:  Follow established pattern
  • My shorts bunch a little bit in the front crotch area.  If I were to make these again, I would try to work out some shaping in this area.

Difficulty:  Moderate-Hard

Time Required:  40 Movies

Overall Experience:  Excellent

20140329-164446.jpg

20140329-164720.jpg

20140329-164850.jpg

20140329-165054.jpg

Owl Baby Hat

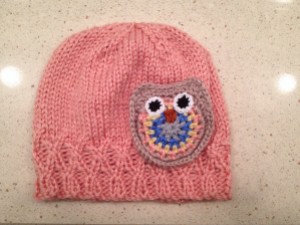
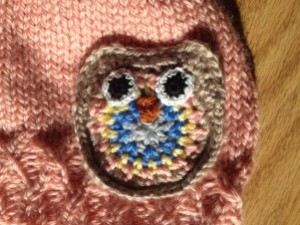
My cousin Amber asked if I could come up with a pattern for a baby owl hat.  I combined the hat from my Hello Kitty Hat with an adorable owl keychain I saw on Ravelry.  The outcome was quite cute.  She wanted the main hat color to be peach.  I usually work in jewel-tones, which aren’t available in baby yarn.  I made this hat in pastel baby yarns.  The yarn is so unbelievably soft!  It was quite a bit less stretchy than what I normally use, so I had to start over with larger needles halfway through the project.  I should actually start recording my gauge and experience with different fibers.

20140310-195753.jpg

20140311-173346.jpg

Disclaimer:  Feel free to make this pattern for your personal use, for your platypus, for charity, or to sell.  The only thing I ask is that you please do not sell it on Etsy.  If you are interested in purchasing a koozie from my Etsy store, you may do so here.

Materials:

  • 5 Size 8 Double Pointed Knitting Needles
  • US Size 0 Crochet Hook
  • US Size 2 Crochet Hook
  • 1 Skein Bernat Softee Baby in Soft Peach (P)
  • Small amounts of crochet thread in black (K) and white (W)
  • Small amount of orange yarn (O)
  • Scraps of various sport weight/baby yarn (I used the following:  Bernat Softee Baby in Flannel (G), Lion Brand Jamie in Little Boy Blue (B), Lion Brand Jamie in Light Yellow (Y), Bernat Softee Baby in Little Mouse (N))

Gauge:

9 stitches =13 rows = 2 inches Stockinette Stitch

The hat is about 14″ in circumference unstretched and stretches to about 19.”

Stitches Used:

Instructions:

Band:

Cast on 72 stitches with P, knit in round being careful not to twist

R1-R4:  (k2, p2) 18 times (72 stitches)

R5:  (tr, p2) 18 times (72 stitches)

R6:  (k2, p2) 17 times, k2, p1 (71 stitches), leave last stitch unworked, this stitch becomes the first stitch of the next row

R7:  (pr, pl) 18 times (72 stitches)

R8:  (k1, p2, k1) 17 times, k1, p2 (71 stitches), leave last stitch unworked, this stitch becomes the first stitch of the next row

R9:  (tl, p2) 18 times (72 stitches)

R10:  (k2, p2) 17 times, k2, p1 (71) stitches), leave last stitch unworked, this stitch becomes the first stitch of the next row

R11:  (tr, tl) 18 times (72 stitches)

R12:  k71, leave last stitch unworked, this stitch becomes the first stitch of the next row (71 stitches)

R13:  (tl, k2) 18 times (72 stitches)

Knit each following row until the hat is 5 inches long.

Crown:

R1:  (K4, K2tog, SSK, K4) 6 times (60 stitches)

R9:  K60

R10:  (K3, K2tog, SSK, K3) 6 times (48 stitches)

R11:  K48

R12:  (K2, K2tog, SSK, K2) 6 times (36 stitches)

R13:  K36

R14:  (K, K2tog, SSK, K) 6 times (24 stitches)

R15:  K24

R16:  (K2tog, SSK) 6 times (12 stitches)

Cut the yarn with several spare inches.  Thread a tapestry needle and pull yarn through all 12 stitches on needles.  Work in ends.

Owl (Adapted from Owl Keychain Pattern):

With G and size 0 hook ch3 and sl st to form ring.

R1:  Ch3, work 7 dc in ring, sl st in third ch of ch3 which acts as first dc (8 dc)

Fasten off G and work in ends.

R2:  With B sl st between any two dc from R1, ch2 (acts as first hdc), hdc in same space, 2 hdc in each space around, sl st in second ch of ch2. (16 hdc)

Fasten off B and work in ends.

R3:  With Y sc between any two hdc from R2, ch1 , (sc, ch 1) in each space around, sl st in top of first sc (16 sc, 16 ch)

Fasten off Y and work in ends.

R4:  With P sc in any ch 1 space from R3, sc in same space, ch 1, (2 sc, ch1) in each ch 1 space around, sl st in top of first sc (32 sc, 16 ch)

Fasten off P and work in ends.

R5:  With N sc in an ch 1 space from R4, 2 sc in same space, ch 1, (3 sc, ch1) in next 10 ch 1 spaces, 3 dc in next ch 1 space, 2 hdc in next ch 1 space, sc in next ch 1 space, 2 hdc in next ch 1 space, 3 dc in last ch 1 space, sl st to first sc (44 stitches)

R6:  Ch 1, turn, skip first stitch, sc, hdc, dc in same stitch, trc (mark stitch with extra yarn or stitch marker), dc in same stitch, sc in next 5 stitches, dc, trc in same stitch (mark stitch with extra yarn or stitch marker), dc, hdc in same stitch, sc, sl st

Do not fasten off.

With O, embroider beak as shown in picture.

Eyes (Make 2):

With K and size 2 hook, ch3 and sl st to form ring.

R1:  Ch 1, sc 8 in ring, sl st into first sc (8 sc)

Fasten off and work in ends.

R2:  With W, sc in a sc from R1, sc in same sc, (2 sc in each sc) around, sl st to first sc (16 sc)

Fasten off leaving long tail for sewing.  Sew the eyes onto the owl using the picture for placement.

Owl (continued):

Modified sc (msc):  When you insert your hook under top 2 loops of the stitch below, also insert it under the hat loop directly underneath the stitch on the owl, yarn over, bring loop through hat loop and owl stitch, yarn over and bring loop through both stitches on hook.

R7:  Ch 1, turn, msc in each stitch around, 2 msc in marked stitches, sl st in first msc.

Fasten off and work in ends.

Difficulty:  Moderate

Time Required:  5 Movies

Overall Experience:  Excellent

Obsessed with Bombshell Shorts

None of my recent projects have featured cables, and I didn’t realize how much I missed them until I cast on Bombshell Shorts!  I’ve been obsessed with these cables this week and basically neglecting my other projects.  I also really like how the shorts are fitting thus far.  Please ignore my spandex-clad booty.

20140216-210956.jpg

Hello Kitty Hat

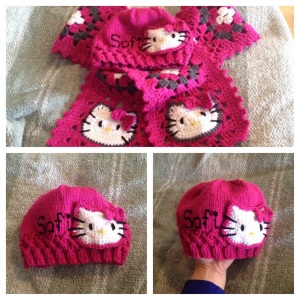
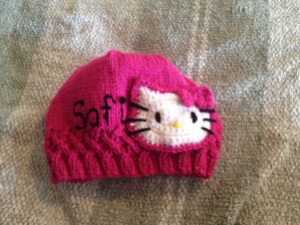
One of my coworkers asked me to make a Hello Kitty hat for his 3-year-old daughter.  He wanted it to be primarily pink rather than white (white and 3-year-olds don’t mesh well).  I knitted a hat and crocheted the Hello Kitty face from the Hello Kitty scarf that I made for my sister last year.  I chose a lattice pattern to put around the bottom of the hat to make the hat more feminine.  Afterwards, my coworker asked me to make the same scarf I made my sister.  I would have incorporated some gray into the hat as well if I was planning to make the scarf from the beginning.  The set did turn out really cute!

20140125-152935.jpg

Disclaimer:  Feel free to make this pattern for your personal use, for your platypus, for charity, or to sell.  The only thing I ask is that you please do not sell it on Etsy.  If you are interested in purchasing a koozie from my Etsy store, you may do so here.

Materials:

  • Vanna’s Choice Yarn in Berrylicious (P)
  • Vanna’s Choice Yarn in White (W)
  • Vanna’s Choice Yarn in Black (B)
  • Vanna’s Choice Yarn in Radiant Yellow (Y)
  • 5 Size US 7 Double Pointed Needles
  • Size H Crochet Hook

Stitches Used:

Instructions:

Band:

Cast on 84 stitches with P, knit in round being careful not to twist

R1-R4:  (k2, p2) 21 times (84 stitches)

R5:  (tr, p2) 21 times (84 stitches)

R6:  (k2, p2) 20 times, k2, p1 (83 stitches), leave last stitch unworked, this stitch becomes the first stitch of the next row

R7:  (pr, pl) 21 times (84 stitches)

R8:  (k1, p2, k1) 20 times, k1, p2 (83 stitches), leave last stitch unworked, this stitch becomes the first stitch of the next row

R9:  (tl, p2) 21 times (84 stitches)

R10:  (k2, p2) 20 times, k2, p1 (83) stitches), leave last stitch unworked, this stitch becomes the first stitch of the next row

R11:  (tr, tl) 21 times (84 stitches)

R12:  k83, leave last stitch unworked, this stitch becomes the first stitch of the next row (83 stitches)

R13:  (tl, k2) 21 times (84 stitches)

Knit each following row until the hat is 5.5 inches long.

Crown:

R1:  (K4, K2tog, SSK, K4) 7 times (70 stitches)

R2:  K70

R3:  (K3, K2tog, SSK, K3) 7 times (56 stitches)

R4:  K56

R5:  (K2, K2tog, SSK, K2) 7 times (42 stitches)

R6:  K42

R7:  (K, K2tog, SSK, K) 7 times (28 stitches)

R8:  K28

R9:  (K2tog, SSK) 7 times (14 stitches)

Cut the yarn with several spare inches.  Thread a tapestry needle and pull yarn through all 14 stitches on needles.  Work in ends.

Hello Kitty Face (from Made by K):

Switch to crocheting with W and crochet hook.

R1:  Ch5, sc in second ch from hook, sc in next 3 stitches (4 stitches)

R2: ch1, turn, 2 sc in next stitch, sc in next 2 sts, 2 sc in next stitch, 2 sc in bottom of same sc, 3 sc in bottoms of next 3 sc, sl st to 1st sc of current round (12 stitches)

R3: ch1, turn, sc, 2 sc in next stitch, sc x 2, 2 sc in next stitch x 3, sc x 4, 2 sc in next stitch, sl st to 1st sc of current round (18 stitches)

R4: ch1, turn, sc, 2 sc in next stitch, sc x 6, 2 sc in next stitch x 3, sc x 6, 2 sc in next stitch, sl st to 1st sc of current round (24 stitches)

R5: ch1, turn, sc x 2, 2 sc in next stitch, sc x 6, 2 sc in next stitch, sc, 2 sc in next stitch, sc, 2 sc in next stitch, sc x 8, 2 sc in next stitch, sc, sl st to 1st sc of current round (30 stitches)

R6: ch1, turn, sc x 3, 2 sc in next stitch, sc x 8, 2 sc in next stitch, sc, 2 sc in next stitch, sc x 2, 2 sc in next stitch, sc x 10, 2 sc in next stitch, sc, sl st to 1st sc of current round (36 stitches)

R7: ch1, turn, sc x 3, 2 sc in next stitch, sc x 10, 2 sc in next stitch, sc x 2, 2 sc in next stitch, sc x 2, sl st, hdc, ch1, dc in same stitch as hdc, ch 1, trc, ch 1, dc, ch1, hdc in same stitch as dc, sl st, sc x 4, sl st, hdc, ch1, dc in same stitch as hdc, ch 1, trc, ch 1, dc, ch1, hdc in same stitch as dc, sl st, sc x 2, sl st to 1st sc of current round and break off and work in ends (52 stitches)

Embroider eyes and nose on face using B and Y.

Hair Bow:

R1:  With P, ch5, sc in second ch from hook, sc in next 3 stitches (4 stitches)

R2:  Ch1, turn, sc 4 (4 stitches)

R3:  Ch1, turn, sc2tog twice (2 stitches)

R4:  Ch1, turn, sc 2 (2 stitches)

R5:  Ch1, turn, sc 2 in next stitch x 2 (4 stitches)

R6:  Ch1, turn, sc 4 (4 stitches)

R7:  Ch1, turn, sc 4  break off and work in ends (4 stitches)

Pinching center of bow together, sew the bow onto the face while wrapping the yarn around the center of the bow

Connecting the Face to the Hat:

Modified sc (msc):  When you insert your hook under top 2 loops of the stitch below, also insert it under the hat loop directly underneath the stitch on the face, yarn over, bring loop through hat loop and face stitch, yarn over and bring loop through both stitches on hook.

Hold the face in place on the hat.  With P, sl st to any stitch on R7 of the face, ch1, msc in same stitch.  Msc in each stitch on face except trc, place 3 msc in each trc, after completing all msc, sl st in first msc.

Embroider whiskers on face.

20140125-152957.jpg

Difficulty:  Moderate

Time Required:  5 Movies

Overall Experience:  Excellent

Groom’s Survival Kit

While searching for wedding things on Pinterest, I found many groom’s survival kits.  Since I knit I really liked the idea of making socks for my groom, so he didn’t get cold feet.  I put my own spin on the rest of items.

20131101-161058.jpg 20131101-161004.jpg 20131101-160918.jpg 20131101-160849.jpg 20131101-160811.jpg

The typical groom’s kit list comes with a piece of paper that says something similar to the following:

Groom’s Day-Of Survival Kit

  • Socks to keep cold feet away
  • Lifesavers to keep you from drowning in emotion
  • Small bottle of alcohol to calm your nerves
  • Mints to ensure a fresh kiss
  • Ring pop in case you forget the essentials

Looking at the list, there were lots of things I didn’t like about it:

  • Socks–Loved the socks idea
  • Lifesavers–Neither one of us are emotional people.  I’ve been called a robot by several people, and he isn’t any better.  He got me a shirt for my birthday that says:  “Feelings are boring.  Kissing is awesome.”  Lifesavers were off the list.
  • Small bottle of alcohol–I wasn’t sure when I would give this to him, and we got fined if we got caught with outside alcohol at the ceremony site.  A small bottle of alcohol was off the list.
  • Mints–This implies that he NEEDS a mint.  I didn’t want to imply that he had bad breath.  That seemed in poor taste.
  • Ring pop–Apparently the essentials are that he buys my jewelry and/or candy?  I didn’t like this one either.

That left me with one item.  Socks.  I decided to replace the items with different items that matched our personalities better.  I wrote a note on a tag on each item.  If you click on the pictures above you can see them.  Otherwise, each note is listed below:

  • Socks–So you don’t get cold feet
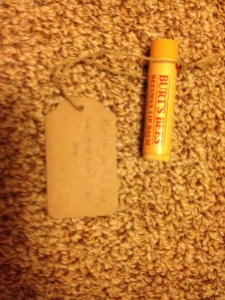
  • Lip balm–For the perfect first kiss that tastes like me (I wear Burt’s Bees all the time.)
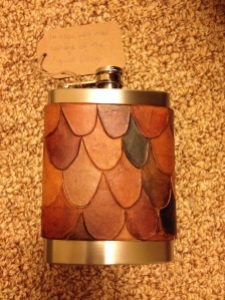
  • Flask–In case you need courage of the liquid variety (that won’t get us fined…he could fill it at the venue)
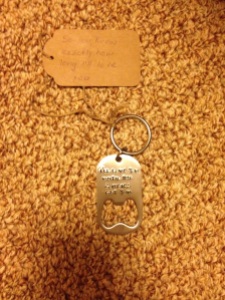
  • A bottle opener key chain that says:  “I’LL LOVE YOU UNTIL THE ZOMBIES GET YOU”–So you know exactly how long I’ll love you
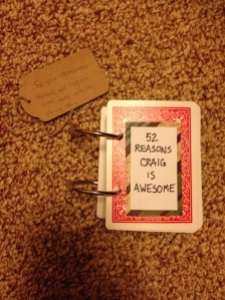
  • 52 REASONS CRAIG IS AWESOME–So you remember where we began and why we are doing this

Each of the items (except the lip balm) was hand made, not necessarily by me:

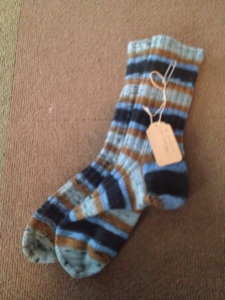
  • Socks–I made the socks.  See my Don’t Get Cold Feet post.
  • Lip balm–I actually had an unopened lip balm laying around because I buy them in bulk.
  • Flask–The flask came from Scoutmob.com.  Scoutmob is a site that features products by independent makers.  It’s pretty cool.  Check it out.
  • Key Chain–The zombie key chain came from Etsy.  The maker, FleurDesigns, was great to work with.  I got the key chain crazy fast.
  • 52 Reasons Book–I made the book during our first Valentine’s together.  See my 52 Reasons Book post.