Gospel Presentation and Cross Bracelets

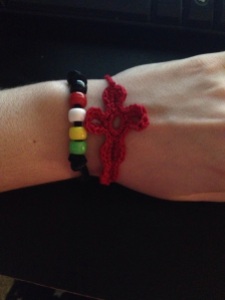
This summer I helped to teach dance at a sports camp sponsored by my church.  I was in charge of the middle and high school girls.  As part of our Bible lesson, we made gospel presentation bracelets consisting of several colored beads.  Each color represents part of the gospel presentation.  In short:  The black bead represents the darkness of sin in each man.  The red bead represents Jesus’ blood and sacrifice.  The white bead represents the washing away of our sin.  The yellow bead represents heaven.  The green bead represents growing in a relationship with God.  Here is a link providing Bible verses for each color and a tutorial on how to make the bracelet.

My girls liked jewelry, so I crocheted cross bracelets to give them if they had their memory verse memorized to sign language.  Many of them didn’t speak English, but they could still participate using sign language.  I used this necklace tutorial and used a simple chain slip stitched to the top and bottom of the cross to make it a bracelet.  The girls were so excited!

IMG_2600

Owl Baby Hat

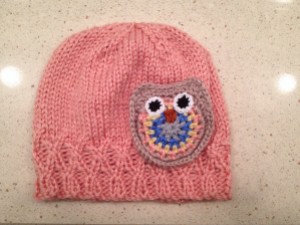
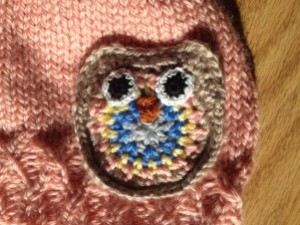
My cousin Amber asked if I could come up with a pattern for a baby owl hat.  I combined the hat from my Hello Kitty Hat with an adorable owl keychain I saw on Ravelry.  The outcome was quite cute.  She wanted the main hat color to be peach.  I usually work in jewel-tones, which aren’t available in baby yarn.  I made this hat in pastel baby yarns.  The yarn is so unbelievably soft!  It was quite a bit less stretchy than what I normally use, so I had to start over with larger needles halfway through the project.  I should actually start recording my gauge and experience with different fibers.

20140310-195753.jpg

20140311-173346.jpg

Disclaimer:  Feel free to make this pattern for your personal use, for your platypus, for charity, or to sell.  The only thing I ask is that you please do not sell it on Etsy.  If you are interested in purchasing a koozie from my Etsy store, you may do so here.

Materials:

  • 5 Size 8 Double Pointed Knitting Needles
  • US Size 0 Crochet Hook
  • US Size 2 Crochet Hook
  • 1 Skein Bernat Softee Baby in Soft Peach (P)
  • Small amounts of crochet thread in black (K) and white (W)
  • Small amount of orange yarn (O)
  • Scraps of various sport weight/baby yarn (I used the following:  Bernat Softee Baby in Flannel (G), Lion Brand Jamie in Little Boy Blue (B), Lion Brand Jamie in Light Yellow (Y), Bernat Softee Baby in Little Mouse (N))

Gauge:

9 stitches =13 rows = 2 inches Stockinette Stitch

The hat is about 14″ in circumference unstretched and stretches to about 19.”

Stitches Used:

Instructions:

Band:

Cast on 72 stitches with P, knit in round being careful not to twist

R1-R4:  (k2, p2) 18 times (72 stitches)

R5:  (tr, p2) 18 times (72 stitches)

R6:  (k2, p2) 17 times, k2, p1 (71 stitches), leave last stitch unworked, this stitch becomes the first stitch of the next row

R7:  (pr, pl) 18 times (72 stitches)

R8:  (k1, p2, k1) 17 times, k1, p2 (71 stitches), leave last stitch unworked, this stitch becomes the first stitch of the next row

R9:  (tl, p2) 18 times (72 stitches)

R10:  (k2, p2) 17 times, k2, p1 (71) stitches), leave last stitch unworked, this stitch becomes the first stitch of the next row

R11:  (tr, tl) 18 times (72 stitches)

R12:  k71, leave last stitch unworked, this stitch becomes the first stitch of the next row (71 stitches)

R13:  (tl, k2) 18 times (72 stitches)

Knit each following row until the hat is 5 inches long.

Crown:

R1:  (K4, K2tog, SSK, K4) 6 times (60 stitches)

R9:  K60

R10:  (K3, K2tog, SSK, K3) 6 times (48 stitches)

R11:  K48

R12:  (K2, K2tog, SSK, K2) 6 times (36 stitches)

R13:  K36

R14:  (K, K2tog, SSK, K) 6 times (24 stitches)

R15:  K24

R16:  (K2tog, SSK) 6 times (12 stitches)

Cut the yarn with several spare inches.  Thread a tapestry needle and pull yarn through all 12 stitches on needles.  Work in ends.

Owl (Adapted from Owl Keychain Pattern):

With G and size 0 hook ch3 and sl st to form ring.

R1:  Ch3, work 7 dc in ring, sl st in third ch of ch3 which acts as first dc (8 dc)

Fasten off G and work in ends.

R2:  With B sl st between any two dc from R1, ch2 (acts as first hdc), hdc in same space, 2 hdc in each space around, sl st in second ch of ch2. (16 hdc)

Fasten off B and work in ends.

R3:  With Y sc between any two hdc from R2, ch1 , (sc, ch 1) in each space around, sl st in top of first sc (16 sc, 16 ch)

Fasten off Y and work in ends.

R4:  With P sc in any ch 1 space from R3, sc in same space, ch 1, (2 sc, ch1) in each ch 1 space around, sl st in top of first sc (32 sc, 16 ch)

Fasten off P and work in ends.

R5:  With N sc in an ch 1 space from R4, 2 sc in same space, ch 1, (3 sc, ch1) in next 10 ch 1 spaces, 3 dc in next ch 1 space, 2 hdc in next ch 1 space, sc in next ch 1 space, 2 hdc in next ch 1 space, 3 dc in last ch 1 space, sl st to first sc (44 stitches)

R6:  Ch 1, turn, skip first stitch, sc, hdc, dc in same stitch, trc (mark stitch with extra yarn or stitch marker), dc in same stitch, sc in next 5 stitches, dc, trc in same stitch (mark stitch with extra yarn or stitch marker), dc, hdc in same stitch, sc, sl st

Do not fasten off.

With O, embroider beak as shown in picture.

Eyes (Make 2):

With K and size 2 hook, ch3 and sl st to form ring.

R1:  Ch 1, sc 8 in ring, sl st into first sc (8 sc)

Fasten off and work in ends.

R2:  With W, sc in a sc from R1, sc in same sc, (2 sc in each sc) around, sl st to first sc (16 sc)

Fasten off leaving long tail for sewing.  Sew the eyes onto the owl using the picture for placement.

Owl (continued):

Modified sc (msc):  When you insert your hook under top 2 loops of the stitch below, also insert it under the hat loop directly underneath the stitch on the owl, yarn over, bring loop through hat loop and owl stitch, yarn over and bring loop through both stitches on hook.

R7:  Ch 1, turn, msc in each stitch around, 2 msc in marked stitches, sl st in first msc.

Fasten off and work in ends.

Difficulty:  Moderate

Time Required:  5 Movies

Overall Experience:  Excellent

Little Lady Slippers

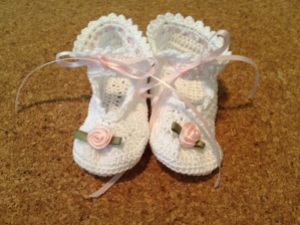
My friend Parnak’s baby shower is today.  I’m so sad that I’m missing it!  I still have a lot of things to do for my wedding and just didn’t have time to drive to San Antonio, spend a whole day, and drive back.  In addition to the “real” present that I shipped, I sent these sweet little baby booties.  The pattern is available in Booties by the Dozen by Kay Meadors.  This is my go to book for baby booties.  I love these patterns!  I didn’t alter the pattern from what is written.  The pattern is really simply, so I don’t really have any tips either!

20130901-094850.jpg

Difficulty:  Easy

Time Required:  2 Movies

Overall Experience:  Excellent

Wedding Doilies 3.0

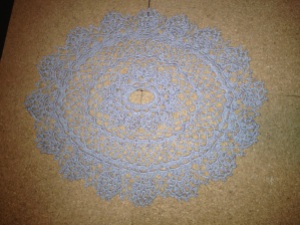
Last week I posted a pattern for an oval doily that I developed for my wedding. It almost looked circular from the outside, so I wasn’t overly happy with it. I edited the pattern, “fudging” the top and bottom stitches so they would be shorter in each round. I’m much happier with the outcome. The pattern would be absolutely ridiculous to write out. It’s quite complicated. Of anyone really, really wants it, leave me a comment and I’ll write it out. I really just wanted to share.  Yay ovals!

20130814-205056.jpg photo-46 Doily

Wedding Doilies 2.0

I haven’t had a lot to post recently despite the fact that I’ve been crafting A LOT. I’m making a lot of things for my wedding, and most of them are gifts for people helping me with things; therefore, they are secret.
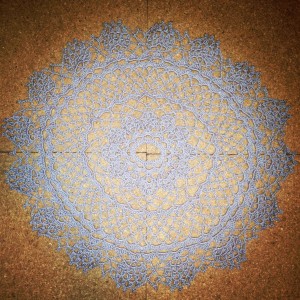
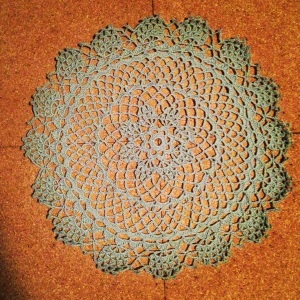
photo-46 Doily

I wrote a few weeks ago about the doilies I am making for my wedding. In addition to the round varieties, I also needed some oval doilies. I took the original pattern and made some adjustment to it to create an oval version. The pattern for the oval version is below. I wanted the doilies to have a larger difference between their “long” and “short” sides, but they will do. They look nice with the round versions.

Materials:

  • Size 1 Crochet Hook
  • Bernat Handicrafter Crochet Thread in Misty Grey

Stitches Used:

Instructions:

Ch 36, join to form a ring.

R1: Ch 3, d c in same stitch,2 d c in next 5 stitches, d c in next 12 stitches, 2 d c in next 6 stitches, d c in next 12 stitches, slip stitch in top of ch 3.

R2: S c in same space, * ch 5, skip 3 d c, s c in next d c, repeat from * all around ending row with sl st in 1st s c.

R3: Work 1 s c, 7 d c, 1 s c in each ch 5 loop, join.

R4: Sl st to center of scallop, ch 7, 1 tr c in same space, * ch 3, 1 tr c in same space, repeat from *, * ch 4, 4 tr c with ch 3 between each tr c in center st of next scallop, repeat from * 12 times, ch 4, join to 4th st of ch 7.

R5: Sl st in first st of loop, ch 4, * thread over needle twice, insert in loop, pull through and work off 2 loops twice, repeat from *, thread over and pull through all loops at one time, ** ch 3, thread over twice, insert in next loop, pull through and work off 2 loops twice. * thread over twice, insert in same loop, pull through and work off 2 loops twice, repeat from *, thread over and work off all loops at one time, (cluster st), ch 3, cluster st in same loop, ch 3, cluster st in next loop, d c in next 4 ch loop, cluster st in next 3 ch loop, repeat from ** 12 times, ch 3, 2 cluster sts with ch 3 between each cluster st in next loop, ch 3, cluster st in next loop, d c in next 4 ch loop, join to top of 1st cluster st.

R6: Sl st in next loop, ch 4, * thread over needle twice, insert in same loop, pull through and work off 2 loops twice, repeat from *, thread over and work off all loops at one time, ch 3, cluster st in next loop, ch 3, thread over needle twice, insert in next loop, pull through and work off 2 loops twice, repeat from *, thread over and work off remaining loops at one time, ch 4, sl st in same loop, sl st in top of d c, repeat 11 times.

R7: Sl st in next 4 chain stitches, sl st in next loop, sc in same loop, ch 7, s c in next loop, ch 9, s c in 12 ch loop, repeat from beginning all around ending row with ch 5, d tr c in last stitch of previous row.

R8: Ch 9, s c in next loop, repeat from beginning all around ending row with ch 5, d tr c in d tr c of previous row.

R9: Ch 9, s c in next loop, repeat from beginning all around, join.

R10: Sl st to loop, ch 3, 8 d c in loop, * 9 d c in next loop, repeat from * all around, join.

R11: Sl st to center d c of d c group, * ch 5, skip 4 d c, cluster st in next space, ch 5, sl st in center d c of next d c group, repeat from * all around ending row with ch 2, d c in joining.

R12: S c in same space, ch 9, s c in next loop, repeat from beginning all around ending row with ch 5, d tr c in 1st s c.

R13 and 14: Same as 12th row.

R15: Ch 6, s c in next loop, repeat from beginning all around, join.

R16: Ch 3, 7 d c in next loop, * d c in next s c, 7 d c in next loop, repeat from * all around, join.

R17: Sl st to 4th d c, * ch 7, skip 7 d c, s c in next d c, repeat from * all around, join.

R18: Work 1 s c, 1 d c, 5 tr c, 1 d c, 1 s c in each loop, join.

R19: Sl st to center st of scallop, ch 7, tr c in same space, * ch 3, tr c in same space, repeat from *, * ch 4, s c in center st of next scallop, ch 9, s c in center st of next scallop, ch 4, 4 tr c with ch 3 between each tr c in center st of next scallop, repeat from * 14 times, ch 4, s c in center st of next scallop, ch 9, s c in center st of next scallop, ch 4, join to 4th st of ch 7.

R20: Sl st to loop, * 2 cluster sts with ch 3 between each cluster st in each of the next 3 loops, ch 5, skip ch 4 loop, s c in 9 ch loop, ch 5, skip ch 4 loop, repeat from * all around, join to top of 1st cluster st.

R21: Sl st to loop, * 1 cluster st with ch 3 between each cluster st in each of the next 5 loops, ch 7, sl st in next s c, ch 7, skip ch 5 loop, repeat from * all around, join in top of 1st cluster st.

R22: Sl st to loop, cluster st in same loop, * ch 6, sl st in 5th st from hook for picot, ch1, cluster st in next loop, ch 1, picot, ch 1, cluster st in next loop, ch 1, picot, ch 1, cluster st in next loop, ch 7, s c in next loop, ch 4, picot. ch 4, s c in next loop, ch 7, cluster st in next loop, repeat from * all around, in same manner join in top of 1st cluster st, break thread.

Difficulty: Medium to Hard (the stitches are somewhat difficult)

Time Required: 4 Movies

Overall Experience: Excellent

State Plaque

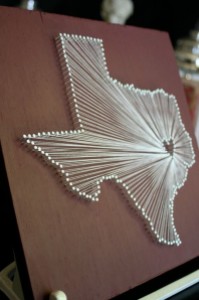
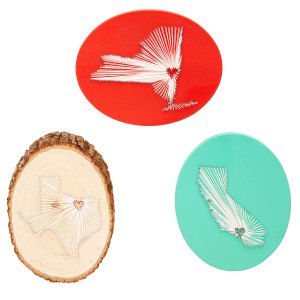
Last year, I found a cute idea on Pinterest.  Someone had created this adorable plaque.  Unfortunately, the link attached to the pin didn’t lead to directions.  I decided to make similar plaques for my parents and my boyfriend’s parents for Christmas.  I detailed my improvised process below.  Sorry for the lack of pictures!

Texas Plaque Inspiration

Materials (and where I bought them):

  • A Plaque ( Hobby Lobby)
  • A Box of Small Nails (Home Depot)
  • A Small Finishing Hammer (Home Depot)
  • Ball of Cotton Crochet Thread (Hobby Lobby)
  • Masking Tape
  • Scissors
  • Access to a Computer/Printer

Instructions:

  1. Purchase your plaque so you are certain of the size.
  2. Print out a state map and a small heart using your computer and printer.  Make sure the sizes are appropriate for your plaque.  I copied my state map into PowerPoint so that I could scale it to fit my plaque well. Also in PowerPoint, I superimposed the heart on the map over the cities where my parents and my then boyfriend’s (now fiance’s!) parents live.
  3. Cut out the map and the heart using scissors.
  4. Create small rolls of masking tape and put the tape on the back of the map.
  5. Place the map on the plaque in the orientation desired.
  6. Line the paper map and heart with nails.  I would suggest using a spacer so the nails are evenly spaced.  I used a crochet hook.  A pen would be an appropriate size.
  7. After the paper map and heart are completely lined with nails, carefully remove the map.
  8. Tie the end of the thread to one of the heart nails.  Maintaining tension in the thread, wrap the thread around the nails alternating between heart nails and map nails.  Wrap thread around each map nail once and each heart nail several times.  When all of the nails are wrapped, tie the string to the final nail and cut the string close to the nail.

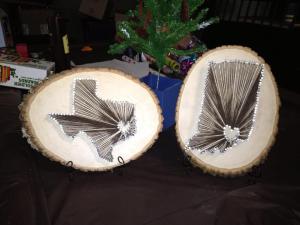
My Plaques

I was very pleased with the final product and both of our parents loved their gifts!

Difficulty:  Easy

Time Requited:  2 Movies

Overall Experience:  Excellent

About a month ago, I got an email from Uncommon Goods.  They are selling almost the exact same plaques for $85!  I wish that I had thought to paint the tips of the nails red for the heart.  That was a really cute idea!

Uncommon Goods Plaque

Wedding Doilies

I’m currently working on various projects for my upcoming October wedding.  Our colors are purple and grey.  For the centerpieces, I chose groups of three glass cylinders containing a single eggplant calla lily.  The cylinders will be filled with water with a floating candle floating on top of each.  The effect will be similar to picture below.

My dress is extremely lacy, and I am incorporating lace into various aspects of the decorations.  I wanted to include both lace and grey into the centerpieces, so I chose to crochet doilies to place under the centerpieces.  I searched Ravelry for free doily patterns and chose Doily 4403 8 Point Star.  The pattern creates a 9 3/4″ doily.  To achieve a more appropriate size for my purposes (17 “), I used a size 0 crochet hook rather than a size 11.  I’m making the doilies out of Bernat Handicrafter Crochet Thread in Misty Grey.

Doily

I recruited my grandmother and great aunt to help me make some of the 20+ doilies need for the reception.  That’s a lot of doilies!  Since I will busy with these, my summer knit-a-long project Nachtfalter, and some surprise projects for my wedding party, I won’t have “new” project to blog about for quite some time.  I have pictures of quite a few old projects to blog about until I finish.