Valentine’s Cozy Roundup – Day 1

I had surgery this week and am supposed to be doing nothing at home, so I whipped up six coffee cozies for my kids to give their teachers for Valentine’s Day.  I plan to share one cozy a day until the big event!

Day 1 – The Love Cozy

I saw a pattern I liked on Pinterest for a coffee mug cozy with the word “love” embroidered on it.  I wanted this to by a coffee cup cozy, not a mug cozy, so I followed this simple pattern by Dakotah Knits.

After I finished the cozy, I chain stitched the word “love” on the cozy.  Easy and cute!


Simple Crochet Christmas Ornaments

I love to make homemade gifts for people.  With teacher Christmas gift time approaching, I decided to make some simple crochet ornaments (in addition to contributing to class gift cards).  Gift cards, while appreciated, feel so generic to me.  I like to give at least a little something that is special.  

That being noted, I also bit off a little more than I could chew and didn’t finish six of them before Christmas.  Better late than never, right?  I got a set of three to Zoe’s three teachers before the holidays, but Jack’s teachers just got their today.

I chose a set of three free patterns from 5 Little Monsters that I found on Pinterest.  Didn’t they turn out cute?


Elmo Inspired Hat version 2

I made up an Elmo Inspired Hat pattern a few years ago to go with my Oscar Inspired Hat; however, I wanted a hat without a mouth to go with my Zoe Inspired Hat, so here is a no mouth version with a slight variation on the eyes that I like much better.

This is my son wearing the hat as part of his Halloween costume.  He is Elmo-obsessed right now.

Materials:

  • Red yarn (I used Vanna’s Choice in Scarlet)
  • White yarn (I used Vanna’s Choice in White)
  • Black yarn (I used Vanna’s Choice in Black)
  • Orange yarn (I used some Red Heart yarn from my stash.  I’m not sure the exact shade)
  • Tapestry needle
  • Size E crochet hook
  • Knitting needle size needed for my basic hat pattern
  • Fiber fill


Stitches Used:

Directions:

Hat:

First, knit your hat in the size desired using my basic hat pattern using red.  I purposely sized up one size on my son’s hat below so that he can wear it longer.

Here is my daughter wearing a more fitted version of the hat.

Eyes (make 2) (This is different from the original pattern because it is worked in continuous rounds.  It makes the pupil of the eye look more uniform):

R1:  With black use magic ring technique to start round, ch 1, sc 8, on the last stitch switch to white   Cut black yarn and work in ends. (8 stitches)

Continue with white.

R2:  2 sc in first stitch from R1 and in each sc around (16 stitches)

R3:  Sc 3, 2 sc in next stitch around (20 stitches)

R4-R6:  Sc in each stitch around (20 stitches)

R7:  Sc 3, sc2tog around (16 stitches)

R8:  Sc2tog around (8 stitches)

R9:  Sc2tog around (4 stitches)

Cut yarn and leave tail for sewing.


Nose:

R1:  With O use magic ring technique to start round, ch 1, sc 8 (8 stitches)

R2:  2 sc in first stitch from R1 and in each sc around (16 stitches)

R3:  Sc 3, 2 sc in next stitch around (20 stitches)

R4-R10:  Sc in each stitch around (20 stitches)

R11:  Sc 3, sc2tog around (16 stitches)

R12:  Sc2tog around (8 stitches)

R13:  Sc2tog around (4 stitches)

Cut yarn and leave tail for sewing.

Using a picture of Elmo as inspiration, tack the eyes and nose onto the hat using a tapestry needle and yarn.  I would also suggest tacking the eyes and nose to each other.


Zoe Inspired Hat

My daughter Zoe is going to be Zoe from Sesame Street for Halloween. I made her a Zoe inspired knit/crochet hat to be worn with a ballerina outfit since Zoe from Sesame Street loves to dance!

Materials:

  • Gold worsted weight yarn (I used Yarn Bee Soft Secret in Saffron)
  • Gold “eyelash” or “fur” yarn (I used Yarn Bee Haute Fur in Goldenlash)
  • Small amounts of black, white, brown, pink, teal, and purple worsted weight yarn
  • Red crochet thread
  • Knitting needle size needed for my basic hat pattern
  • Size E crochet hook
  • Size 3 crochet hook
  • Tapestry needle
  • Fiber Fill


Stitches Used:

Directions:

Hat:

First, knit your hat in the size desired using my basic hat pattern using gold worsted weight yarn.

Eyes (Make 2):

R1:  With black using a magic ring, sc six, on the last stitch switch to white (6 stitches)

R2:  Two sc in each sc around (12 stitches)

R3 and R4:  Sc in each sc around (12 stitches)

R5:  Sc2tog around (6 stitches), stuff eye with fiber fill

R6:  Sc2tog around (3 stitches), break yarn and leave end for sewing

R1:  With teal using a magic ring, sc eight (8 stitches)

R2:  Two sc in each sc around (16 stitches)

R3, R4, R5:  Sc in each sc around, on last stitch of R5, switch to brown (16 stitches)

R6:  Sc in eash sc around, break yarn and leave end for sewing

Sew eyelids onto eyes using pictures below for placement.  Sew the eyes to the hat using pictures for placement.  Sew the eyes to each other for stability.

Nose:

R1:  Using pink using a magic ring, sc six (6 stitches)

R2:  Sc, 2 sc in next stitch, sc twice, 2 sc in next stitch, sc (8 stitches)

R3:  Sc in each sc around (8 stitches)

R4:  Sc, sc2tog, sc twice, sc2tog, sc (6 stitches), stuff nose with fiber fill

R5:  sc2tog three times (3 stitches), break yarn and leave end for sewing

Sew nose to hat between the eyes.  Sew to eyes for stability.

Hair:

Cut the “eyelash” yarn into six inch pieces.  Follow this tutorial for how to attach the hair to the hat.  I placed one “hair” approximately every half inch on the entire back half of the hat.

Bow:

R1:  With purple ch 4, sc in second chain from hook and in next two chains (3 stitches)

R2 – R6:  Sc in each sc across (3 stitches), break yarn and work in ends.

Cut long piece of purple yarn.  Wrap the yarn around the center of your crocheted piece several times tightly to make it look like a bow.  Used the remaining yarn to sew it to the hat.

Dragonfly:

R1:  With red crochet thread and size 3 hook, ch 5 (foundation chain), sc in second ch from hook, sc, ch 5, sl st in fifth ch from hook, sc in same foundation ch as previous sc, sc in next foundation ch, ch 7, sl st in seventh ch from hook, sc in same foundation ch as previous sc, sc in last foundation ch 3 times, working in back of foundation ch sc in next ch, ch 7, sl st in seventh ch from hook, sc in same foundation ch as previous sc, sc in next foundation ch, ch 5, sl st in fifth ch from hook, sc in same foundation ch as previous sc, two sc in last foundation ch, sl st to first sc

R2:  Working in foundation ch, sc over first sc from R1, (sl st, sc, hdc, dc, tr, dc, hdc, sc, sl st) in chain loop, (sl st, sc, hdc, dc, tr 3 times, dc, hdc, sc, sl st) in next chain loop, skipping two foundation ch, sl st in next foundation chain (end chain), sc three times, sl st in same foundation ch, (sl st, sc, hdc, dc, tr 3 times, dc, hdc, sc, sl st) in next chain loop, (sl st, sc, hdc, dc, tr, dc, hdc, sc, sl st) in next chain loop, skipping two foundation ch, sc in next foundation chain, sc in same foundation ch, ch 3, sl st in third chair from hook, sc in same foundation ch, sl st to first sc in R2, break off and leave long piece of yarn for sewing.

Sew dragon fly to head as shown.

Check out the full costume in my Elmo and Zoe Halloween Costumes post!

Where the Wild Things Are Amigurumi

About two months before Jack’s second birthday I started thinking about themes, and Where the Wild Things Are seemed perfect. He is definitely a wild thing!  I had also really been missing crafting. When I stumbled upon a wild thing amigurumi pattern, I knew I had to make it. The main pattern is here; however, I did not want to glue on felt eyes and teeth. This, after all, would eventually be a toy for a rough and tumble two-year-old.  The edits I made to the pattern can be found below. Enjoy!

Materials for Eyes and Teeth:

  • US Size E Crochet Hook (4 mm)
  • Tapestry needle
  • Red Heart Super Saver in Bright Yellow (Y)
  • Red Heart Super Saver in Black (B)
  • Red Heart Super Saver in White (W)


Stitches Used for Eyes and Teeth:

Original Pattern:

Unnamed Monster Pattern

Directions for Eyes and Teeth:

Eyes (make 2):

Row 1:  With B, ch 3, 6 sc in first ch, cut yarn and leave extra for sewing

Row 1:  With Y, ch 4, 6 dc hdc in first ch, cut yarn and leave extra for sewing

Center black semi-circle along flat edge of yellow semi-circle and sew on.

Sew eyes on instead of gluing felt accord to the directions in the original pattern.

Teeth:

Row 1:  With W, sl st to face near cap just below eye as shown in the picture below, p, (sl st, p, sl st) into face curving halfway between nose and beard, the curving back up to just below other eye.  End with final sl st of pattern.

Appalachian Trail Plaque

As I mentioned in my Appalachian Trail Koozie post, for Secret Santa at work, I drew a colleague who had recently hiked the entire Appalachian Trail (AT).  I was looking for a cool AT themed gift. I found some really cool signs/plaques on Etsy, but they were outside of the Secret Santa budget. I decided to make my own. I bought a wooden plaque from Michaels. I then made my own stain by putting some old steel bolts in vinegar overnight. (I had seen the idea on Pinterest.) It brushed on clear, but turned the wood a nice vintage-like brown/grey. Using PowerPoint, I designed a hiker on a trail. Using the same method I used for my wedding signs, I transferred the design to the plaque. It turned out great, and he loved it!  
 

 Difficulty: Easy

Time Required: 2 Movies

Overall Experience: Excellent

Cowboys Mason Jar Koozie

I haven’t written a blog post in forever. A lot of that is that it takes a lot of effort to figure out a pattern I improvised from pictures after I already gave away the actual product. I’ve been lazy. I decided to play catch up just sharing what I’ve been making. If someone wants the pattern, I am more than willing to share!
First up: a Dallas Cowboys mason jar koozie. I actually did not love how this turned out. I was knitting at a friends’ child’s birthday party and their neighbor asked if I could make them a mason jar koozie with the Cowboys logo. I said sure. I figured out a pattern for the letters, but it was really wide. Knitting with number 2 needles and worsted weight yarn (which is ridiculously tight if you know knitting) the letters went more than halfway around the jar. The only way I was going to get the letters on the front was to use super fine yarn. That would have been a crazy number of stitches, and I would have to buy new yarn instead of using stash yarn. Considering I had already spent a lot of time ripping out my work to even get the letters mostly on the front half of the jar, I really didn’t want to go through any more effort. Next I tried several different crochet star patterns, none of which were pointy enough.  Lastly, the letters ended up too low. I’m a perfectionist. Here is how it turn out. Not my best work.   


Difficulty: Easy

Time Required: 6 Movies (Due to a lot of ripping out)

Overall Experience: Meh

Baby Baseball Hat

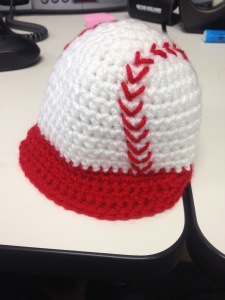
In honor of Craig Biggio being elected for the baseball hall of fame today, I will finish my summer of baby hats (I know…  I’m super behind.  Other hats included:  Chappy Newsboy Cap, Lacey Summer Baby Cap, Elmo Inspired Baby Hat, and Emory Beanie.) with my baby baseball hat.  Some friends of mine are huge Astros fans, so when they had a baby I naturally wanted to make them a baseball hat.  I had seen pictures of hats I liked, but couldn’t find a pattern.  I ended up remaking the Chappy Newsboy Cap with same alterations.  Instead of single crocheting in the front and back loops, I single crocheted in both loops to give a smoother texture.  I crocheted the hat in white with a red brim and embroidered baseball stitching over the white.  It turned out super cute!

IMG_2605

Difficulty:  Easy

Time Required:  2 Movies

Overall Experience:  Good

Purple Multiplicity

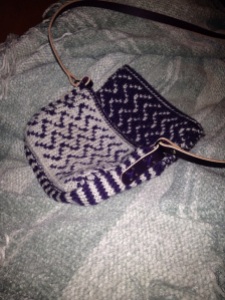
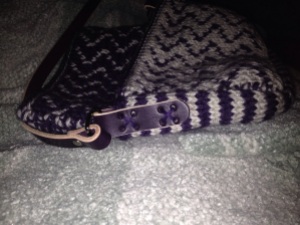
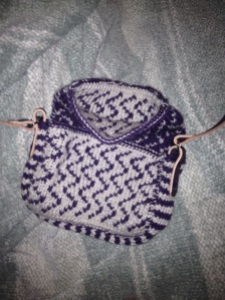
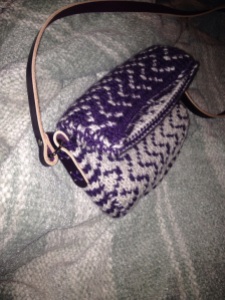
After carrying my Multiplicity for a couple of days, a friend asked me to make one in purple and off-white.  I really love how it turned out!

20140612-181750-65870450.jpg

20140612-181819-65899246.jpg

20140612-181837-65917621.jpg

20140612-181903-65943436.jpg

Difficulty:  Moderate

Time Required:  12 Movies

Overall Experience:  Excellent