Elmo and Zoe Halloween Costumes

A couple of months ago I started getting emails advertising Halloween costumes.  I looked at the options online, and had a hard time justifying the cost of the available costumes.  It would be a little different if Zoe was six, obsessed with Moana, and would play dress up in her costume for the next year.

Jack was almost two and had just become obsessed with Elmo.  Elmo’s best friend is Zoe, and it was just too perfect for our Zoe to be dressed as Zoe.  (Apparently I have a thing for matching names.  Last year Jack was Jack-Jack from the Incredibles.)

While Elmo costumes are available commercially, I was not going to put my 2-year-old in a fur costume in Texas.  He doesn’t understand the concept of dressing up for Halloween, I wasn’t sure he would even recognize the fur costume as “Melmo,” and it would be very uncomfortable.

Instead, I decided to knit/crochet hats for them and fill out the rest of their costumes with clothes from their closet.  They would give the impression of the characters while still being comfortable.

For Jack, I made his hat.  Can’t knit or crochet?  You can buy an Elmo hat on Amazon or Etsy.  I added a solid red Elmo t-shirt and jeans.  He could still run around being himself, and he had “Melmo” on his clothes, which was pretty cool.  At a party we attended this weekend, another toddler was following him around calling him Elmo, so I call that a success.


I also made Zoe’s hat.  If you can’t knit or crochet, Zoe hats are a little harder to come by, but are still available on Etsy.  Because Zoe (the character) loves to dance and often wears a ballet costume, we put our Zoe in a solid pink onesie and leggings with a tutu she wore during her newborn pictures and socks made to look like pointe shoes.


Elmo Inspired Hat version 2

I made up an Elmo Inspired Hat pattern a few years ago to go with my Oscar Inspired Hat; however, I wanted a hat without a mouth to go with my Zoe Inspired Hat, so here is a no mouth version with a slight variation on the eyes that I like much better.

This is my son wearing the hat as part of his Halloween costume.  He is Elmo-obsessed right now.

Materials:

  • Red yarn (I used Vanna’s Choice in Scarlet)
  • White yarn (I used Vanna’s Choice in White)
  • Black yarn (I used Vanna’s Choice in Black)
  • Orange yarn (I used some Red Heart yarn from my stash.  I’m not sure the exact shade)
  • Tapestry needle
  • Size E crochet hook
  • Knitting needle size needed for my basic hat pattern
  • Fiber fill


Stitches Used:

Directions:

Hat:

First, knit your hat in the size desired using my basic hat pattern using red.  I purposely sized up one size on my son’s hat below so that he can wear it longer.

Here is my daughter wearing a more fitted version of the hat.

Eyes (make 2) (This is different from the original pattern because it is worked in continuous rounds.  It makes the pupil of the eye look more uniform):

R1:  With black use magic ring technique to start round, ch 1, sc 8, on the last stitch switch to white   Cut black yarn and work in ends. (8 stitches)

Continue with white.

R2:  2 sc in first stitch from R1 and in each sc around (16 stitches)

R3:  Sc 3, 2 sc in next stitch around (20 stitches)

R4-R6:  Sc in each stitch around (20 stitches)

R7:  Sc 3, sc2tog around (16 stitches)

R8:  Sc2tog around (8 stitches)

R9:  Sc2tog around (4 stitches)

Cut yarn and leave tail for sewing.


Nose:

R1:  With O use magic ring technique to start round, ch 1, sc 8 (8 stitches)

R2:  2 sc in first stitch from R1 and in each sc around (16 stitches)

R3:  Sc 3, 2 sc in next stitch around (20 stitches)

R4-R10:  Sc in each stitch around (20 stitches)

R11:  Sc 3, sc2tog around (16 stitches)

R12:  Sc2tog around (8 stitches)

R13:  Sc2tog around (4 stitches)

Cut yarn and leave tail for sewing.

Using a picture of Elmo as inspiration, tack the eyes and nose onto the hat using a tapestry needle and yarn.  I would also suggest tacking the eyes and nose to each other.


Zoe Inspired Hat

My daughter Zoe is going to be Zoe from Sesame Street for Halloween. I made her a Zoe inspired knit/crochet hat to be worn with a ballerina outfit since Zoe from Sesame Street loves to dance!

Materials:

  • Gold worsted weight yarn (I used Yarn Bee Soft Secret in Saffron)
  • Gold “eyelash” or “fur” yarn (I used Yarn Bee Haute Fur in Goldenlash)
  • Small amounts of black, white, brown, pink, teal, and purple worsted weight yarn
  • Red crochet thread
  • Knitting needle size needed for my basic hat pattern
  • Size E crochet hook
  • Size 3 crochet hook
  • Tapestry needle
  • Fiber Fill


Stitches Used:

Directions:

Hat:

First, knit your hat in the size desired using my basic hat pattern using gold worsted weight yarn.

Eyes (Make 2):

R1:  With black using a magic ring, sc six, on the last stitch switch to white (6 stitches)

R2:  Two sc in each sc around (12 stitches)

R3 and R4:  Sc in each sc around (12 stitches)

R5:  Sc2tog around (6 stitches), stuff eye with fiber fill

R6:  Sc2tog around (3 stitches), break yarn and leave end for sewing

R1:  With teal using a magic ring, sc eight (8 stitches)

R2:  Two sc in each sc around (16 stitches)

R3, R4, R5:  Sc in each sc around, on last stitch of R5, switch to brown (16 stitches)

R6:  Sc in eash sc around, break yarn and leave end for sewing

Sew eyelids onto eyes using pictures below for placement.  Sew the eyes to the hat using pictures for placement.  Sew the eyes to each other for stability.

Nose:

R1:  Using pink using a magic ring, sc six (6 stitches)

R2:  Sc, 2 sc in next stitch, sc twice, 2 sc in next stitch, sc (8 stitches)

R3:  Sc in each sc around (8 stitches)

R4:  Sc, sc2tog, sc twice, sc2tog, sc (6 stitches), stuff nose with fiber fill

R5:  sc2tog three times (3 stitches), break yarn and leave end for sewing

Sew nose to hat between the eyes.  Sew to eyes for stability.

Hair:

Cut the “eyelash” yarn into six inch pieces.  Follow this tutorial for how to attach the hair to the hat.  I placed one “hair” approximately every half inch on the entire back half of the hat.

Bow:

R1:  With purple ch 4, sc in second chain from hook and in next two chains (3 stitches)

R2 – R6:  Sc in each sc across (3 stitches), break yarn and work in ends.

Cut long piece of purple yarn.  Wrap the yarn around the center of your crocheted piece several times tightly to make it look like a bow.  Used the remaining yarn to sew it to the hat.

Dragonfly:

R1:  With red crochet thread and size 3 hook, ch 5 (foundation chain), sc in second ch from hook, sc, ch 5, sl st in fifth ch from hook, sc in same foundation ch as previous sc, sc in next foundation ch, ch 7, sl st in seventh ch from hook, sc in same foundation ch as previous sc, sc in last foundation ch 3 times, working in back of foundation ch sc in next ch, ch 7, sl st in seventh ch from hook, sc in same foundation ch as previous sc, sc in next foundation ch, ch 5, sl st in fifth ch from hook, sc in same foundation ch as previous sc, two sc in last foundation ch, sl st to first sc

R2:  Working in foundation ch, sc over first sc from R1, (sl st, sc, hdc, dc, tr, dc, hdc, sc, sl st) in chain loop, (sl st, sc, hdc, dc, tr 3 times, dc, hdc, sc, sl st) in next chain loop, skipping two foundation ch, sl st in next foundation chain (end chain), sc three times, sl st in same foundation ch, (sl st, sc, hdc, dc, tr 3 times, dc, hdc, sc, sl st) in next chain loop, (sl st, sc, hdc, dc, tr, dc, hdc, sc, sl st) in next chain loop, skipping two foundation ch, sc in next foundation chain, sc in same foundation ch, ch 3, sl st in third chair from hook, sc in same foundation ch, sl st to first sc in R2, break off and leave long piece of yarn for sewing.

Sew dragon fly to head as shown.

Check out the full costume in my Elmo and Zoe Halloween Costumes post!

Bugs Bunny Carrot Koozie

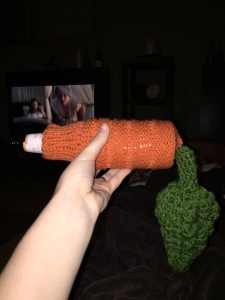
As mentioned in my last post, I’m way behind on my blog. There are things I made in August that haven’t been added yet! I decided to start the posting with something quick and easy. A coworker asked if I could create a beer bottle koozie that looked like a carrot for his Bugs Bunny costume. Challenge accepted! I improvised the carrot using alternating groups of rows of knits and purls to give the carrot texture. I also created a large cartoony leaf that snapped to the bottom to give the effect of Bugs’ carrot. It turned out great!
IMG_2737

1795433_2193527444801_3631131997106704646_o

Difficulty:  Easy

Time Required:  2 Movies

Overall Experience:  Good

Needle Felted Pumpkin

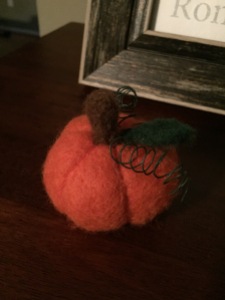
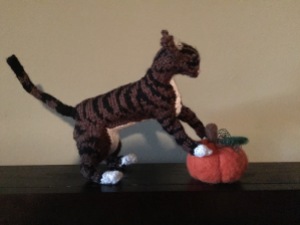
I’ve been itching for months to try real free-form needle felting.  I got a little taste of it with my felted soap a few months ago.  When Etsy sent me an email featuring adorable felted pumpkin starter kits, I knew I had found my first project.  I wanted a kit to at least tell me what to do the first time I tried it.  If it was a good experience, I could experiment later.  I ordered the kit from Emma’s Garden Primitives.  It was a wonderful experience!  The kit shipped promptly, included everything I needed to make an adorable, palm-sized pumpkin, and included easy to follow instructions.  I couldn’t be more pleased!  The pumpkin is now friends with my knit cat.  🙂

IMG_2744

IMG_2745

Eyeball Cake Pops and Punch

Since it’s Halloween, we interrupt all of the wedding posts for…well…a Halloween post.

20131031-182818.jpg

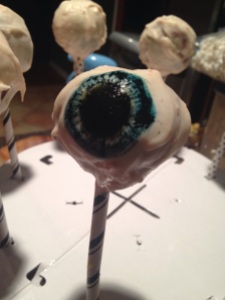
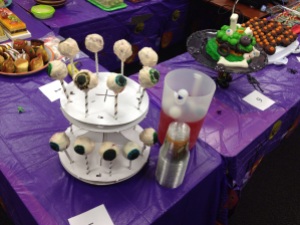
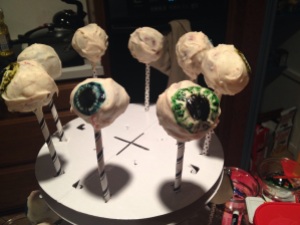
My engineering firm has an annual Halloween dessert contest.  After seeing the outcome of last year’s competition, I realized that the vote goes to aesthetics rather than flavor.  I bake a lot, but do very little dessert decorating.  (I do no dessert decorating.)  After an extensive Pinterest search, I chose to make eyeball cake pops.  I actually get to bake something rather than just putting together pieces of candy.  I had also been wanting to try cake pops for quite some time.  To add to the dessert, I also made eyeball punch.

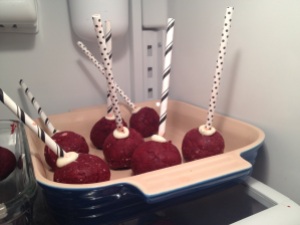
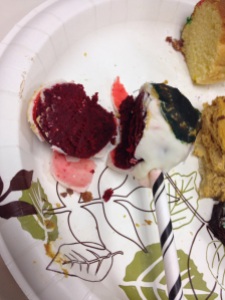
This process turned out to be an exercise on how NOT to make cake pops.  They turned out cute/creepy in the end.  I didn’t even come close to placing in the competition.  I probably need to work on my decorating skills.

Materials/Ingredients:

Cake Pop Instructions:

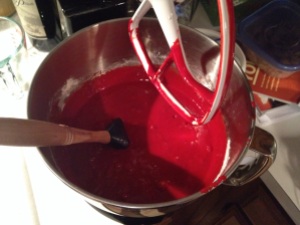
  • Make the cake as indicated on your cake mix.  (My red cake was really creepy.)

20131031-184131.jpg

  • Allow to cool fully.  (I made mine the night before.)
  • Crumble the cake using a fork and place crumbs in large bowl.
  • Mix the crumbs and 1/2 to 3/4 of a container of store bought frosting.  Mix until the frosting is completely absorbed.  My mixture was the consistency of Play-doh.  Since this was my first attempt at cake pops, I’m not sure that was correct.
  • Use a cookie or ice cream scoop to create balls of the mixture.  I used an ice cream scoop and rounded the balls with my hands.
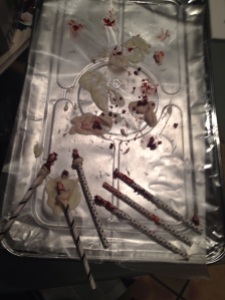
  • (After this point lots of things started going wrong.  So as to not confuse, I’ll continue with the steps that seemed to work.  See carnage below.)

20131031-182916.jpg

  • Place balls in small containers and put into FREEZER.  (Multiple containers are good because you can rotate the containers and only take a few balls out of the freezer at a time.  I used small baking dishes.)
  • While the balls are cooling, use a double boiler (or put water in a pot and put a glass bowl over it as I did) and bring your water to a boil.  Turn the heat down so the water is simmering.  Melt the almond bark in the upper compartment of the double boiler or in the bowl.  Add a few drops of vegetable oil if you wish your almond bark to have a smoother consistency.
  • Remove a container of balls from the freezer.  Dip the end of one stick and push it into the center of the ball. ( Don’t push the stick too far or you will see balls sliding down your sticks later as the ends of the sticks push through the tops of the balls.)  Repeat the process for the rest of the balls in the container.  Put the container back into the freezer and remove a different container.  Repeat until all of the balls have sticks.  Leave the balls in the freezer until the almond bark on the sticks has hardened.

20131031-182800.jpg

  • After the almond bark has hardened for the first container of balls, remove it from the freezer.  Dip the entire ball in the almond bark.  You may need to spoon almond bark over the ball near the stick.  Remove the ball from the bowl of almond bark and spin the ball to remove access almond bark.  I found a wire whisk to be a useful tool for removing access almond bark.  Place the coated ball in the cake pop holder or place on a cookie sheet covered in wax paper.  Repeat until all of the balls are covered in almond bark.
  • Paint the eye design onto the balls using food coloring.  (I tried to use the food coloring markers first.  They did not work.  I would not suggest purchasing them.)  Mixing one drop of red with one drop of green made an almost black.  I painted the pupils first.  After letting the dry, I painted the iris region.  I started out painting the entire iris region a solid color, but the food color pigments were so dark that it looked like a giant, dark dot.  It looked much better when I painted the outer border of the iris and then painted lines going towards but not touching the pupil.  See below.

20131031-182818.jpg

20131031-182934.jpg

The balls turned out OK.  I had lots of problems and trial and error.  I had several pops break apart in my almond bark, causing the almond bark to have cake in it.  This resulted in a much less smooth almond bark.  I also didn’t like the design on the early pops.  They were really creepy when you tried to eat them.

20131031-183139.jpg

Eyeball Punch Instructions:

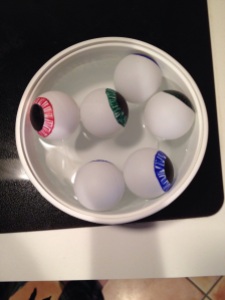
  • Draw eye designs on ping pong balls using Sharpies
  • (I thoroughly tested them to make sure they wouldn’t bleed in my punch.  After drawing on them, I washed them.  I then left them in a small bowl of water for two days to make sure they wouldn’t bleed.)

20131031-184151.jpg

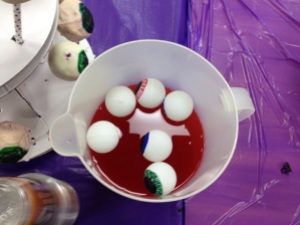
  • Make punch using equal parts Hawaiian Punch and Sprite in the pitcher.  Place the ping pong balls on top for a creepy touch.

20131031-183106.jpg

20131031-183037.jpg