Egg-straordinary Easter Hat Pattern

One of my goals as I try to get my knitting pattern business off the ground was to create a pattern inspired by every major holiday this year.  When I thought of Easter, my mind initially jumped to bunnies and Easter bonnets, but there are a lot of bunny and bonnet hats out there already.  Next my mind jumped to Easter eggs.  A colorful Easter egg pattern could be really fun to make!  And the idea was born.

Ever since Lion Brand came out with their bonbons yarn, I’ve been wanting to make a project out of them!  I finally did it, and here is that project.  This hat was perfect because I wanted make an Easter egg inspired hat with lots of colors.  The bonbons brights colorway came in a sport weight yarn, perfect for spring weather.

Buy the pattern for $5 on Etsy here or on Ravelry here.

Materials:

Go to this link to buy a kit with everything you need to make this hat on Amazon.


Please comment below with any questions!

Sham-Ombre Hat Pattern

I created a St. Patrick’s worthy hat pattern consisting of the standard shamrock and an ombre effect as the hat transitions to the crown.  I chose two coordinating green tones of Knit Picks Hawthorne fingering weight yarn that is light and perfect for spring.  I love the subtle design and the two beautiful yarn tones!  Because of the subtle effect, the hat doesn’t scream St. Patrick’s day and can be worn on other days throughout the year.

Buy the pattern on Etsy here or on Ravelry here.  The pattern is a written pattern, if you would prefer a chart, please contact me, and I can make that happen!

Materials:

Go to this link to buy a kit with everything you need to make this hat on Amazon.

  • Two colors of fingering weight yarn
  • 5 Size US 5 double pointed needles
  • Tapestry needle


Stitches Used:

Please comment below with any questions!


Chevron Pillow

My friend Cassie bought me a knitting pattern book, Knitting 24/7, for my birthday last year.  It is full of fun, modern patterns.  She pointed out that there was a really cool pillow.  I took note and decided she was getting the pillow for her birthday.  While the pillow looks nice, I really hated making it.  I started it at the beginning of October on the car ride back from our wedding and just finished it two weeks ago!

20140530-075842-28722696.jpg

Why I didn’t like the pillow:

  • Construction Type:  I very much like my projects to be seamless if at all possible.  This pillow was the opposite of that.  The front of the pillow was made by knitting in a round with a steek.  A steek is basically an extra stripe in the fabric that you will cut through.  Yes.  You have to cut into your knitted fabric.  Then you have to sew up the edges so it doesn’t unravel.  Scariest thing ever.  You also have to knit a bunch of extra stitches, and I’m lazy.  After the front is made, the knitter must pick up stitches at the top and bottom of the pillow and knit the two back halves.  After all of that, the sides have to be seamed.  It would have been much easier to start at the center of the back, knit to the top, knit the front from the top to bottom, and knit the back from the bottom to the middle.
  • My Own Error:  I started out making the pillow on some very old circular needles my grandma gave me.  They were stiff and I was having a hard time working the project in the round and pulling the front design a little too tight.  I was really frustrated with the needles and was really wishing for new needles.  For Christmas, my husband bought me a new set of circular needles.  He wanted me to try them and I was super frustrated with the ones I was using.  I knew that the tension in the project may change a little if I switched, but I was ready to quit on the project.  I switched needles.  They were wonderful.  It was so easy to keep working the project.  After about an inch of more fabric, I noted that my tension had gotten looser.  I was concerned, but decided the pillow should stretch it out.  As I kept going, I noticed a major difference in the old knitting and new.  I didn’t know if a pillow was going to be able to overcome the problem.  I sat the project down for a couple of months.  I didn’t want to make the back (the pillow was very large) if I couldn’t fix the front.  My husband talked me into finishing it.  Despite the fact that the pillow was knitting too tight horizontally, it turned out wide.  The height was perfect.  Several people complained about this problem on Ravelry, so I wasn’t the only one.  I ended up sewing and stuffing my own pillow to fit it perfectly.  The change in tension isn’t obvious in the overstuffed pillow.

Difficulty:  Easy/Moderate

Time Required:  Many Movies

Overall Experience:  Poor

Chevron Koozies

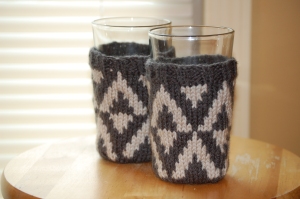
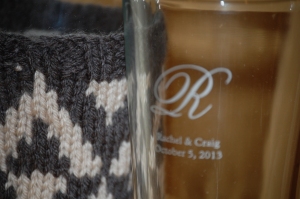
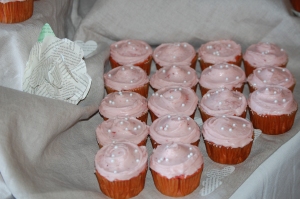
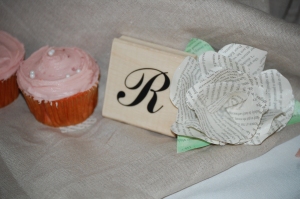
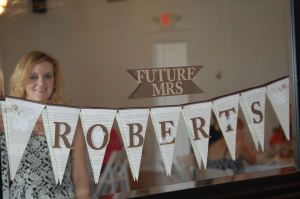
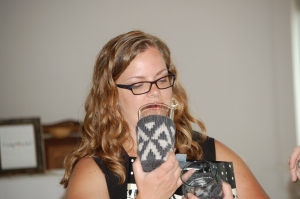
My cousin Amber is the matron-of-honor in my wedding.  She planned a beautiful wedding shower for me that happened yesterday.  To thank her, I made her two chevron koozies and a wine carrier, which will be blogged about in a future post.  I really love how the koozies turned out!  I put them on pint glasses that will be given as a favor at our second reception.  Scroll down through all the pictures for the pattern.  Also, thanks to my sister Emily for taking pictures yesterday!  (One of these days I’m going to have to post a bunch of her pictures.  She’s really amazing!)

001

003

015

016

017

026

029

030

094

Disclaimer:  Feel free to make this pattern for your personal use, for your platypus, for charity, or to sell.  The only thing I ask is that you please do not sell it on Etsy.  If you are interested in purchasing a koozie from my Etsy store, you may do so here.

Materials:

  • Small amounts of worsted-weight yarn in contrasting colors (I chose grey (g) and off-white (w))
  • 5 size US 6 double pointed needles

Stitches Used:

Instructions:

For colorwork, use fair isle technique

Cast on 48 stitches using g, distrubute on four double pointed needles, knit in rounds

R1:  Continuing with g, k2 p2 around (48 stitches)

R2-4:  Repeat R1

R5:   With g and w, k1w, k3g, k5w, k3g around

R6:  Repeat R5

R7:  k2w, k3g, k3w, k3g, k1w around

R8:  Repeat R7

R9:  k3w, k3g, k1w, k3g, k2w around

R10:  Repeat R9

R11:  k1g, k3w, k5g, k3w around

R12:  Repeat R11

R13:  k2g, k3w, k3g, k3w, k1g around

R14:  Repeat R13

R15:  k3g, k3w, k1g, k3w, k2g around

R16:  Repeat R15

R17:  k3w, k3g, k1w, k3g, k2w around

R18:  Repeat R16

R19:  k2w, k3g, k3w, k3g, k1w around

R20:  Repeat R19

R21:  k1w, k3g, k5w, k3g around

R22:  Repeat R21

R23:  k3g, k3w, k1g, k3w, k2g around

R24:  Repeat R23

R25:  k2g, k3w, k3g, k3w, k1g around

R26:  Repeat R25

R27:  k1g, k3w, k5g, k3w around

R28:  Repeat R27

R29:  Continuing in g only, k48

R30:  Repeat R29

R31:  k2tog k2 around (36 stitches)

R32:  k2tog k2 around (27 stitches)

R33:  k2tog k1 around (18 stitches)

R34:  k2tog k1 around (12 stitches)

R35:  k2tog (6 stitches)

To finish, pull a loop through all 6 stitches on needle and pull tight.  Work in ends.

Difficulty:  Easy

Time Required:  1.5 Movies

Overall Experience:  Excellent