Multiplicity

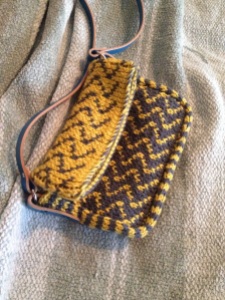
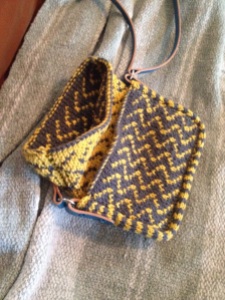
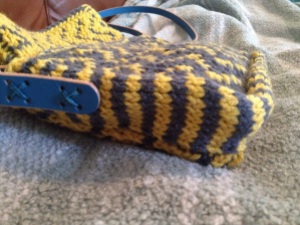
I finished my Multiplicity purse this afternoon, and I love it!  The purse is knit using double knit, which I had been wanting to learn for some time.  The technique is interesting because one creates a double sided fabric by knitting one stitch from one side then one stitch from the other.  The stitches from both sides are alternating on one set of needles.  In the case of this purse, the fabric was grey with yellow details on one side and yellow with grey details on the other.  The purse features a large main pocket that folds over a smaller pocket.  I purchased the leather strap from Homestead Heirlooms.

20140417-122223.jpg

20140417-122304.jpg

20140417-122340.jpg

Difficulty:  Moderate

Time Required:  12 Movies

Overall Experience:  Excellent

Crafternoon Tea Preemie Hats

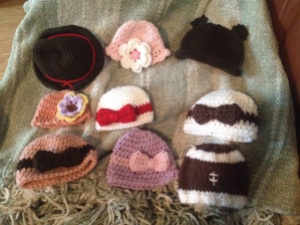
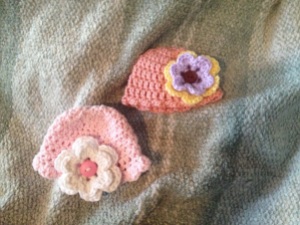
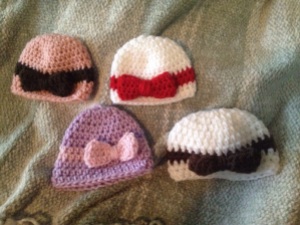
Some ladies in my Sunday School class are interested in learning to knit and crochet.  We decided to add a missions component to the learning experience and make preemie hats to donate to local NICUs.  We had our first meeting yesterday and it was a blast!  We taught some crochet skills and made some hats.  I wanted to show off some of the hats and give the ladies some digital resources concerning what we learned yesterday.

20140406-153518.jpg

Stitches Learned

Yesterday we taught the basics of crochet to the beginners.  We taught some combination of the following stitches.  If you didn’t learn all of them, no big deal!  You can learn them next time.  If you have any questions, feel free to ask Shanda or me anything you would like.  The links below describe the stitches using words and figures.  The Crochet Crowd also provides a great series of YouTube videos for beginners.  After you learn these basic stitches, you can make any of the hats featured above!

Patterns

I had several patterns printed out yesterday and wanted to make them digitally available to everyone.  I found these patterns on Ravelry, which is a great source for everything knitting/crocheting.  If you join Ravelry, friend me!  My profile is here.  Feel free to be creative with the patterns!

Micro Preemie Hats – Crochet

Both of the hats we made have an added on edging.

20140406-153750.jpg

Wrapped with Love – Crochet

20140406-153532.jpg

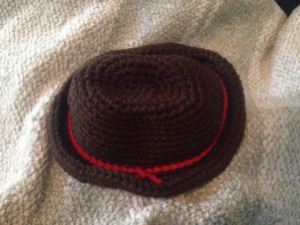
Baby Cowboy Hat – Crochet

This turned out looking a little more like a Fedora than a cowboy hat.  I might edit it a little next time I made it.

20140406-153915.jpg

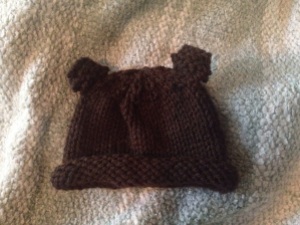
Baby Bear Hat – Knit

I made one edit to this pattern.  The pattern calls to knit until the hat is 6″ long.  That is very long for a preemie hat.  I knit it to 4.5″.  It looks about right.

20140406-154110.jpg

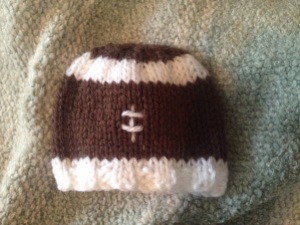
Preemie Football Hat – Knit

20140406-154027.jpg

Enjoy the patterns and feel free to ask me questions!

20140406-153518.jpg

Preemie Football Hat

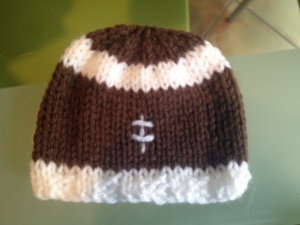
Some ladies in my Sunday School class are interested in learning to knit and crochet.  We decided to add a missions component to the learning experience and make preemie hats to donate to local NICUs.  We had our first meeting yesterday.  Since I wasn’t sure about the skill level that would be coming, I wanted to have some simple hat patterns on hand for the people with some experience.  During my search I found some cute football-inspired baby hats, but they weren’t scaled down to a preemie size.  I decided to make up my own pattern to include preemies.  These hats are heartbreakingly tiny.

20140406-131950.jpg

Materials:

  • 4 Size 8 double pointed needles
  • Lion Brand Vanna’s Choice Yarn in Toffee (B)
  • Lion Brand Vanna’s Choice Yarn in White (W)
  • Tapestry Needle

Gauge:

8 stitches = 12 rows = 2 inches stockinette stitch

Stitches Used:

For a 1 to 3 lb Preemie

(Hat has an 8 in circumference that stretches to 10 in.  The hat is 4 in from edge to crown.)

Using W, cast on 32 stitches

R1 – R2:  (K2, p2) around (32 stitches)

R3:  K32 (32 stitches)

R4 – R13:  With B, k32 (32 stitches)

R14 – R16:  With W, k32 stitches (32 stitches)

R17:  With B, (k2, k2tog) around (24 stitches)

R18:  K24 (24 stitches)

R19:  (K1, k2 tog) around (16 stitches)

R20:  K16 (16 stitches)

R21:  (k2tog) around (8 stitches)

Cut the yarn with several spare inches.  Thread a tapestry needle and pull yarn through all 8 stitches on needles.  Work in ends.  With W, thread tapestry needle and embroider the laces on the football using the picture for placement.

For a 3 to 5 lb Preemie

(Hat has an 10 in circumference that stretches to 12 in.  The hat is 4.5 in from edge to crown.)

Using W, cast on 40 stitches

R1 – R3:  (K2, p2) around (40 stitches)

R4:  K40 (40 stitches)

R5 – R16:  With B, k40 (40 stitches)

R17 – R20:  With W, k40 stitches (40 stitches)

R21:  With B, (k2, k2tog) around (30 stitches)

R22:  K30 (30 stitches)

R23:  (K1, k2 tog) around (20 stitches)

R24:  K20 (20 stitches)

R25:  (k2tog) around (10 stitches)

Cut the yarn with several spare inches.  Thread a tapestry needle and pull yarn through all 10 stitches on needles.  Work in ends.  With W, thread tapestry needle and embroider the laces on the football using the picture for placement.

Difficulty:  Easy

Time Required:  1 TV episode

Overall Experience:  Excellent

Mad Hatter Crochet Challenge – Absolem

I posted last week about the Crochet Crowd’s Mad Hatter Crochet Challenge.  Since I really enjoyed the creativity of designing the decorations for the first hat, I decided to make a second hat.  I chose to base the hat on Absolem, the hookah smoking caterpillar in Tim Burton’s Alice in Wonderland.  I knit the hat holding together two colors to achieve the look of a smoke-filled teal and grey background.   I crocheted the brim of the hat in a tan color to resemble Absolem’s mushroom and embroidered spots on the mushroom.  I free crocheted Absolem’s head and body and embroidered all of his features before sewing him on the side of the hat.  I also free crocheted the hookah and smoke rings.  He turned out beautiful.  My gauge was a little off on the the first hat, so I went down a hook size for this hat.  The shape of the hat turned out a lot better.

20140406-101318.jpg

20140406-101426.jpg

20140406-101446.jpg

20140406-101510.jpg

Mad Hatter Crochet Challenge – Cheshire Cat

One of the blogs I follow, The Crochet Crowd, held a Mad Hatter crochet challenge.  The goal of the challenge was to crochet a Mad Hatter hat following a pattern by Red Heart.  The crocheter could use any colors and decorate the hat using an Alice in Wonderland theme however he or she wished.  I made two hats.

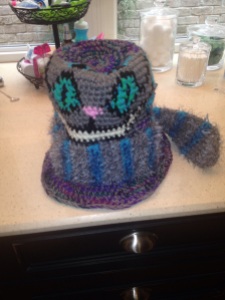
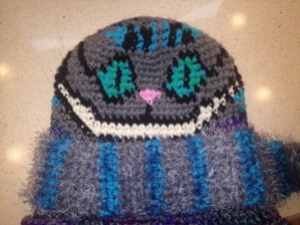
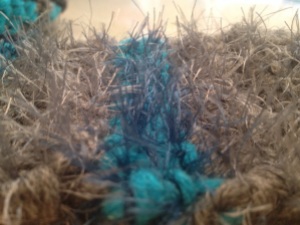
I had fun being a little more artistic than usual with these hats.  The first hat was Cheshire Cat themed.  I loved the colors from the Tim Burton movie, so I based the cat off of that Cheshire Cat.  Typically with crochet the main body of a piece is made in a solid color or stripes.  Other pieces are made seperately and sewn on.  For this hat, I imagined the cat appearing out of the side of the hat so I crocheted the color changes into the hat using a similar technique to that used for stranded colorwork in knitting.  His eyes, nose and smile are clear, he then fades into the hat with only three stripes showing.  His tail became the ribbon that goes around the hat.  I added Red Heart Foxy yarn to his tail to make it furry.  Since the contest was sponsored by Red Heart, I bought all Red Heart yarn (and used a little stash yarn) for the final product.  I love how he turned out!  I had the hardest time not posting pictures of him until after the mail-in deadline for the contest (which was yesterday.)

20140402-200107.jpg

20140402-201305.jpg

20140402-201618.jpg


Bombshell Shorts

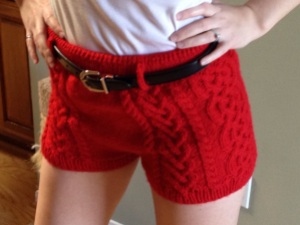
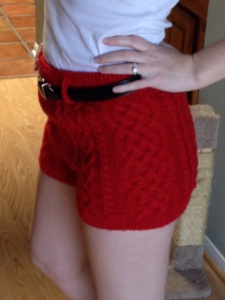
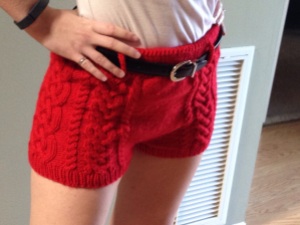
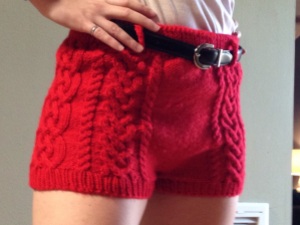
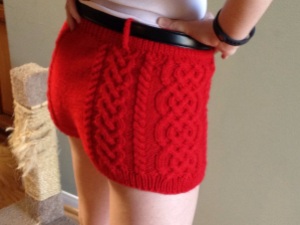
I finally finished my Bombshell Shorts!  It took me a while because I had several other projects in the works at the same time.  They turned out adorable.  I love love love them.  The pattern was very customizable.  My goal here is to share how I customized it and what I would do differently if I made them again.

20140329-164521.jpg

  • The length of the shorts is customizable.  The length that is suggested is longer than I would wear, but a short length suggestion isn’t given.  I knitted the band at the bottom of the shorts and knit the first 8 rows of the first 16 row repeat before joining.  I like the length of the front of the shorts, but my butt requires more material in the back.  They are shorter than I would prefer in the back.  I would knit 12-16 rows of the first 16 row repeat before joining if I were to make them again.  Ideally, the back could be made longer.  At least on me, the difference in length in the front and back is noticeable if you are really looking.  I don’t think there is really any way to do that with this pattern.
  • The pattern suggests that the knitter can decrease for butt shaping if a gap starts to form, but doesn’t give any details on where to decrease.  I didn’t have a noticeable gap until I reached Row 8 of my fourth 16 row repeat.  I made a size medium and decreased as follows:
    • Row 9:  Pearl each stitch until two stitches before the first 4-Stitch Cable, pearl two together, follow established pattern until last 4-Stitch Cable is complete, pearl two together though back loops, pearl until end of row (following rows will have two fewer pear stitches in back panel)
    • Row 10:  Follow pattern until second 4-Stitch Cable is complete, pearl 1, pearl two together, Celtic Cable, pearl two together through back loops, follow pattern until sixth 4-Stitch Cable is complete, pearl 1, pearl two together, Celtic Cable, pearl two together through back loops, follow pattern until end of row (the following rows will have one fewer pearl stitch on each side of Celtic Cable)
    • Row 11:  Pearl each stitch until two stitches before the first 4-Stitch Cable, pearl two together, follow established pattern until last 4-Stitch Cable is complete, pearl two together though back loops, pearl until end of row (following rows will have two fewer pear stitches in back panel)
    • Row 12:  Follow established pattern
    • Row 13:  Pearl each stitch until two stitches before the first 4-Stitch Cable, pearl two together, follow established pattern until last 4-Stitch Cable is complete, pearl two together though back loops, pearl until end of row (following rows will have two fewer pear stitches in back panel)
    • Row 14:  Follow established pattern
    • Row 15:  Pearl each stitch until two stitches before the first 4-Stitch Cable, pearl two together, follow established pattern until last 4-Stitch Cable is complete, pearl two together though back loops, pearl until end of row (following rows will have two fewer pear stitches in back panel)
    • Row 16:  Follow established pattern
  • My shorts bunch a little bit in the front crotch area.  If I were to make these again, I would try to work out some shaping in this area.

Difficulty:  Moderate-Hard

Time Required:  40 Movies

Overall Experience:  Excellent

20140329-164446.jpg

20140329-164720.jpg

20140329-164850.jpg

20140329-165054.jpg

Owl Baby Hat

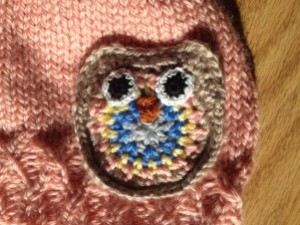
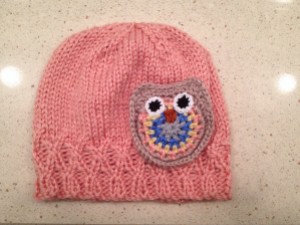
My cousin Amber asked if I could come up with a pattern for a baby owl hat.  I combined the hat from my Hello Kitty Hat with an adorable owl keychain I saw on Ravelry.  The outcome was quite cute.  She wanted the main hat color to be peach.  I usually work in jewel-tones, which aren’t available in baby yarn.  I made this hat in pastel baby yarns.  The yarn is so unbelievably soft!  It was quite a bit less stretchy than what I normally use, so I had to start over with larger needles halfway through the project.  I should actually start recording my gauge and experience with different fibers.
20140310-195753.jpg

20140311-173346.jpg

Disclaimer:  Feel free to make this pattern for your personal use, for your platypus, for charity, or to sell.  The only thing I ask is that you please do not sell it on Etsy.  If you are interested in purchasing a koozie from my Etsy store, you may do so here.

Materials:

  • 5 Size 8 Double Pointed Knitting Needles
  • US Size 0 Crochet Hook
  • US Size 2 Crochet Hook
  • 1 Skein Bernat Softee Baby in Soft Peach (P)
  • Small amounts of crochet thread in black (K) and white (W)
  • Small amount of orange yarn (O)
  • Scraps of various sport weight/baby yarn (I used the following:  Bernat Softee Baby in Flannel (G), Lion Brand Jamie in Little Boy Blue (B), Lion Brand Jamie in Light Yellow (Y), Bernat Softee Baby in Little Mouse (N))

Gauge:

9 stitches =13 rows = 2 inches Stockinette Stitch

The hat is about 14″ in circumference unstretched and stretches to about 19.”

Stitches Used:

Instructions:

Band:

Cast on 72 stitches with P, knit in round being careful not to twist

R1-R4:  (k2, p2) 18 times (72 stitches)

R5:  (tr, p2) 18 times (72 stitches)

R6:  (k2, p2) 17 times, k2, p1 (71 stitches), leave last stitch unworked, this stitch becomes the first stitch of the next row

R7:  (pr, pl) 18 times (72 stitches)

R8:  (k1, p2, k1) 17 times, k1, p2 (71 stitches), leave last stitch unworked, this stitch becomes the first stitch of the next row

R9:  (tl, p2) 18 times (72 stitches)

R10:  (k2, p2) 17 times, k2, p1 (71) stitches), leave last stitch unworked, this stitch becomes the first stitch of the next row

R11:  (tr, tl) 18 times (72 stitches)

R12:  k71, leave last stitch unworked, this stitch becomes the first stitch of the next row (71 stitches)

R13:  (tl, k2) 18 times (72 stitches)

Knit each following row until the hat is 5 inches long.

Crown:

R1:  (K4, K2tog, SSK, K4) 6 times (60 stitches)

R9:  K60

R10:  (K3, K2tog, SSK, K3) 6 times (48 stitches)

R11:  K48

R12:  (K2, K2tog, SSK, K2) 6 times (36 stitches)

R13:  K36

R14:  (K, K2tog, SSK, K) 6 times (24 stitches)

R15:  K24

R16:  (K2tog, SSK) 6 times (12 stitches)

Cut the yarn with several spare inches.  Thread a tapestry needle and pull yarn through all 12 stitches on needles.  Work in ends.

Owl (Adapted from Owl Keychain Pattern):

With G and size 0 hook ch3 and sl st to form ring.

R1:  Ch3, work 7 dc in ring, sl st in third ch of ch3 which acts as first dc (8 dc)

Fasten off G and work in ends.

R2:  With B sl st between any two dc from R1, ch2 (acts as first hdc), hdc in same space, 2 hdc in each space around, sl st in second ch of ch2. (16 hdc)

Fasten off B and work in ends.

R3:  With Y sc between any two hdc from R2, ch1 , (sc, ch 1) in each space around, sl st in top of first sc (16 sc, 16 ch)

Fasten off Y and work in ends.

R4:  With P sc in any ch 1 space from R3, sc in same space, ch 1, (2 sc, ch1) in each ch 1 space around, sl st in top of first sc (32 sc, 16 ch)

Fasten off P and work in ends.

R5:  With N sc in an ch 1 space from R4, 2 sc in same space, ch 1, (3 sc, ch1) in next 10 ch 1 spaces, 3 dc in next ch 1 space, 2 hdc in next ch 1 space, sc in next ch 1 space, 2 hdc in next ch 1 space, 3 dc in last ch 1 space, sl st to first sc (44 stitches)

R6:  Ch 1, turn, skip first stitch, sc, hdc, dc in same stitch, trc (mark stitch with extra yarn or stitch marker), dc in same stitch, sc in next 5 stitches, dc, trc in same stitch (mark stitch with extra yarn or stitch marker), dc, hdc in same stitch, sc, sl st

Do not fasten off.

With O, embroider beak as shown in picture.

Eyes (Make 2):

With K and size 2 hook, ch3 and sl st to form ring.

R1:  Ch 1, sc 8 in ring, sl st into first sc (8 sc)

Fasten off and work in ends.

R2:  With W, sc in a sc from R1, sc in same sc, (2 sc in each sc) around, sl st to first sc (16 sc)

Fasten off leaving long tail for sewing.  Sew the eyes onto the owl using the picture for placement.

Owl (continued):

Modified sc (msc):  When you insert your hook under top 2 loops of the stitch below, also insert it under the hat loop directly underneath the stitch on the owl, yarn over, bring loop through hat loop and owl stitch, yarn over and bring loop through both stitches on hook.

R7:  Ch 1, turn, msc in each stitch around, 2 msc in marked stitches, sl st in first msc.

Fasten off and work in ends.

Difficulty:  Moderate

Time Required:  5 Movies

Overall Experience:  Excellent

Oscar the Grouch Baby Hat

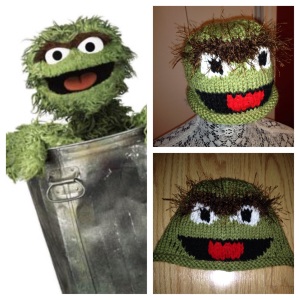
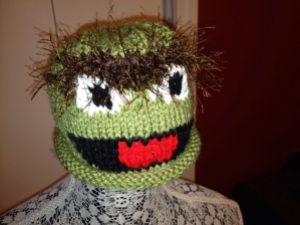
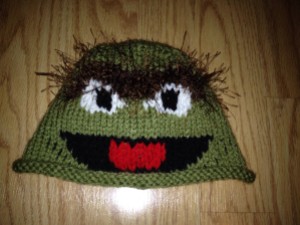
A friend of a friend asked me to make an Oscar the Grouch baby hat.  The patterns I found didn’t have the right eye shape, so I made up my own.  I love his eyebrows!  The hat knits up to be about 14 inches around, but is very stretchy.  It easily fits my friend’s baby with an 18 inch head.  The shape of the hat is based on my Baby Turkey Hat pattern.

20140104-081331.jpg

Materials:

  • 5 Size US 6 double pointed needles
  • Tapestry needle
  • Vanna’s Choice yarn in White (W)
  • Vanna’s Choice yarn in Scarlet (R)
  • Vanna’s Choice yarn in Chocolate
  • Vanna’s Choice yarn in Black (K)
  • Vanna’s Choice yarn in Fern (G)
  • Lion Brand Fun Fur in Chocolate

Note:  For the brown (B) eyebrows, hold together the fun fur and brown yarn together as one strand.


Stitches Used:

Instructions:

Cast on 72 with G and distribute evenly on four needles

R1-R7:  Knitting in round, KG 72

R8:  KG 28, KK 16, KG 28

R9:  KG 26, KK 7, KR 6, KK 7, KG 26

R10:  KG 25, KK 7, KR 8, KK 7, KG 25

R11-R12:  KG 24, KK 8, KR 8, KK 8, KG 24

R13:  KG 23, KK26, KG 23

R14-R17:  KG 72

R18:  KG 27, KW 6, KG 6, KW 6, KG 27

R19:  KG 26, KW 3, KK 3, KW 3, KG 2, KW 3, KK 3, KW 3, KG 26

R20:  KG 26, KW 3, KK 3, KW 2, KG 4, KW 2, KK 3, KW 3, KG 26

R21:  KG 23, KB 3, KW 3, KK 3, KW 1, KB 6, KW 1, KK 3, KW 3, KB 3, KG 23

R22:  KG 24, KB 3, KW 5, KB 8, KW 5, KB 3, KG 24

R23:  KG 25, KB 22, KG 25

R24:  KG 26, KB 20, KG 26

R25:  KG 27, KB 6, KG 6, KB 6, KG 27

R26-R30:  Continuing in G K72

R31:  (K4, k2tog, ssk, K4) six times

R32:  K60

R33:  (K3, k2tog, ssk, K3) six times

R34:  K48

R35:  (K2, k2tog, ssk, K2) six times

R36:  K36

R37:  (K, k2tog, ssk, K) six times

R38:  K24

R39:  (k2tog, ssk) six times

Cut the yarn with several spare inches.  Thread a tapestry needle and pull yarn through all 12 stitches on needles.  Work in ends.

20140104-081352.jpg

20140104-081414.jpg

Difficulty:  Easy-Moderate

Time Required:  4 Movies

Overall Experience:  Excellent

Baby Turkey Hat

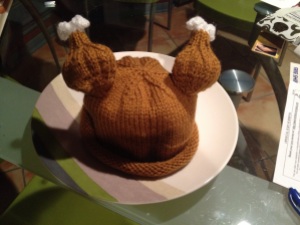
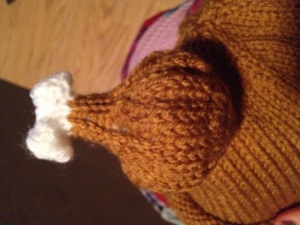
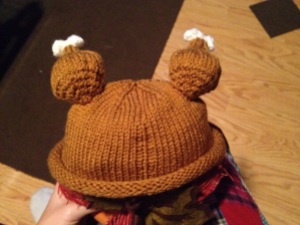
This turned out too cute not to share right away.  A friend sent me a picture of a baby wearing a crocheted turkey hat and asked if I could make something similar.  It was adorable, so I quickly agreed.  I decided to knit the hat instead of crocheting it since the knit hat would be much stretchier.  I didn’t have the baby with me to try the hat on.  I looked online, but none of the patterns I found were quite what I wanted.  Below is the pattern I made up.  It turned out soooooo  cute!

20131112-193559.jpg

Materials:

  • 5 US Size 6 double pointed knitting needles
  • Extra needle or stitch holder
  • Stitch markers
  • Lion Brand Vanna’s Choice Yarn in Honey and White
  • Polyester filling
  • Tapestry needle
  • Crochet hook (optional)


Stitches:

Hat Instructions:

With Honey, cast on 72 stitches and distribute them evenly on four double pointed needles.

Join in round (being careful not to twist!) and knit each round until the piece is 5 inches long.  The brim of the hat will be rolled.  Unroll it to measure your 5 inches.

Crown:

R1:  K21, K and place marker on next stitch, K50 (72 stitches)

R2:  K72

R3:  K48, K and place marker on next stitch, K23 (72 stitches)

R4-7:  K72

R8:  (K4, K2tog, SSK, K4) 6 times (60 stitches)

R9:  K60

R10:  (K3, K2tog, SSK, K3) 6 times (48 stitches)

R11:  K48

R12:  (K2, K2tog, SSK, K2) 6 times (36 stitches)

R13:  K36

R14:  (K, K2tog, SSK, K) 6 times (24 stitches)

R15:  K24

R16:  (K2tog, SSK) 6 times (12 stitches)

Cut the yarn with several spare inches.  Thread a tapestry needle and pull yarn through all 12 stitches on needles.  Work in ends.

Leg Instructions:

20131112-193707.jpg

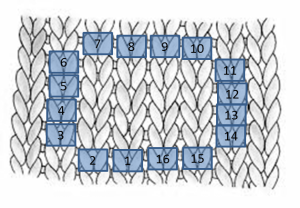
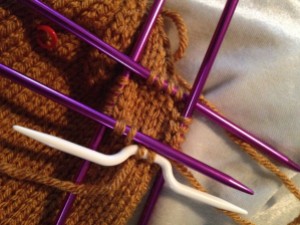
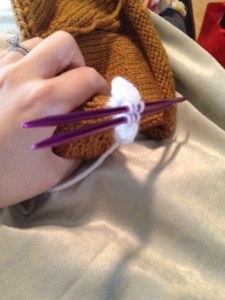
The tricky part of the leg is getting started.  You will need to pick up 16 stitches from the hat.  At the first marker, they should be picked up using Honey as shown in the figure below.  The number 1 corresponds to the first marked stitch on the hat.  Pick up the stitches in numerical order.  I find it easier to pick up the stitches using a crochet hook.  Place stitches 1 and 2 on the first needle, 3-6 on the second needle, 7-10 on the third needle, 11-14 on the forth needle, and 15-16 on an extra needle or stitch holder.  A picture of the stitch placement is also shown below.

Placement120131112-193313.jpg

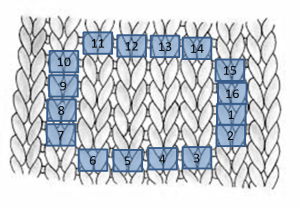
After completing the first leg (see pattern below), pick up stitches for the second leg using the same method, but starting in a different place.  The number 1 in the figure below corresponds to the second marked stitch.

Placement2

Once the stitches are picked up, you are ready to knit!  The piece is worked back and forth for several rows and then worked in a round.  The pattern is the same for both legs once the stitches are picked up.

R1:  Starting with the marked stitch, K4, turn

R2:  S1, P4, turn

R3:  S1, K1, KFB twice, K2, turn

R4:  S1, P8, turn

R5:  S1, K1, KFB, K, KFB twice, K, KFB, K2, turn

R6:  S1, P14 turn

R7:  S1, K1, (KFB, K1) three times, (K1, KFB) three times, K2, turn

R8:  S1, P22, turn

R9:  S1, K1, (KFB, K) four times, K5, (KFB, K) four times, K3

R10:  Continuing in round, K36

R11-14:  K36

R15:  K6, K2tog, SSK, K4, K2tog, SSK, K2tog, SSK, K4, K2tog, SSK, K6 (28 stitches)

R16:  K5, K2tog, SSK, K2, K2tog, K2, SSK, K2, K2tog, SSK, K5 (22 stitches)

R17:  K4, K2tog, SSK, K2tog, K2, SSK, K2tog, SSK, K4 (16 stitches),

(Place polyester filling in leg)

R18:  (K2tog, SSK) four times (8 stitches)

R19-23:  K8

R24:  Break Honey and start knitting with White, K8

R25:  (K1, K2tog, K1) twice (6 stitches)

R26:  K1, Bobble, K2, Bobble, K1

Place more polyester filling in the leg if you wish.  Bind off.  I used the Kitchener stitch to bind off.

20131112-193419.jpg

20131112-193728.jpg

Difficulty:  Moderate-Difficult

Time Required:  4 Movies

Overall Experience:  Excellent